


If you have chosen to use a mix of both Composite and S-Video sources, the VIDEO field of the INPUT
SETTINGS menu is the place to set the mode. In the example from section 1.2, a composite VCR and an S-
Video DVD are to be used. Select the VCR input of the GTP-760. The VIDEO field should show COMPOSITE.
Now select the GTP-760 input where the DVD player is connected (DVD, digital 1 or digital 2). Highlight the
VIDEO field and press either the < or > remote button. The on screen display disappears from your television.
Without altering anything else on the GTP-760, change your television to its S-Video input (consult your televi-
sion owner’s manual for directions). The GTP-760 on screen display should reappear, this time with a light gray
background. The VIDEO field will now say S-VIDEO. Repeat this procedure for each individual input you wish
to change.
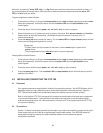
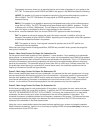
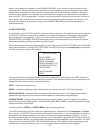
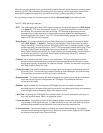
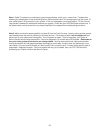
The LEVELS MENU selection is not a field but another menu. Highlight LEVELS MENU with the or remote
buttons and press select/play. You will see the following screen:
LEVELS MENU
FRONTS - +
CENTER - +
REARS - +
SUB - +
UNDO CHANGES
DONE
The menu shows levels for FRONT, CENTER, REARS and SUB. The bars for each item should be equally
centered at this time. Inactive channels show not available, N/A.
The immediate question you might ask, “Why are we looking at channel trims again when we have already set
this?” There is an important distinction to be made between the LEVELS MENU screen and the menus you
used to setup the system. The previous screens were used to balance the system due to system and room
parameters. These things do not often change and therefore should not be changed in the GTP-760. However,
while playing different movies or music, you may find that fine adjustments are necessary. Perhaps the
subwoofer on one soundtrack is too quiet while another has loud rear channels. The LEVELS MENU screen
allows level adjustments to be made WITHOUT effecting the system settings that have been carefully entered.
Using the < and > buttons on the remote OR using the sub, rear and center up and down buttons on the remote
changes the displayed settings on the LEVELS MENU screen (the sub, center and rear remote buttons do not
effect the CHANNEL BALANCE setup screen). In this way, you are free to adjust level trims “on the fly” for
different soundtracks. If you want to return to your carefully balanced system setup, simply set the bars for
each field on the LEVELS SETTING screen back to the center/equal positions. If you have not changed the
CHANNEL BALANCE menu levels or used the noise sequencer since initial setup, then you have returned to
your default setting and can leave the sound meter in the closet.
4.0 BASIC OPERATION
4.1 Operating Mode Selection
The GTP-760 features several operating modes - DTS, Dolby Digital, Dolby Pro Logic, 5 channel
stereo, several “enhancement” modes, etc. - designed to present music and movie soundtracks as
realistically as possible. In addition, some of these modes add the ability to “custom tailor” the GTP-
760’s spatial presentation to better suit individual tastes.
You’ll need to understand these modes - DTS, Dolby Digital, Cinema, Dolby Pro Logic, Symphony Hall,
Stadium, Jazz Club, 5-channel stereo, 2-channel stereo - to get the most out of your GTP-760.
At first, selecting the proper mode can be confusing, particularly when increasingly popular digital
formats like DVD present an often-bewildering array of soundtrack options. For this reason, the
GTP-760 features automatic mode selection (or “Auto Select”) to analyze digital input signals and
process them properly. (Auto Select works
only
with digital input signals).
>
>
34