23
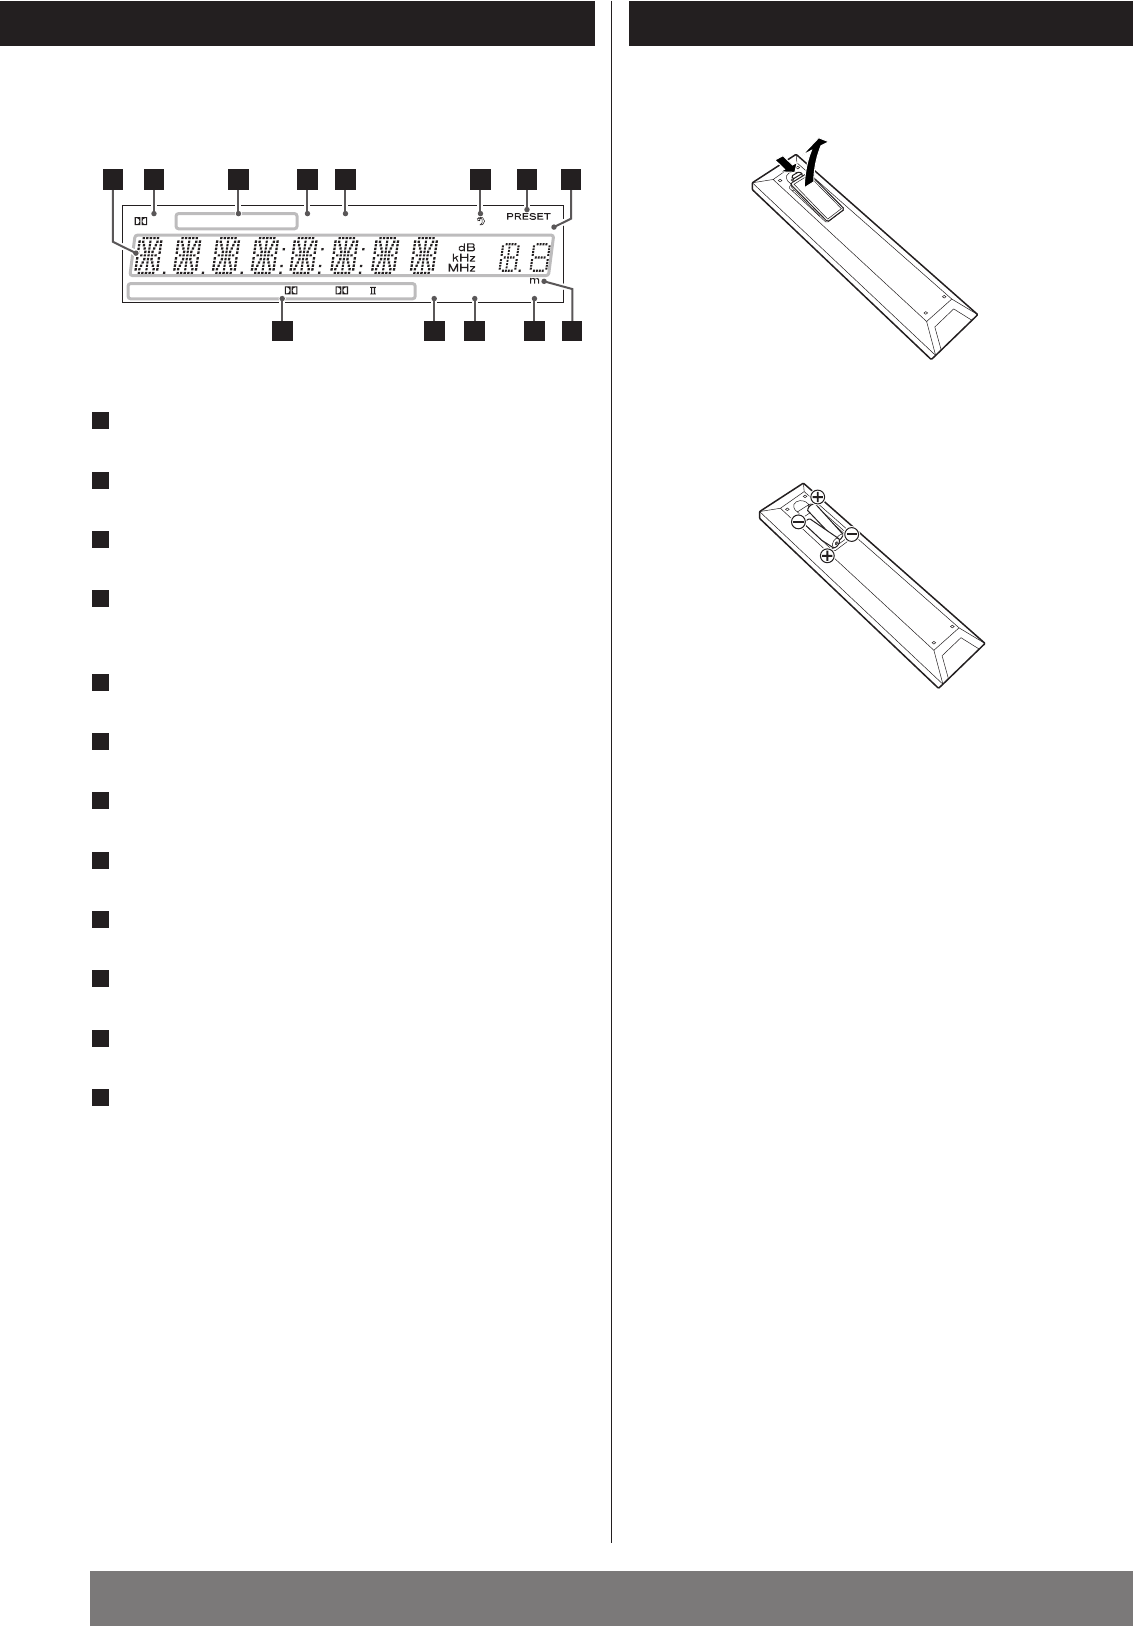
displays current status.
surround mode
illuminates when RDS function is active.
illuminates when the multi-channel sound is downmixed to
stereo, or when an FM stereo broadcast is tuned.
illuminates when a station is tuned.
illuminates when sleep timer is set.
illuminates when preset tuning mode is selected.
blinks when the MEMORY button is pressed.
meter
illuminates when tone control is set to off.
illuminates or blinks when a digital source is selected.
illuminates when the decoding mode is set to “IN-AUTO”.
l
k
j
i
h
g
f
e
d
c
b
a
1. Remove the battery compartment cover.
2. Insert two “AAA” (R03, UM-4) dry batteries. Make sure that
the batteries are inserted with their positive “+
” and negative
“_
” poles positioned correctly.
3. Close the cover.
Battery Replacement
If the distance required between the remote control unit and
main unit decreases, the batteries are exhausted. In this case
replace the batteries with new ones.
Precautions concerning batteries
<
Be sure to insert the batteries with correct positive “+” and
negative “_
” polarities.
<
Use batteries of the same type. Never use different types of
batteries together.
<
Rechargeable and non-rechargeable batteries can be used.
Refer to the precautions on their labels.
<
When the remote control unit is not to be used for a long
time (more than a month), remove the batteries from the
remote control unit to prevent them from leaking. If they leak,
wipe away the liquid inside the battery compartment and
replace the batteries with new ones.
<
Do not heat or disassemble batteries and never dispose of old
batteries by throwing them in a fire.
Battery Installation
Front Panel Display
HVS RDS EON TP PTY ST.TUNED
DTS MPEG DEX PL x DSP AUTO DIGITAL
MEMORY
DIRECT
ES
96/24
NEO:6
TA
c
b
a
d
e
f
g
h
i
j
klb
ENGLISH


