


43
GB
D:\NORM'S JOB\SONY HA\SO0126\STR-DN1020\4282218111_GB Web\GB04GET_STR-
DN1020-CEL.fm
masterpage: Right
STR-DN1020
4-282-218-11(1)
Preparing the Receiver
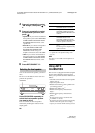
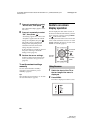
You can customize the Auto Calibration by
selecting the calibration type you want.
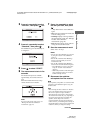
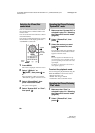
1 Press MENU.
The menu is displayed on the TV screen.
2 Press V/v repeatedly to select
“ Settings”, then press or
b.
The Settings menu list appears on the TV
screen.
3 Press V/v repeatedly to select
“Auto Cal.”, then press or b.
4 Press B/b repeatedly to select
“Custom”, then press .
5 Press V/v repeatedly to select
the calibration type you want,
then press .
• Full Flat: Makes the measurement of
frequency from each speaker flat.
• Engineer: Sets to “the Sony listening
room standard” frequency
characteristics.
• Front Reference: Adjusts the
characteristics of all the speakers to
match the characteristics of the front
speaker.
• Off: Sets the Auto Calibration equalizer
level and the A.P.M. (Automatic Phase
Matching) function to off.
Note
Set the calibration type to “Off” if you want to
decode DTS 96/24 audio format.
6 Press to confirm the
selected calibration type.
7 Repeat steps 5 to 9 in
“Performing Auto Calibration”
(page 40).
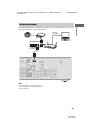
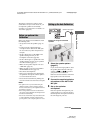
Configuring the network
settings of the receiver
The network settings for the receiver must be
set correctly to use the network functions of
the receiver.
The procedure used to set up the IP address
automatically (DHCP) is explained below.
In this case, the router that is connected to the
receiver or the Internet provider must support
DHCP.
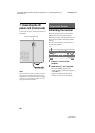
1 Press HOME NETWORK to
select the Home Network
function.
2 Press MENU.
The menu is displayed on the TV screen.
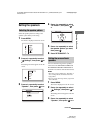
3 Press V/v repeatedly to select
“ Settings”, then press or
b.
4 Press V/v repeatedly to select
“Network”, then press .
5 Press V/v repeatedly to select
“Settings”, then press .
6 Press V/v repeatedly to select
“Auto”, then press .
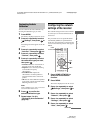
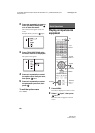
Customizing the Auto
Calibration
V/v/b,
MENU
HOME
NETWORK
continued