32
H
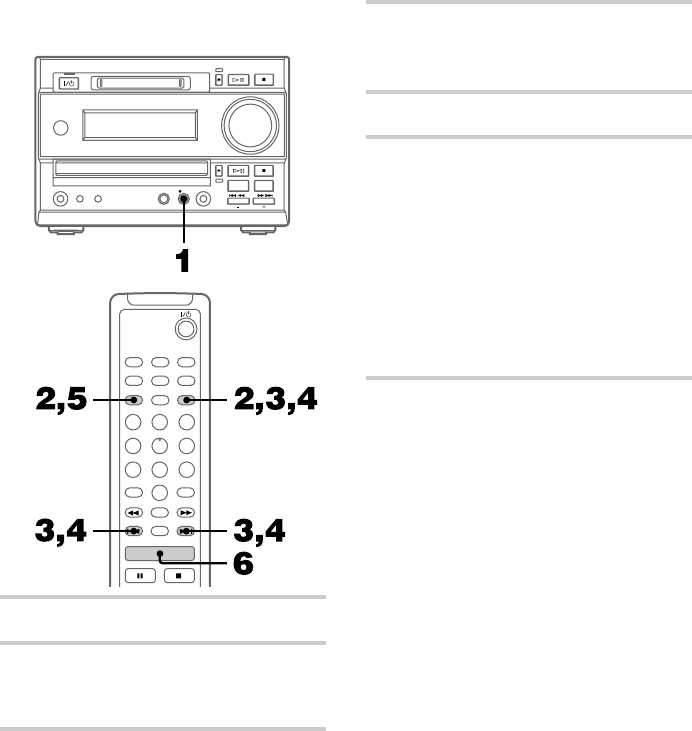
1 Press z REC to stand by for recording.
2 Press MENU/NO on the remote.
“Setup ?” appears, then press ENTER/YES
on the remote.
3 Press . or > on the remote
repeatedly until “S.Space Off” (or
“S.Space On”) appears, then press
ENTER/YES.
4 Press . or > repeatedly until
“S.Space On” appears, then press
ENTER/YES.
5 Press MENU/NO.
6 Press H on the remote.
Recording starts.
If there is an extended silence of less than 30
seconds, “Smart Space” appears, and the MD
deck replaces the silence with a blank of
about 3 seconds and continues recording.
If there is no sound input for 30 seconds or
more, “Auto Cut” appears, and the MD deck
replaces the silence with a blank of about 3
seconds and switches to recording pause.
Press H to restart the recording.
To stop recording
Press MD x.
To turn off Smart Space and
Auto Cut functions
1 Press MENU/NO on the remote during
recording pause.
“Setup ?” appears, then press ENTER/YES on
the remote.
2 Press . or > on the remote repeatedly
until “S.Space On” appears, then press ENTER/
YES.
3 Press . or > repeatedly until “S.Space
Off” appears, then press ENTER/YES.
4 Press MENU/NO.
Tip
The Smart Space and Auto Cut functions are factory
set to on. If you turn off the system or disconnect the
mains lead, the MD deck will retain the last setting
(S.Space On or Off).
Making a space between tracks
3 seconds long (continued)
