MULTI-ROOM SYSTEM CONTROLLER RMZ-955
18
Zone Connection Strategies
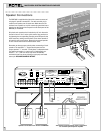
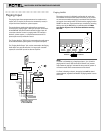
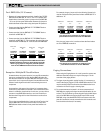
Each zone will support up to three RSM-901s and three
RKP-901s. All of the command devices for one zone should con-
nect to each other in serial fashion using their appropriate cir-
cuit board-mounted “In” and “Out” terminals.
Each RSM-901 signals when it receives and processes a com-
mand. This happens regardless of whether the command was
generated by a keypad or a hand held remote. However, a key-
pad located “downstream” of a sensor/display will
not
trigger
that sensor’s command processing indicator.
Whenever possible, we suggest that you configure each zone so
that all keypads are “upstream” from all sensor/displays. Al-
though not always practical depending on the zone configura-
tion, this arrangement will reduce user confusion.
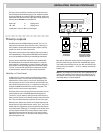
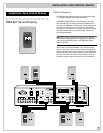
Regardless of other considerations, we suggest that you always
wire an RSM/RKP double wall box so that the RSM is located
“downstream” from adjacent RKP (i.e., between the RKP and the
RMZ-955 controller/amplifier). This assures that the sensor/dis-
play always signals the user when the adjacent keypad is used.
Installation is the first step towards enjoying an RMZ-955 system.
Proper set-up ensures that the RMZ-955 will function optimally
with all associated source components and provide total system
control.
Installation: Multi-controller Systems
Each RMZ-955 provides independently controlled audio distribu-
tion from four sources to four separate zones. To satisfy the re-
quirements of more elaborate systems, up to four RMZ-955s can
be cascaded to build a system with as many as 16 independent
zones. Under these circumstances, all RMZ-955 controller/ampli-
fiers share one set of four source components.
When system complexity calls for more than one RMZ-955, we
have no cautions about stacking controller/amplifiers on top of
each other. As long as there is sufficient room to allow relatively
unrestricted air flow, heat should not be a problem.
In most respects, installing a multi-controller system is no differ-
ent than a single controller system. Source input connections,
speaker output connections, data cable connections to the re-
mote zones, and other configuration steps are essentially the
same. Review
Installation: RMZ-955 Controller
(page 5) for com-
plete information.
There are, however, some additional considerations and installa-
tion steps required for a system with multiple RMZ-955 control-
lers. These steps all deal with the need to link the controllers:
a) AC connections for fully-integrated system control
b) Sharing four sources among all controllers
c) Passing IR commands from one controller to the rest
d) Linking special features like system-wide paging
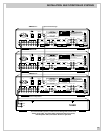
All hookup instructions in this section assume that Zones 1-4
will be handled by the first RMZ-955 (called “A”), Zones 5-8 by
the RMZ-955 immediately above it (“B”), Zones 9-12 by third
unit (“C”), and Zones 13-16 by the top unit (“D”). In most cases,
we do not illustrate all four controllers, as additional controllers
are merely added in the same fashion as the second or third con-
troller.
There is no functional distinction between the first RMZ-955 and
additional controllers in a system. However, for convenience and
simplicity, we assume that the first controller will handle some
additional responsibilities, such as source inputs and sending IR
signals to the sources. This approach makes it easy on the in-
staller, particularly when starting with a single RMZ-955 and later
expanding with additional controllers. Essentially, the work done
installing a single RMZ-955 remains unchanged and additional
zones are handled by “add-on” RMZ-955 controllers.


