


11
The long runs from amplifier to speaker typically found in multi-
zone installations demand heavy gauge, low resistance speaker
wire. Small diameter wire reduces effective amplifier power and
adds substantial distortion to the audio signal. Avoid problems by
following these minimum recommendations:
Under 150'
➠
18 gauge wire
150' - 300'
➠
16 gauge wire
Loudspeaker runs over 300' are discouraged.
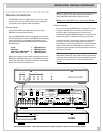
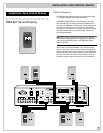
Preamp outputs
Two RCA jacks (Left and Right Channel) labeled “Pre-out” pro-
vide line level outputs for each of the four zones. These are pri-
marily used for systems with external power amplifiers driving
speakers in one or all of the remote zones.
Each zone’s preamp output is fully buffered and may be used ei-
ther independently or along with the RMZ-955’s internal amplifi-
ers to provide additional flexibility for demanding installations.
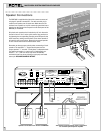
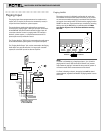
If a zone requires additional amplification, use standard RCA-
RCA shielded interconnects from these outputs to a separate
power amplifier’s unbalanced line inputs as shown in the hook-
up illustration on the preceding page. Connect the left channel
“Pre-out” jack to the left channel input on the power amplifier
for that zone; then repeat for the right channel connections.
Variable vs. Fixed Level
As delivered, the preamp outputs are configured to provide a
variable level output, i.e. the volume level of the signal can be
adjusted with a volume control in each zone. Alternatively, the
pre-amp outputs for one or more zones can be converted to pro-
vide a fixed level line drive signal, i.e. a signal that is always at a
fixed gain (0.25dBV below that of the source component). This
may be useful in certain custom applications.
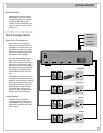
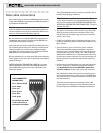
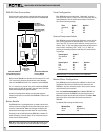
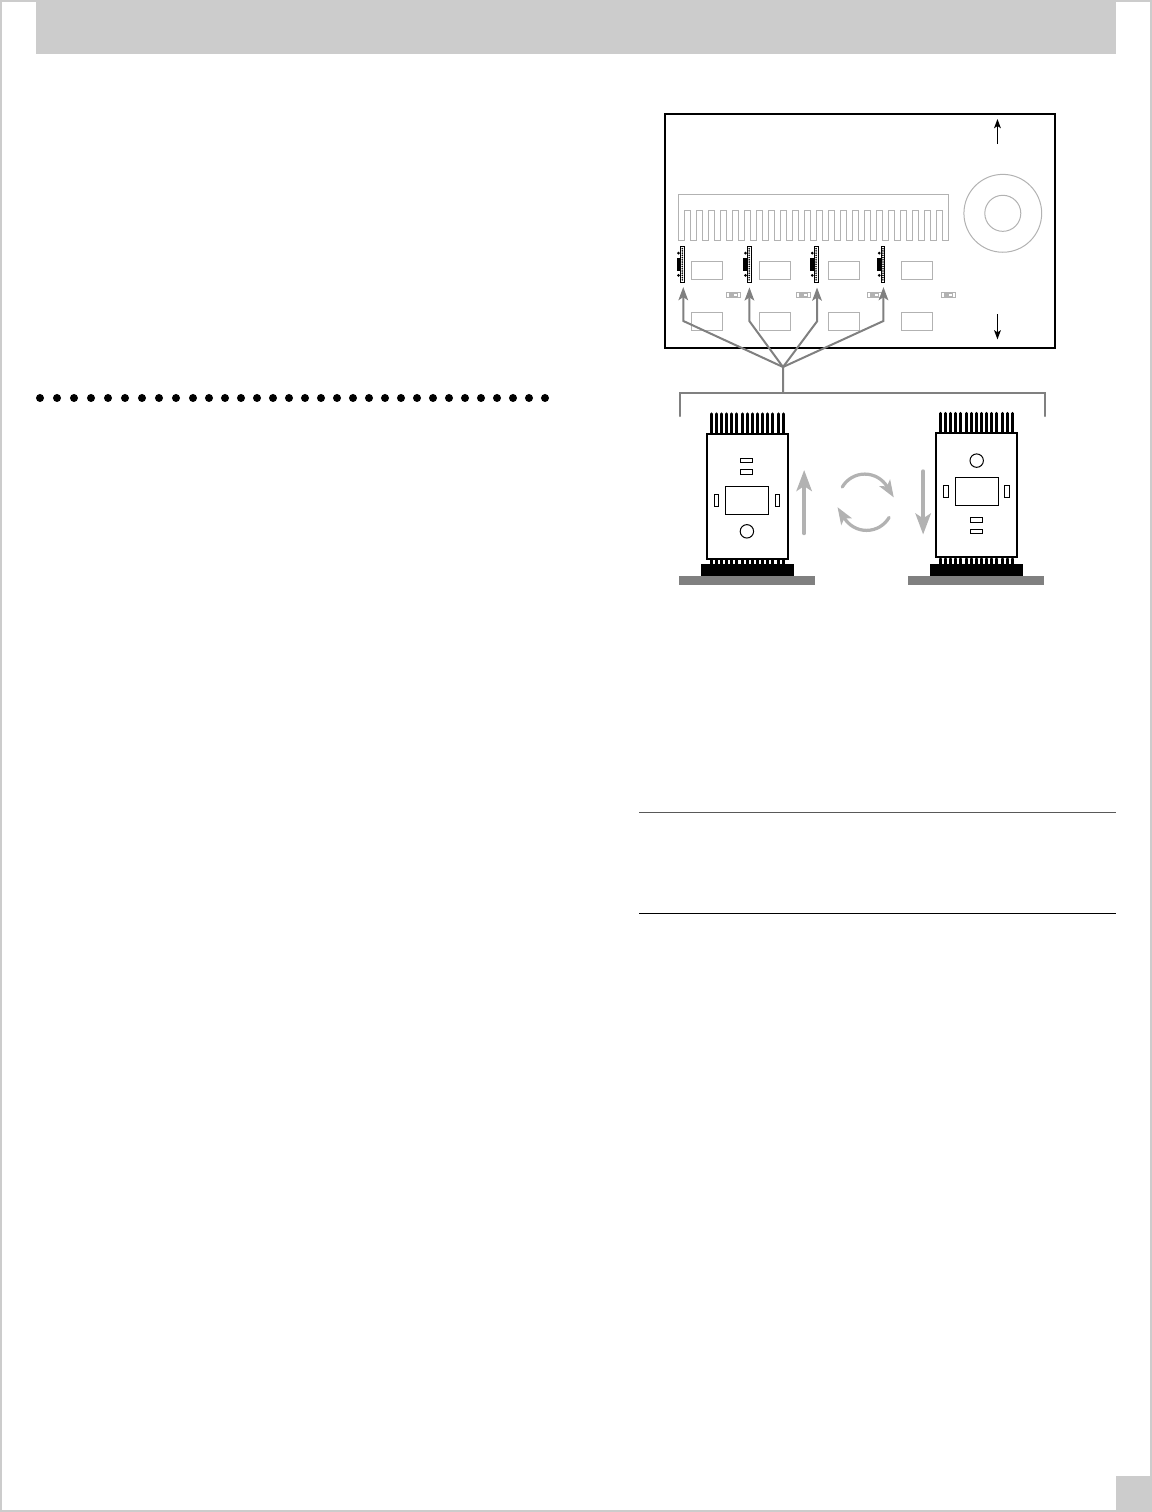
Converting the pre-amp outputs to fixed level operation requires
removing the top cover of the RMZ-955 and locating the four
“line driver” plug-in modules. Looking from the front of the unit,
these are small vertical circuit boards located in front of the heat
sink. They are labeled Zone A through Zone D, from left to right.
Notice that the modules are printed circuit boards that plug into
the main board. Each module has two rows of “pins”, one on the
bottom (which is plugged into a socket as delivered from the fac-
tory) and the other pointing up. To reconfigure from variable level
pre-amp outputs to fixed level pre-amp outputs, simply remove
the module from the socket on the main circuit board, rotate it
180 degrees, and reinsert it in the same socket using the row of
pins on the opposite end.
ZONE A ZONE B ZONE C ZONE D
RMZ-955 Circuit Board
back
front
115
115
115
115
LINE DRIVER
151
PRE-OUT
151
LINE DRIVER
151
PRE-OUT
151
Factory default:
variable level
pre-amp output
For fixed-level line-driver
output, remove module,
rotate 180° and reinstall
using other set of pins.
151
151
Note that the side of the module with the actual electronic com-
ponents remains facing to the left side of the RMZ-955, regard-
less of which set of header pins you use. Also note that the pins
and the socket are labeled 1 — 15. Pin 1 is always inserted into
Socket 1, etc.
Note You can configure each of the four zones independently, by
rotating just its module. Some zones can be configured as vari-
able outputs, while others are reconfigured as fixed outputs by
reorienting some or all of the modules.
INSTALLATION: RMZ-955 CONTROLLER