


38
Use of computer and setup
fig.OmsMidiDeviceSetup.eps
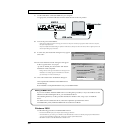
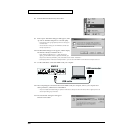
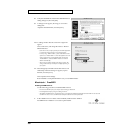
8. Verify that the MMP-2 is listed in the OMS MIDI device
setting dialog box, then click [OK].
9. A dialog box will appear, allowing you to save the
settings file.
Input the desired filename, and click [Save].
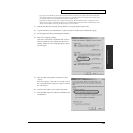
fig.OmsMyStudioSetup.eps
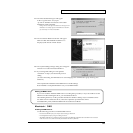
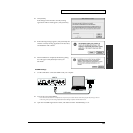
10. A settings window like the one shown at right will
appear.
Click on the name, and change the name to “Roland
MMP-2 Interface”
* If the name is same, it may be possible for some MIDI application
to confuse the name of interface or connected equipment.
* In case of using “MMP-2 Editor”, please remark that the name
of the device (“Roland MMP-2” comes with keyboard icon in the
setting window shown at right) should always be start from
“Roland MMP-2”, otherwise MMP-2 Editor can not detect
MMP-2 automatically.
* This is only one possible example of the settings window. The
settings window that you actually see will differ depending on
your system.
11. Select the [Quit] command from the File menu to exit
OMS Setup. If the Save dialog box appears, input a
filename, and click [Save].
This completes driver settings.
Read “ReadMe” of adopted CD-ROM in case you use MMP-2 Editor.
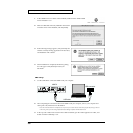
Macintosh / FreeMIDI
Installing the MMP-2 Driver
Use the following procedure to install the MMP-2 driver.
* Disconnect the MMP-2 from your computer before starting up Macintosh.
* Exit all applications before you begin installing the driver.
* The MMP-2 FreeMIDI Driver included on the disc is provided as an additional module that allows the MMP-2 to be used with
FreeMIDI. In order to use it, FreeMIDI must already be installed on the start-up hard disk.
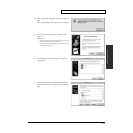
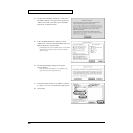
fig.e.FmDriverEInstallIcon.eps
1. In the “MMP-2 Driver E” folder of the CD-ROM, double-click the “MMP-2
FreeMIDI Driver-E Installer” icon to start up the installer.