


C2900M-B (1/03) 35
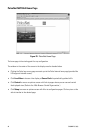
7. Change the Connect using field to the COM port of the computer to which you have
connected the serial cable. Click OK.
8. Change the Bits per second field to 19200.
9. Change the Flow control field to None. Click OK.
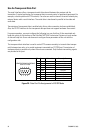
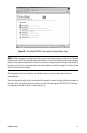
10. Hold the Shift key and press the ? key to bring up the Help menu.
11. Press the I key to set the IP address. Type the new IP address PelcoNet will be using on the
network. Press ENTER.
12. Press the S key to set the subnet mask. Type the new subnet mask. Press ENTER.
13. Press the G key to set the gateway IP address. Type the new gateway IP address. Press ENTER.
14. Close HyperTerminal. If prompted to save settings, click OK.
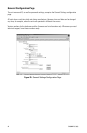
The following section shows a typical terminal session.
Typical Session
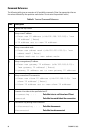
The help screen appears as follows in the terminal window:
* * * * * * * * * * * * * * * * * * * * *
Help menu
? this site
i set the IP address
s set the subnet mask
g set the gateway IP address
a set the alarm IP
c connect to alarm IP
d disconnect from alarm IP
D disconnect all connections
m display MAC address
v display version information
b display current transmission data rate
t toggle DHCP on/off
disable ‘local echo’ for a better display!
* * * * * * * * * * * * * * * * * * * * *
NOTE: You cannot use backspace during a terminal session—if you mistype a character, end your
entry by pressing Enter and try again. If you see duplicate characters on any entry, the “local echo”
feature of your PC’s terminal program is not disabled.
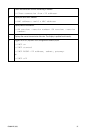
If you are using the terminal to set up the unit’s IP address, just type i and you are prompted to
enter a new IP address:
i
->Enter new IP address (old:192.168.0.1): 192.168.0.5 (Enter)
->IP address set to 192.168.0.5
If you want to establish a live video connection to a remote unit, you have to specify the remote IP
address by typing a and entering the remote IP address in the same manner as the unit IP address
as shown in the example above.
To establish a connection, type c; to disconnect, type d.