


33NILES AUDIO CORPORATION – 1-800-BUY-HIFI – 305-238-4373
SYSTEM CONFIGURATION
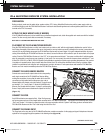
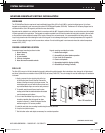
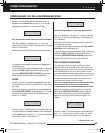
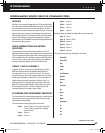
the zones. The cursor blinks under the zone number when it is
highlighted. Press the Band button to toggle “Y” on or off in the
highlighted zone. Zones with “Y” present will be linked.
123456
YY
L I N K I N G
MASTER
NOTE: IN THIS EXAMPLE ZONES 1 AND 2 ON THE MASTER ARE LINKED.
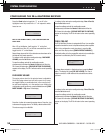
After “6” on the Master, it will toggle back to “1” on the first
connected Slave. After “6” on the last connected Slave, it will toggle
back to “1” on the Master.
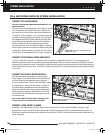
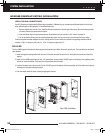
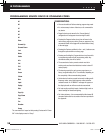
Repeat these steps until all of the desired zones have been linked.
123456
YYYY
L I N K I N G
SLAVE 1
To continue to the next system configuration step,
Paging
, press
the Set button once.
To save the settings and exit the configuration mode, simultaneously
hold down the Band and Set buttons. After the ZR-6 saves the
information, [RELEASE BUTTONS TO CONTINUE] appears on the
display. The ZR-6 will return to the normal operating mode.
PAGING
By default, all zones are enabled for paging (Figure 10). If there
are zones where the end-user does not want to hear a page, follow
these steps.
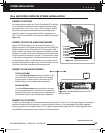
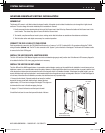
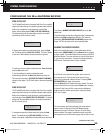
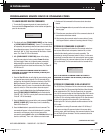
While in the configuration mode (see above), press the Set button
until [123456 PAGE MASTER] shows in the display. A “Y” appears
below every zone number. A cursor will be blinking under the
number “1” or "Zone 1."
123456
YYYYYY
PAGE
MASTER
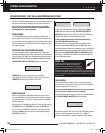
Press the + button or - button to toggle the cursor between the zones.
The cursor under the zone number blinks when a zone is highlighted.
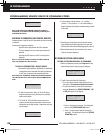
Press the Band button to toggle the “Y” on or off in the highlighted
zone. Paging is enabled in all zones with a “Y”
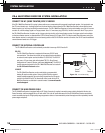
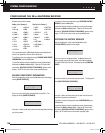
123456
Y Y Y
PAGE
M ASTER
NOTE: IN THIS EXAMPLE ZONES 1, 3 AND 5 HAVE PAGING ENABLED.
After “6” on the Master, it will toggle to “1” on the first connected
Slave. After “6” on the last connected Slave, it will toggle back to
“1” on the Master.
Repeat these steps until all of the desired zones have been set for
the desired paging operation.
To continue to the next system configuration step,
Party or Whole
House Mode
, press the Set button once.
To save the settings and exit the configuration mode, simultaneously
hold down the Band and Set buttons. After the ZR-6 saves the
information, [RELEASE BUTTONS TO CONTINUE] appears on the
display. The ZR-6 will return to the normal operating mode.
PARTY OR WHOLE HOUSE MODE
This feature lets the end-user press-and-hold any Source
Selection button for three seconds to turn on the entire house
to the same source for a party. It also allows for the press-and-
hold of the Off button to turn off the entire system from one
zone keypad without the need to walk around to every keypad to
do so. By default all zones will respond to Party mode. If there
are zones that the end-user does not want to turn on when a
press-and-hold is initiated, follow these steps.
NOTE: THIS FEATURE ONLY DEACTIVATES THE PRESS-AND-HOLD TURN-
ON AND NOT THE TURN-OFF. THE PRESS-AND-HOLD TURN-OFF
IS ALWAYS AVAILABLE AT ANY KEYPAD REGARDLESS OF THIS SETTING.
While in the configuration mode (see above), press the Set
button until [123456 PARTY MASTER] shows in the display.
The numbers represent the 6 zones of the ZR-6 MultiZone
Receiver. A cursor will be blinking under the number “1” or
"Zone 1."
123456
YYYYY
PARTY
MASTER
Press the + button or - button to toggle the cursor between the
zones . A “Y” appears under every zone number. The cursor
under the zone number blinks when a zone is highlighted.
CONFIGURING THE ZR-6 MULTIZONE RECEIVER
(CONTINUED ON NEXT PAGE)
DS00643A-1 ZR6 Manual.indd 33 7/22/08 11:58:09 AM