


29NILES AUDIO CORPORATION – 1-800-BUY-HIFI – 305-238-4373
GUIDELINES
The ZR-6 MultiZone Receiver requires at least one Master Keypad (Solo-6 IR or Solo-6 MD) in each active listening zone. Up to three
keypads can be installed in each zone using the optional ZR-KE Keypad Expander (FG01494). The Numeric-6P Accessory Keypad can be
combined with the Solo-6 IR keypad to provide even more functionality.
Keypads must be installed in an outlet box listed in accordance with the NEC. Keypads installed in damp or wet locations must be installed
in boxes approved for the application. The keypads are weather-resistant from the front face when the wall plate is sealed to the wall with
a silicone bead or other waterproof sealant. If the inside of the wall is a wet environment, it is recommended that all wiring utilize a drip
loop to help prevent water from entering the back of the keypad. Do not submerge the keypad. In freezing temperatures, the keypad’s IR
sensor will have reduced range, but will recover when unfrozen. Do not install keypads in environments where the ambient temperature
exceeds 100ºC (212ºF).
CHOOSE A MOUNTING LOCATION
Convenient keypad mounting locations include:
1. Near a doorway
2. Near a desk
3. At your bedside
4. Close to a telephone
5. Near other wall-mounted controls.
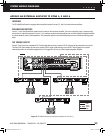
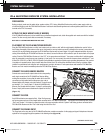
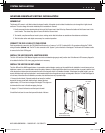
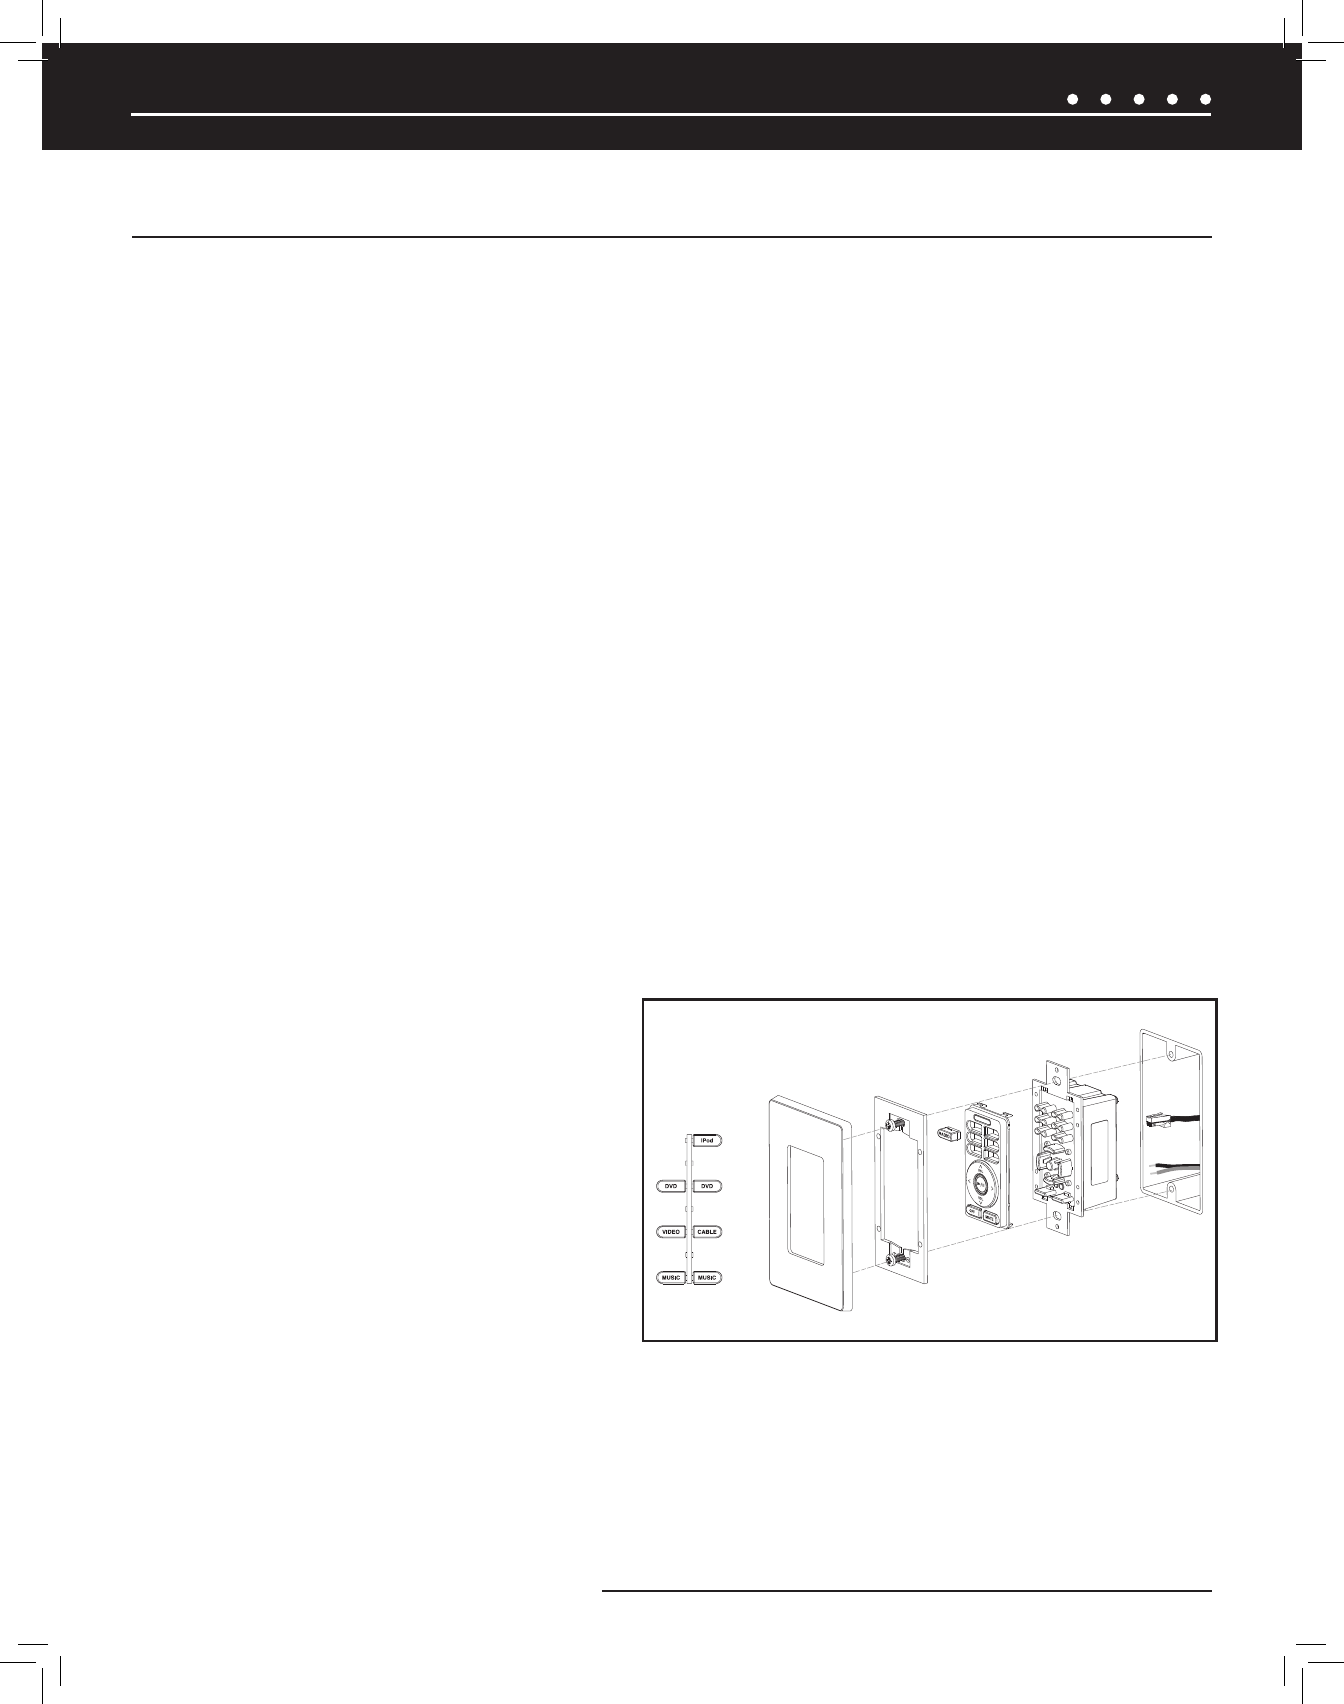
SOLO-6 IR
The Solo-6 IR comes in a kit that includes the keypad in white with a white faceplate. Also included are color change kits in light almond
and bone. Optional kits are available in black (FG#01532) and silver (FG#01570). The color change kit must be installed prior to installation
in the wall.
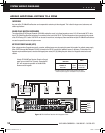
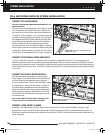
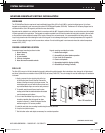
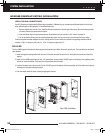
1. Gently compress the two retaining tabs at the top
of the Decora insert, then lift the top. Remove the
bottom of the Decora insert in the same manner. The
main buttons will come off with the Decora insert and
any installed Master Keys can now be easily removed.
2. To reinstall, snap the new Decora insert in place,
making certain that the attached buttons are seated
over the elastomer sub-buttons.
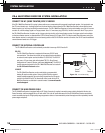
3. Do not install the Master Keys at this point. They
should be installed after the keypad has been
mounted in the wall. 4. Install the keypad into the
wallbox using the 6-32 screws provided.
5. Install the wall plate two mounting bracket using the screws provided.
6. Snap the trim plate into place.
7. Test the button action and adjust as necessary for consistent operation.
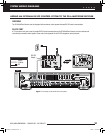
SYSTEM INSTALLATION
Solo-6 IR Installation
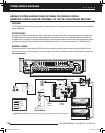
WEATHER-RESISTANT KEYPAD INSTALLATION
Keypad mounting considerations include:
1. Avoid direct sunlight
2. Accessibility for direct button operation
3. Line of site for IR operation
4. Close to a telephone
5. Appropriate height for display visibility
6. Accessibility for wiring (if retrofit)
(CONTINUED ON NEXT PAGE)
DS00643A-1 ZR6 Manual.indd 29 7/22/08 11:58:02 AM