


82
ENGLISH DEUTSCH FRANÇAIS ITALIANO ESPAÑOL NEDERLANDS SVENSKA
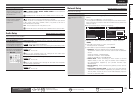
Manual Setup
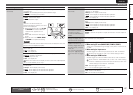
Remote control operation
buttons
Move the cursor
(Up/Down/Left/Right)
Confirm the setting Return to previous menu
Setting items Setting details
Crossover Frequency
Set the maximum frequency
of the bass signal output
from each channel to
the subwoofer. Set the
Crossover Frequency to
suit the bass reproduction
capability of the speaker
being used.
Crossover : Set the crossover frequency.
• 40Hz / 60Hz / 80Hz / 90Hz / 100Hz / 110Hz / 120Hz / 150Hz / 200Hz /
250Hz
Advanced : Specify crossover frequency for each speaker.
• Front / Center / Surround / S.Back / F.Height / F.Wide : Select the
speaker.
• 40Hz / 60Hz / 80Hz / 90Hz / 100Hz / 110Hz / 120Hz / 150Hz / 200Hz /
250Hz : Set the crossover frequency.
• “Crossover Frequency” can be set when the “Bass Setting” –
“Subwoofer Mode” (vpage81) setting is “LFE+Main”, or when you
have a speaker that is set to “Small”.
• Always set the crossover frequency to “80Hz”. When using small
speakers, however, we recommend setting the crossover frequency to
a higher frequency.
• For speakers set to “Small”, sound below the crossover frequency
is cut from the sound output. The cut bass sound is output from the
subwoofer or front speakers.
• The speakers that can be set when “Advanced” is selected differ
depending on to the “Subwoofer Mode” setting (vpage81).
• When “LFE” is selected, speakers set to “Small” at “Speaker Config.”
can be set. If the speakers are set to “Large”, “Full Band” is displayed
and the setting cannot be made.
• If set to “LFE+Main”, this setting can be made regardless of the
speaker size.
HDMI Setup Default settings are underlined.
Make settings for HDMI video/audio output.
Setting items Setting details
RGB Range
Set the video range of RGB
output from the HDMI
connector.
Normal : Output with RGB video range (16 (black) to 235 (white)).
Enhanced : Output with RGB video range (0 (black) to 255 (white)).
This setting is active when using a TV equipped with a DVI terminal.
Auto Lip Sync
Make automatic
compensation for timing
shift in audio and video
output.
ON : Compensated.
OFF : Not compensated.
HDMI Audio Out
Select HDMI audio output
device.
AMP : Play back through speakers connected to the receiver.
TV : Play back through TV connected to the receiver.
When the HDMI control function is activated, priority is given to the TV
audio setting (vpage57 “HDMI control function”).
Monitor Out
Make settings for HDMI
monitor output.
Monitor 1 : A TV connected to the HDMI OUT 1 terminal is always used.
Monitor 2 : A TV connected to the HDMI OUT 2 terminal is always used.
With “Resolution” (vpage72) not set to “Auto”, check whether
the TV you are using is compatible with the resolution under “HDMI
Information” – “HDMI Monitor 1 Information” and “HDMI Monitor 2
Information” (vpage90).
HDMI Control
You can link operations with
devices connected to HDMI
and compatible with HDMI
Control.
ON : Use HDMI control function.
OFF : Do not use HDMI control function.
• When a device that is not compatible with the HDMI control function is
connected, set “HDMI Control” to “OFF”.
• Please consult the operating instructions for each connected component
to check the settings.
• Refer to “HDMI control function” (vpage57) for more information about
the HDMI control function.
NOTE
• When “HDMI Control” is set to “ON”, it consumes more standby
power. If you are not using this unit for an extended period, it is
recommended that you unplug the power cord from the power outlet.
• “HDMI Control” does not work when the power to the equipment is off.
Either turn power on or set to standby.
• The HDMI control function controls operations of a TV that is compatible
with the HDMI control function. Make sure that the TV and HDMI are
connected when you perform HDMI control.
• If the “HDMI Control” settings have been changed, always reset the
power to connected devices after the change.