8
ENGLISH
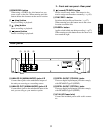
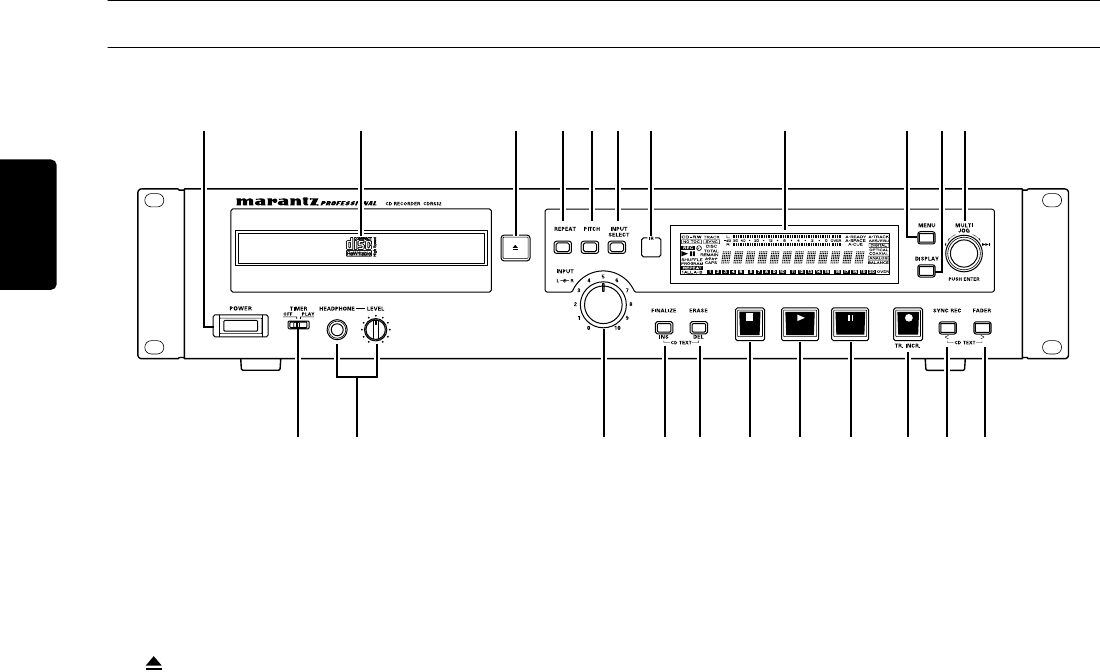
2 – Front and rear panel
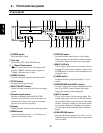
Front panel
1
POWER switch
Turns the power on/off.
2
Disc tray
Insert a disc (CD, CD-R, CD-RW) here.
3
(Open/Close) button
Opens or closes the disc tray. The display will
indicate
“Open”
when the tray is opened, or
“Close”
when the tray is closed.
4
REPEAT button
Switches the repeat playback function on/off.
5
PITCH button
Switches pitch control on/off.
6
INPUT SELECT button
Selects the input jacks that will be the recording
source.
7
Remote signal sensor
Receives commands from the RC632CDR
(remote control unit). Be aware that if there are
obstructions in front of this sensor, commands
may not be received successfully.
8
Display
Displays menus and the current operating status.
9
MENU button
Accesses the Menu mode (
→
p.12) where you
can use various menu items.
0
DISPLAY button
Switches the time mode shown on the display.
When entering text, this button switches the type
of characters (upper or lower case) being input.
A
MULTI JOG dial
This is used to select tracks or to edit the value of
a setting. This dial can be pressed to operate as an
ENTER button to finalize a selected menu item or
an edited value.
B
TIMER switch
Switches the timer playback function (
→
p.19)
on/off.
C
HEADPHONE jack/LEVEL control
You can connect a set of stereo headphones to this
jack. The LEVEL control located at the right
adjusts the volume of the headphones.
D
INPUT controls
This is a level control for the analog inputs. The
outside ring controls the level of the left channel,
and the inside knob controls the level of the right
channel. Normally, turning one will cause both to
turn together. However by holding one of them,
you can adjust the left and right levels indepen-
dently.
E
FINALIZE/INS button
Executes the Finalize operation for a disc (
→
p.31).
When entering text, this button inserts a space at the
cursor location.
B E F G H I J K LD
2 3 7 8 A91 04 56
C


