


38
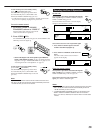
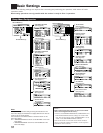
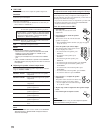
1 Setting the Speakers—SPEAKER SETTING
To obtain the best possible
surround sound of the Surround/
THX/DSP modes in Zone 1, you
have to register the information
about the speaker arrangement
after all connections are
completed.
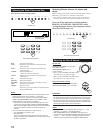
7
SUBWOOFER
Register whether you have connected a subwoofer.
YES : Select when a subwoofer is connected.
NO : Select when no subwoofer is used.
7
FRONT SP, CENTER SP, SURROUND SP,
SURR BACK SP
Register the speaker size for each speaker connected—front
speakers, center speaker, surround speakers, and surround back
speakers.
LARGE : Select when the speaker size is relatively large.
SMALL : Select when the speaker size is relatively small.
NONE : Select when you have not connected a speaker. (Not
selectable for the front speakers)
Notes:
• Keep the following comment in mind as reference when
adjusting:
– If the size of the cone speaker unit built in your speaker is
greater than 12 cm (4
3
/
4
inches), select “LARGE,” and if it is
smaller than 12 cm (4
3
/
4
inches), select “SMALL.”
• If you have selected “NO” for the subwoofer, you can only
select “LARGE” for the front speakers.
• If you have selected “SMALL” for the front speakers, you
cannot select “LARGE” for the center, surround, and surround
back speakers.
• If you have selected “SMALL” for the surround speakers, you
cannot select “LARGE” for the surround back speakers.
• If you have selected “NONE” for the surround speakers, the
surround back speakers are fixed to “NONE.”
7
SURR BACK OUT
Register the number of the surround back speakers connected—
you can use only one unit or a pair of the units for your surround
back sounds.
1SPK : Select when only one speaker is connected for your
surround back sounds—minimum requirement for
THX Surround EX (see page 51).
2SPK : Select when a pair of speakers are connected for
your surround back sounds—requirement for THX
Ultra2 Cinema and THX Music (see page 51).
7
CROSSOVER
You can select the crossover frequency for the small speakers
used. The signals below the preset frequency level will be sent to
and be reproduced by the subwoofer (or by “LARGE” speakers
when “SUBWOOFER” is set to “NO”).
Select one of the crossover frequency levels according to the
size of the small speaker connected:
80Hz : Select when the cone speaker unit built in the
speaker system is about 12 cm (4
3
/4 inches).
100Hz : Select when the cone speaker unit built in the
speaker system is about 10 cm (3
15
/16 inches).
120Hz : Select when the cone speaker unit built in the
speaker system is about 8 cm (3
3
/16 inches).
Notes:
• Use the above comments as reference when adjusting.
• If you have selected “LARGE” for all activated speakers, this
function will be set to “OFF.”
• Crossover frequency is not valid for “3D HEADPHONE.”
• If Analog Direct is in use, this function does not take effect.
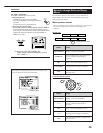
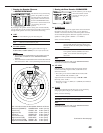
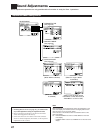
2 Adjusting the Speaker Channel Output
Levels—CHANNEL LEVEL
On this submenu, you can adjust
the speaker channel output
levels. While transmitting the
test tone, select a speaker
channel and adjust its output
level.
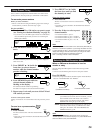
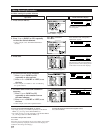
Note:
You can show this submenu simply by pressing TEST (after pressing
SOUND) on the remote control. The test tone comes out of the
activated speakers in sequence.
7
Adjustment procedure on this submenu
Adjustment is also possible without emitting the test tone. In this
case, you can skip steps 1, 2, and 6 below.
• You can only adjust the activated speakers on the SPEAKER
SETTING submenu (see the left column). The test tone will
not come out of the deactivated speakers.
1 Press fi or % (DOWN or UP) to select “TEST TONE.”
2 Press # or @ (RIGHT or LEFT) to output the test tone.
(See “TEST TONE” on the next page.)
3 Press fi or % (DOWN or UP) to select a speaker you want
to adjust.
4 Press # or @ (RIGHT or LEFT) to adjust the speaker output
level.
5 Repeat steps 3 and 4 to adjust the other speaker output
levels.
6 After adjustment is finished, stop the test tone.
1 Press % (UP) to select “TEST TONE.”
2 Press # or @ (RIGHT or LEFT) to select “OFF.”
Continued on the next page.