Preparation
8
The left and right speakers are the same.
■ IMPORTANT
• Improper speaker cable connection reduces the
stereo effect and sound quality.
• The supplied speakers are magnetically
shielded, but color irregularity may occur on the
TV depending on some conditions. To prevent
color irregularity, set up the speakers following
the instructions below.
1. Turn off the main power of the TV before
setting up the speakers.
2. Place the speakers enough distance from the
TV so that they do not cause color irregularity
on the TV.
3. Wait for approximately 30 minutes before
turning on the main power of the TV again.
CAUTION
• Do not short-circuit the ª and · speaker termi-
nals. Doing so may damage the main unit.
• The impedance of speakers connected to the
main unit must be within the range of 4
Ω
to 16
Ω
.
• Do not connect other speakers together with the
supplied speakers. The change in impedance
may damage the main unit and the speakers.
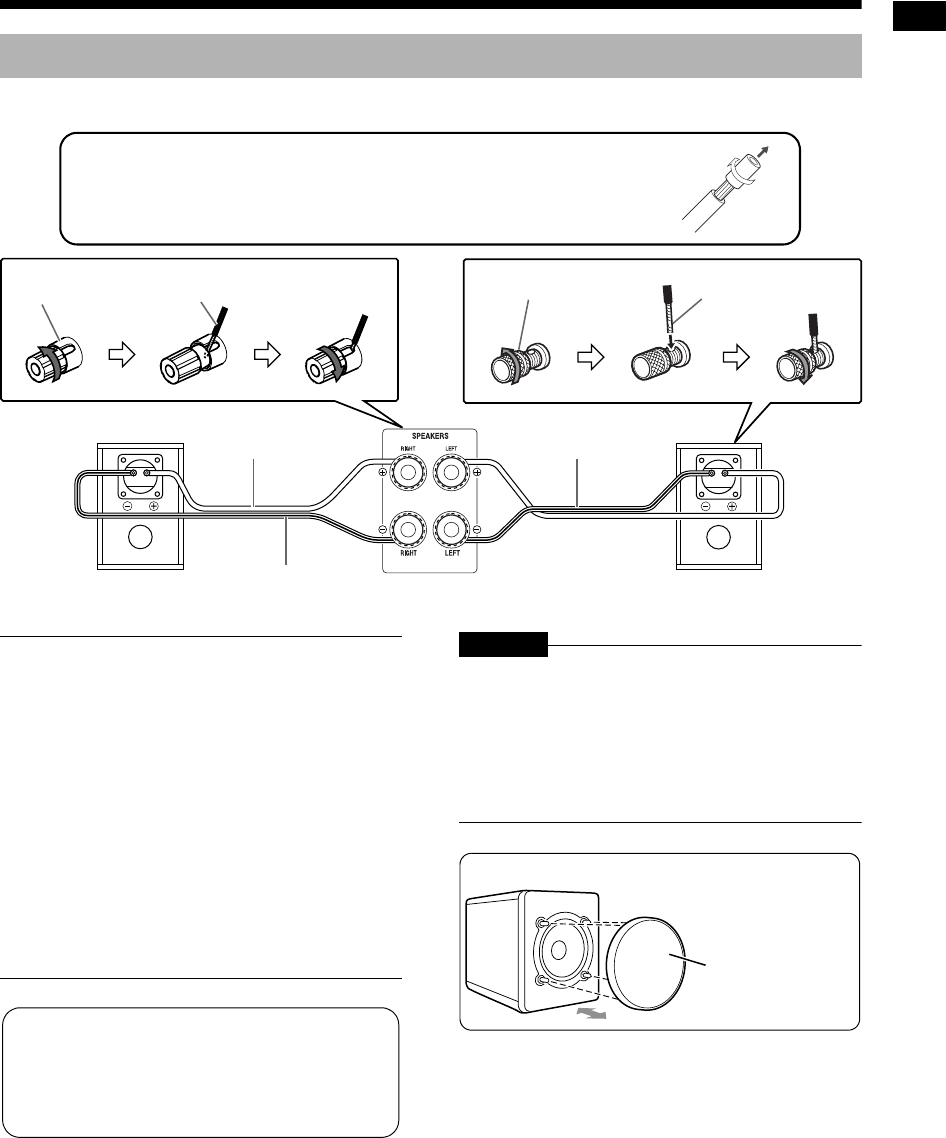
Connecting the speakers
Before connecting the speaker cables, twist and pull off the insulation at
the end of each speaker cable.
Speaker terminal
Speaker cable
Right speaker (rear view)
Speaker cable
(supplied)
Speaker terminal
Speaker cable
Left speaker (rear view)Main unit (rear view)
Black line
Black line
The speakers employ natural wood for the
diaphragm and the cabinet in order to
reproduce the original sound faithfully.
The appearance therefore differs for each
system.
You can detach the speaker cover.
Speaker cover
EX-A3[J_C].book Page 8 Wednesday, December 27, 2006 3:53 PM


