


44
DriveRack
®
DriveRack® User Manual
Section 5
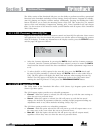
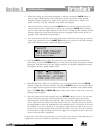
• When the Security Level function parameter is selected, rotating the DATA wheel is
used to select which function you would like to set the security for. Items include:
Program Changes, Program List, Mutes, Store, Inputs, Pre EQ, Insert 1, Insert 2, Pre
Delay, Crossover, Post EQ, Dynamics, Post Delay and Outputs.
• Once the function is selected, press the DATA wheel to set the security level for the
selected function. The security level is selected by rotating the DATA wheel, which is
used to select either the High, Medium or Low level of security for the currently selected
function. Repeat the steps from the three previous paragraphs until security levels are
properly set for all Security Level functions.
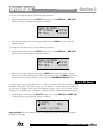
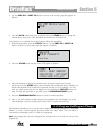
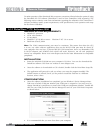
• Now that security levels have been set for the various functions in the unit, you need to
create your passwords. Press the NEXT PG button twice to move to the Edit Password
page of the Security section, which will appear as follows:
Utility
LCD Contrast 10
Auto EQ Plot RTA
Power Up Modes
PUP Program Stored
PUP Mute Current
ZC Setup
Panel 1 None
(STORE) - EDIT PANEL
Panel 1 ZC-2
Boost 0dB Cut 0dB
Output
1 3 5
2 4 6
Set Security Level
Pre EQ
Low
Set 260 Device Level
High
Password
Enter Password
Password
Edit High Password
Edit Med Password
Press Store to Change
Press Store
Program List
List Size 10
List Index 1
Program 1
Prog Change Mode
Program List
Prog Lock 24
Output Jumpers
Output 1
Setting 30
Panel 1 ZC-3
Select A
No Change
Panel 1 ZC-4
Switch
No Change
123 4
<DATA> - SELECT CHARACTER
<PREV/NEXTPG> - LEFT/RIGHT:
<STORE>-SAVE/<UTIL>-EXIT
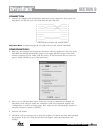
NAME: ROCK VENUE
<DATA> - SELECT CHARACTER
<PREV/NEXTPG> - LEFT/RIGHT:
<STORE>-SAVE/<UTIL>-EXIT
NAME:
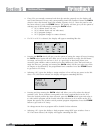
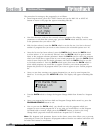
• Press the DATA wheel to select the password to edit. When the password level has
been selected, press the STORE button to set the password. Please note that the default
passwords, from the factory, are SRV (High password) and Hendrix (Medium password).
The display will now appear similar to this:
Utility
LCD Contrast 10
Auto EQ Plot RTA
Power Up Modes
PUP Program Stored
PUP Mute Current
ZC Setup
Panel 1 None
(STORE) - EDIT PANEL
Panel 1 ZC-2
Boost 0dB Cut 0dB
Output
1 3 5
2 4 6
Set Security Level
Pre EQ
Low
Set 260 Device Level
High
Password
Enter Password
Password
Edit High Password
Edit Med Password
Press Store to Change
Press Store
Program List
List Size 10
List Index 1
Program 1
Prog Change Mode
Program List
Prog Lock 24
Output Jumpers
Output 1
Setting 30
Panel 1 ZC-3
Select A
No Change
Panel 1 ZC-4
Switch
No Change
123 4
<DATA> - SELECT CHARACTER
<PREV/NEXTPG> - LEFT/RIGHT:
<STORE>-SAVE/<UTIL>-EXIT
NAME: ROCK VENUE
<DATA> - SELECT CHARACTER
<PREV/NEXTPG> - LEFT/RIGHT:
<STORE>-SAVE/<UTIL>-EXIT
NAME:
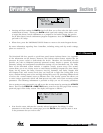
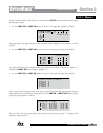
• Enter the characters which you would like to use as your password. Turn the DATA
wheel to change the selected character. Pressing the DATA wheel in successively allows
you to toggle between uppercase letters, lowercase letters, numbers, and symbols/blank
space. The PREV PG and NEXT PG buttons allow you to move to the next or previous
character (left and right).
• Once the password has been entered, press the STORE button to save it. You can now
repeat the previous steps for the other password level if required. Since the security
system has three levels (high, med and low), there can be three different levels of user
access. High level users always have full access to the box. Typically, the device would
be programmed to allow the medium level users minimal access, and the low level users
very limited or no access. However, if you simply require full access and no access, you
do not need to set the medium level password. Just make sure to set all of your Security
Level functions to high, meaning one must be logged in as a high level user to have any
access to the processor’s parameters.
To now lock out the box you must log in as a low level access user (or essentially log out as
a high level access user). Follow this procedure to lock out the device:
Utilities/Meters