


DriveRack
®
23
DriveRack® User Manual
Section 3
3.5 Creating a User Configuration
The 260 has 25 Factory Presets in which to choose from. For some configurations, you may be
able to simply select one of these presets as a starting point and edit the program from there.
In the Quick Start section of this manual, you saw how you can use the Wizards to configure
basic programs (i.e. stereo Full Range, stereo 2-Way and stereo 3-Way programs with mono
or stereo subs). The Wizard works especially well if your speakers and amps are in the list.
However, there may be times when the routing in your configuration may need to be changed,
you want to link/unlink processing modules or select different DSP inserts in the signal chain.
This is where the Driverack 260’s User Configuration mode comes in. User Configuration is
an ideal feature available in the DriveRack 260. Even with the versatility of the Factory Preset
configurations within the DriveRack, there may be an application that requires a unique
“custom” program configuration. The DriveRack gives you the ability to create a custom routing
configuration by selecting and modifying the modules including: Inputs, pre-crossover EQ, an
insert section which includes: Notch Filter, Compressor, Gates, AGC, Subharmonics Synthesizer
and AFS (Advanced Feedback Suppression), Crossovers, post-crossover Parametric EQ,
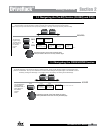
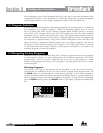
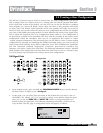
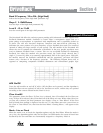
Dynamics, post Delay, Output Gain and Phase. The following information contain a standard
block diagram of the signal path in the DriveRack 260 which can be used as a reference map,
as well as step-by-step instructions for creating custom user configurations.
260 Signal Path
260 Signal Path
WIRE
RTA
MIXER
ROUTING
A
B
A+B
RTA
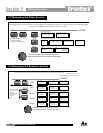
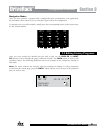
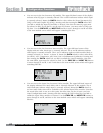
• From Program mode, press and hold the PROGRAM/CONFIG button until the bottom
left-hand corner of display reads: “Configure”
• At this point, you can either press the button of the module that you wish to edit (i.e.
DYNAMICS, EQ, DELAY, etc.), or if you wish to change every module within the signal
path, you can use the PREV PG and NEXT PG buttons to navigate through every
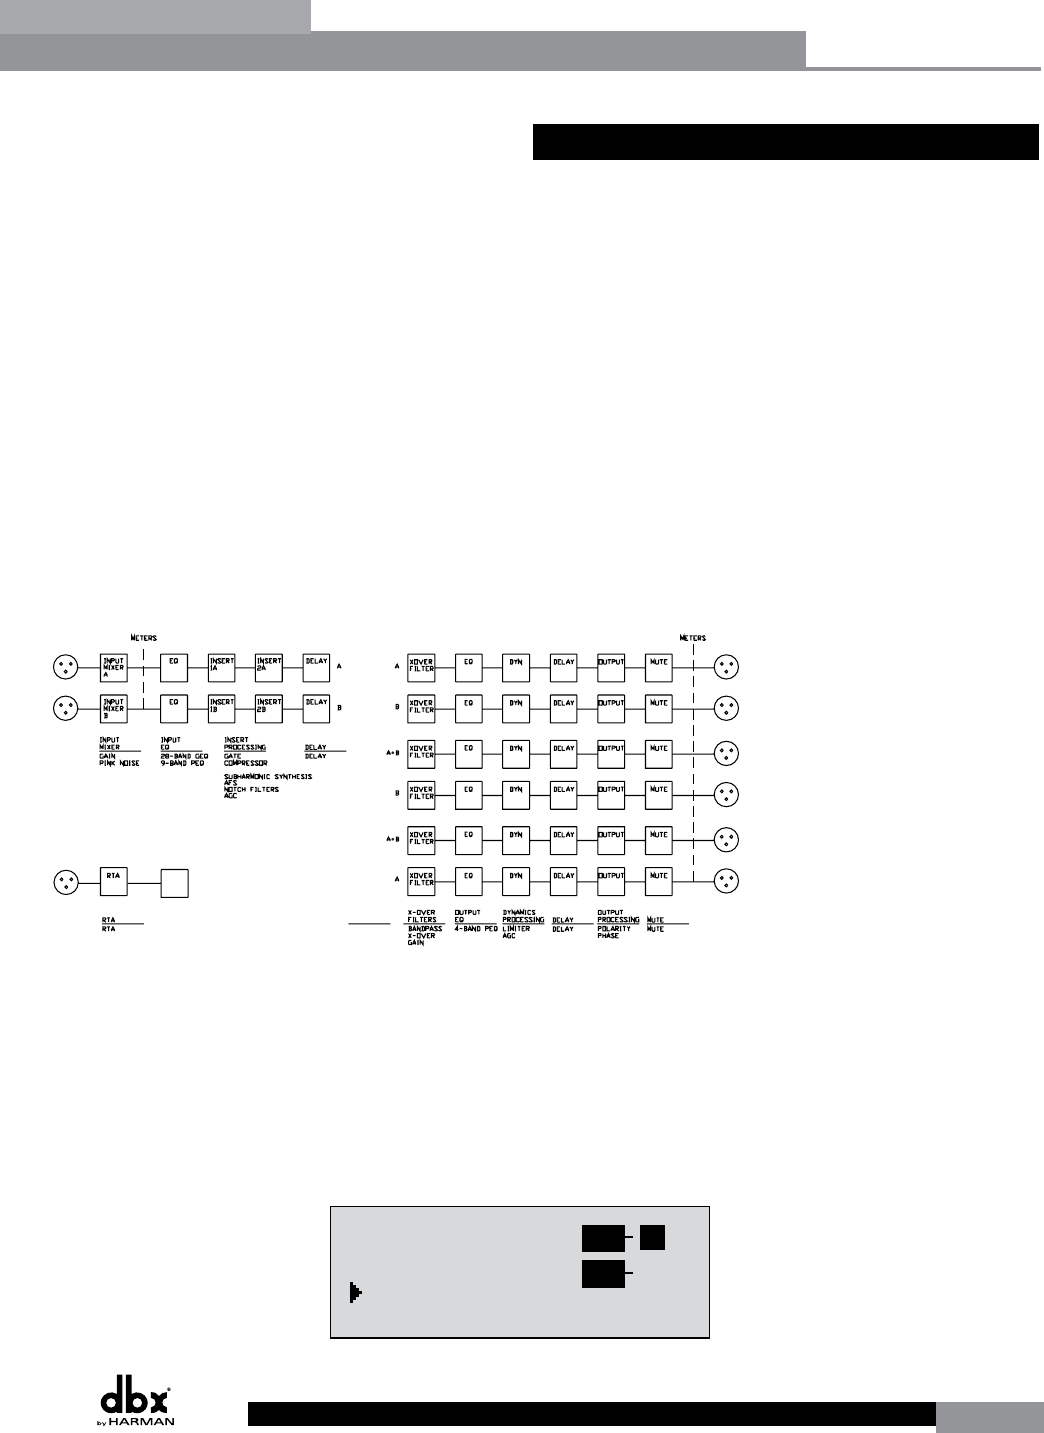
module within the signal path. The following information will make a basic touch on
every module. The first page in configuration mode will appear as follows: ”
GEQ
Select
Link/Unlink
<DATA> - SELECT CHARACTER
<PREV/NEXTPG> - LEFT/RIGHT
<STORE>-EDIT/<UTIL>-EXIT
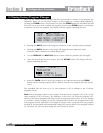
NAME: Output Ch2
CONFIGURATION ERROR!
One or more outputs
have duplicated
channels.
M
6
4
2
5
3
1
M
A
B
Program 1
8
FACT
GEQ
GEQ
G
G
A
B
COMP
Select
Link/Unlink
A
B
2
N
C
F
N
S
D
D
P2X6 PP
C
C
F
1
MONO DLY 1.3
10 ms Unused
Select
Link/Unlink
A
B
D
D
1X1 FILTER
Select
Route
2
A
A
3
4
A
B
5
6
A
A
2
POST EQ
Link/Unlink
2
3
4
5
6
2P
P
P
P
P
P
LIMITER
Select
Link/Unlink
2
3
4
5
6
2L
L
L
L
L
L
MONO DLY 20 MS
810 ms Unused
Select
Link/Unlink
2
3
4
5
6
2D
D
D
D
D
D
OUTPUT CH2
Route
NAME Output Ch2
2
3
4
5
6
2
<STORE>-EDIT NAME
Configuration Functions