17
Check operation
Once you have installed the drive hardware, you should verify that it is functioning properly before
you store your valuable data.
1 Switch on the drive and the computer. Every time you turn on the tape drive it runs a POST which
takes several seconds to complete. At the end of POST, all LEDs turn off. Read more about the self-
test and front panel lights in “Troubleshooting” on page 21.
2 Verify that the tape drive installation was successful.
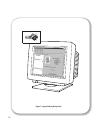
For Windows and NetWare systems, use HP Library & Tape Tools as described on page 19.
For UNIX systems, refer to the configuration instructions in the online
User’s Guide
on the web site: /
/www.hp.com/support/dlt1 which includes a verification procedure.
Note If you encounter a problem during this verification procedure, turn to “Troubleshooting” on page 21
for help in diagnosing and fixing the problem.
3 You are now ready to install backup software, as required (see page 4), and carry out a backup and
restore test to check that the drive can write data to tape. Use a blank cartridge.
To load a cartridge
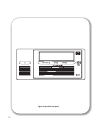
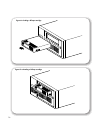
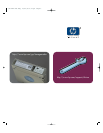
1 Insert the cartridge into the slot in front of the drive, oriented as shown in Figure 6a. Apply gentle
pressure until the drive takes the cartridge and loads it. (The label and write-protect switch are on
the rear face of the cartridge.)
2 The Ready LED flashes while the drive performs its load sequence. When the cartridge is loaded, the
Ready LED is steadily illuminated.
To unload a cartridge
Note Remove the cartridge from your HP Surestore DLT1 tape drive before turning off
before turning offbefore turning off
before turning off the desktop drive.
Leaving a cartridge in the drive when power is off can result in cartridge and drive damage
Leaving a cartridge in the drive when power is off can result in cartridge and drive damageLeaving a cartridge in the drive when power is off can result in cartridge and drive damage
Leaving a cartridge in the drive when power is off can result in cartridge and drive damage.
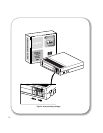
1 Press the Eject button on the front panel or use your backup software to eject the cartridge (see Figure
6b). The Ready LED flashes while the drive rewinds the tape.
2 The drive completes any task it is currently performing, winds the tape to the beginning, and ejects
the cartridge. The sequence can take up to two minutes.


