


UNIX pc
hp learning products
http://www.hp.com/support/tape may have a later version
data protection
contact hp
home page
before you start
operation
cartridge care
cleaning
specifications
media compatibility
diagnostics
troubleshooting
FAQs
SCSI configuration
UNIX configuration
hp systems
dec systems
ibm RS/6000
systems
pc based UNIX
systems
silicon graphics
sun systems
verify installation
UNIX glossary
ordering supplies
PC-based UNIX, SCO and Linux
This topic is available in English only.
contents of this section
determining the SCSI ID (Linux)
configuring for an SCO system
configuring for a Linux system
related topics
verifying installation
glossary
determining the SCSI id (Linux)
Look at the output of dmesg to find out what SCSI channel number is used for
each connection.
To find out the SCSI IDs in use on each channel:
run cat /proc/scsi/scsi
This will produce output similar to the following for each device:
Attached devices:
Host: SCSI0 Channel:00 Id:00 Lun:00
Vendor: HP Model ------------
Type: Direct-Access ANSI SCSI Revision 02
Look at the Id information to establish which Ids are in use.
configuring for an SCO system
To install the appropriate driver and device files on a SCO system, perform the
following steps:
1
Run ‘mkdev tape’ as root.
2
Select ‘Configure SCSI tape drive’.
3
Select ‘Install tape drive’.
4
Select the appropriate SCSI adapter.
5
Select the appropriate SCSI bus.
6
Select the Target ID to match the SCSI ID set on the back of the drive.
7
Select the LUN to be 0.
8
Enter ‘y’ to update the SCSI configuration.
9
Enter the following details:
Vendor identification string: BNCHMARKDLT1
SCSI version to which the drive conforms: 2
Response Data Format (SCSI-2): 2
Generic device: 1
This procedure will automatically make the drive the default device, even if
another device is already configured.
You may want to edit /etc/conf/pack.c/stp/space.c to change the
filemark handling on close. By default, it writes only one filemark for a write
filemark ioctl(). See the comments in the space.c file.
10
Enter ‘q’ to leave unchanged the boot string that is displayed when the
system is rebooted.
11
Enter ‘q’ to return to the Main Menu.
12
Enter ‘q’ to quit.
13
You are now prompted to rebuild the kernel and the kernel environment
(which includes the device files). Perform both steps by answering ‘y’ when
prompted, and select the new kernel to be booted by default.
You can now use one of the following files, as appropriate, for backup
operations:
/dev/nrStpX
if you require a no-rewind device
/dev/rStpX
if you require a rewind device
where X is the instance number as assigned to the drive by the operating
system (0 is the first device, 1 is the second, and so on).
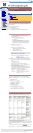
controlling compression with SCO
Because SCO does not have any compression/no-compression device files, you
must use ‘tape setcomp’ to control the compression status of the drive as
follows:
Command Compression Decompression
tape -a 0 setcomp disabled disabled
tape -a 1 setcomp enabled disabled
tape -a 2 setcomp disabled enabled
tape -a 3 setcomp enabled enabled
If you have multiple drives, you must specify the appropriate device files in the
command. For example:
% tape -a 0 setcomp /dev/nrStp2
Use ‘tape getcomp’ to tell you the current status of the drive.
NOTE: Do not use the SCO ‘mt’ utility. This is obsolete, and does not perform the
same function as ‘mt’ on other platforms. Use ‘tape’ to achieve the same result.
improving performance through block size on SCO
In order to improve performance, specify larger blocking factors for cpio and
tar. Use the ‘b’ option of tar with an argument of 20 or use the ‘B’ option of
cpio. For example:
% tar cvbf 20 /dev/rStpY ./*
or
% find / -print | cpio -ocB > /dev/rStpY
or, if you have a version of SCO UNIX earlier than 5.x:
% find / -print | cpio -ocB > /dev/rStpY
In each case, Y is the instance number as assigned to the drive by the operating
system (0 is the first device, 1 is the second, and so on).
Alternatively, you can use the tape command as follows:
% tape -a 32768 setblk <device file>
This explicitly sets the block size used for the drive when you are using built-in
applications such as cpio and tar. The <device file> is either
/dev/nrStpY or /dev/rStpY as described above.
configuring for Linux systems
No changes are needed to support DLT1 on Linux platforms, however you should
ensure that you have the relevant drivers loaded.
To see the device drivers loaded currently, execute an lsmod command, this will
give output like:
Module Size Used by
sgm 4376 1
ide-scsi 7200 0
lockd 30792 1
sunrpc 53316 1
st 24656 0
ncr53c8xx 52096 1
aic7xxx 136184 2
The lines of interest here are:
st This is the tape driver. Its presence in the output of the lsmod
command shows that the tape driver is loaded.
ncr53c8xx This is a SCSI chipset driver for the LSI Logic family of HBAs
(amongst others).
aix7xxx This is a SCSI chipset driver for the Adaptec 7xxx chipset family (such
as Adaptec 2940UW).
In order to communicate with a tape device, the operating system needs to have
drivers for the tape and the underlying transport mechanism (the host bus
adaptor) loaded. Ensure that both are available as either loadable modules (for
example, usable with insmod and visible with lsmod) or are statically built into
your kernel.
In order to determine if the drive has been detected by the tape driver at module
load time, execute:
dmesg | grep "st"
This should find a number of lines. One should look like:
Detected SCSI tape st0 at scsi1, channel 0, id 5, lun 0
To load the tape driver module if it is not loaded as above, execute:
insmod st
to load it. This should happen naturally if your system is rebooted after attaching
the drive.
In order to enable large transfers under Linux (>64 KB per write), edit the file
/usr/src/linux/drivers/scsi/st_options.h and change the definition
of ST_BUFFER_BLOCKS.
If you want requests to space to end of data to be faster, you should also enable
ST_FAST_MTEOM in the same file. After changing this file, rebuild the modules and
install the new binary. At the very least, this requires:
make modules
make modules_install
from the /usr/src/linux directory. See your kernel documentation.
© 2000, Hewlett-Packard Company
file:///C|/Documents%20and%20Settings/topher.COL-SPRINGS/Desktop/manual/document/dlt1/user/reseller/eng/c_pc.htm [12/3/2001 7:50:51 AM]