


24
iniTiAL SETUP
NOTE: If there are fewer than five main speakers in your
system, do not use the EzSet/EQ process. Instead, proceed
as described in the Advanced Functions section. If you have
selected a 6.1-channel configuration with a single surround
back speaker, use EzSet/EQ automatic configuration for
5.1 speakers, connect the single surround back speaker
to the left Surround Back Speaker Output, then configure
the surround back speaker manually, as described in the
Advanced Functions section. The 6.1-channel configuration
is not recommended. If the subwoofer is to be connected to
the Front Speaker Outputs, do not connect the subwoofer until
after running the EzSet/EQ process.
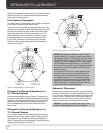
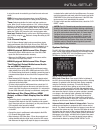
The AVR 1600 will automatically set its master volume to – 25dB.
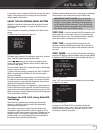
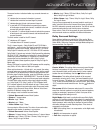
The test will begin, and a screen such as the one shown in Figure 21
will appear. Maintain silence during the EzSet/EQ configuration.
Figure 21 – EzSet/EQ in Progress
As the EzSet/EQ system tests each speaker, its position will appear
on screen. If the test sweep is heard from a different speaker than
the one indicated on screen, turn off the AVR and check the speak-
er-wire connections, then begin again.
When the test is completed, select the Continue option. The results
will be displayed, along with these options:
• The Retest option repeats the EzSet/EQ process. Increase the master
volume manually if some speakers were not correctly detected.
• Select Cancel to return to the Master menu.
See the Advanced Functions section for instructions on how to
manually configure the speakers or manually adjust the settings
established by the EzSet/EQ process.
Set Up Sources
The Input Setup menu is used to assign the correct physical audio
and component video connections to each source.
The AUDIO IN setting must be adjusted now, and if a component
video input was used for the source, the COMPONENT IN setting
must also be adjusted. Otherwise, there will be no sound or picture
when the source is playing. The other settings may be adjusted
later.
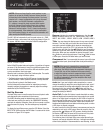
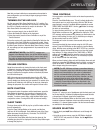
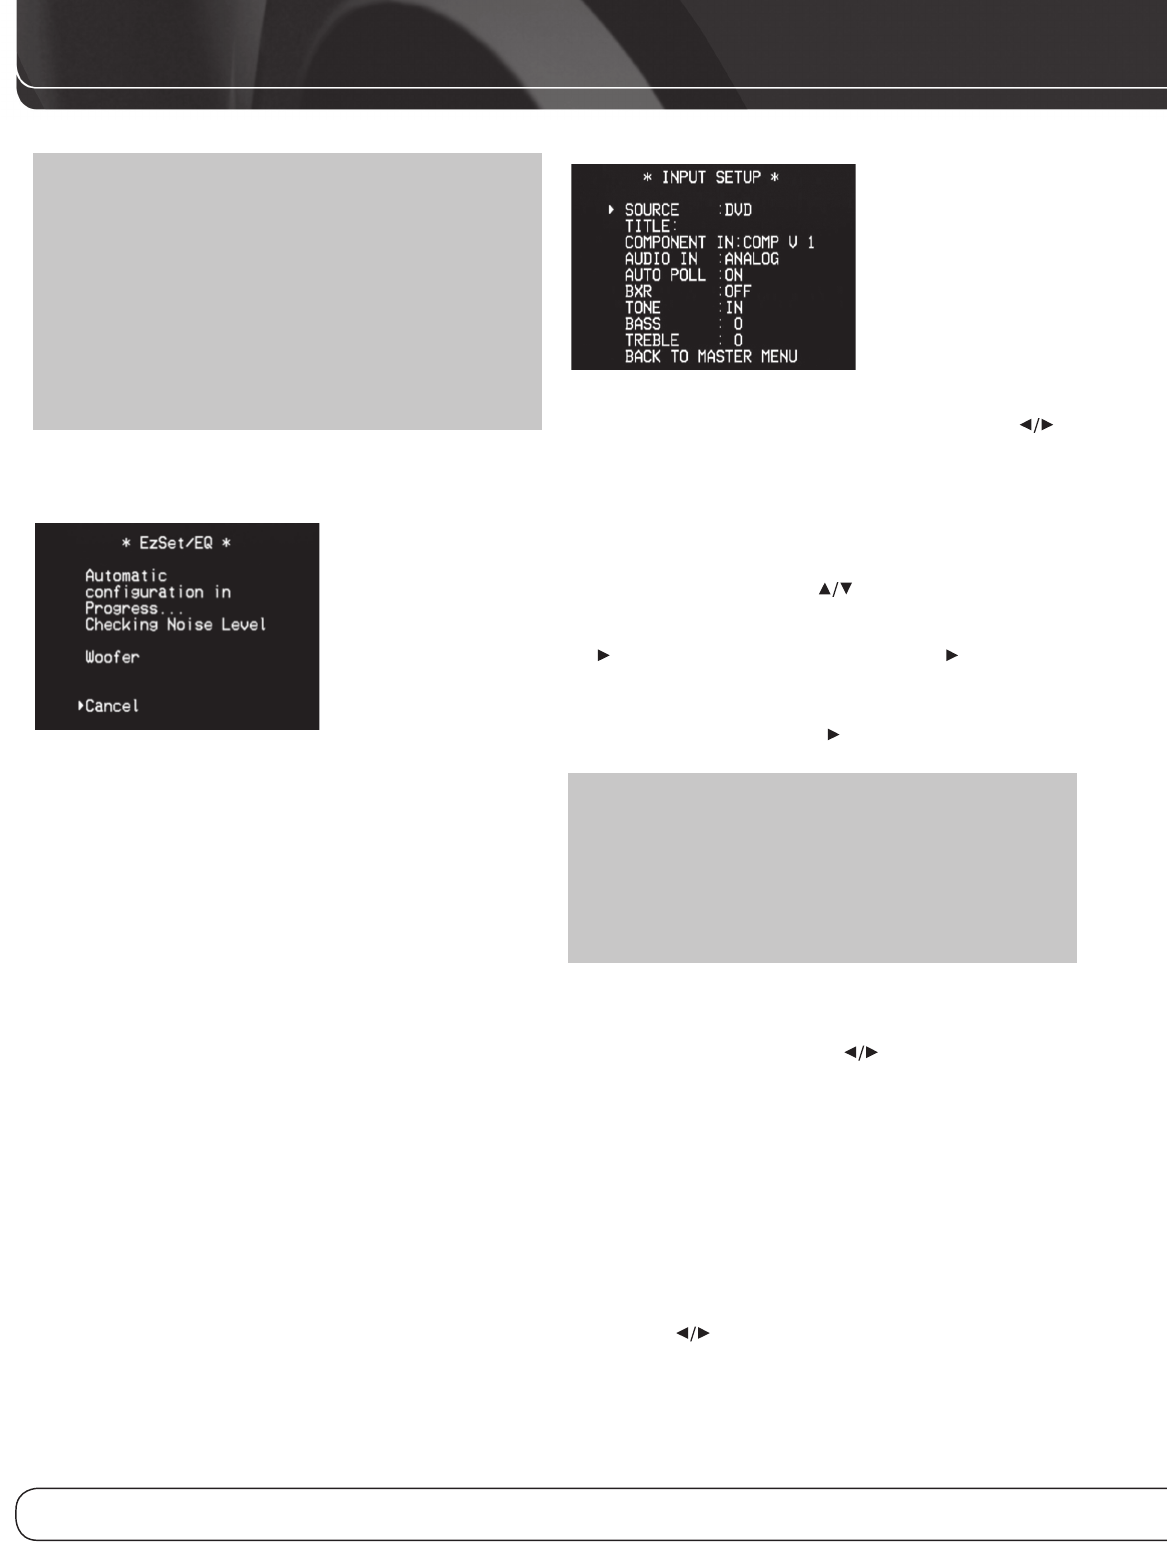
To display the Input Setup menu, press the OSD Button. Select the
INPUT SETUP LINE and press the OK Button. A screen similar to the
one shown in Figure 22 will appear.
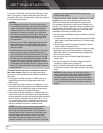
Figure 22 – Input Setup Menu
Source: Indicates the currently selected source. Use the
Buttons to select a source: DVD, CD, TUNER (Radio), Tape, 8 CH
DIRECT, AUX, VIDEO 1, VIDEO 2, VIDEO 3, HDMI 1, HDMI 2, HDMI 3.
Title: You may change the display name for any source (except
the tuner). This may help you to select the correct source device
even when you have forgotten which physical connections you
used. Move the cursor to the TITLE line and press the OK Button.
A block cursor will blink. Use the Buttons to scroll through the
alphabet in upper and lower case, the numbers and many punctua-
tion marks. When you have selected the desired character, press
the Button to move to the next space. Press the Button to leave
a blank space. Press the OK Button when you have finished.
Component In: If you connected the source to one of the two
component video inputs, press the Button to adjust the setting if
needed.
NOTE: If the source is connected to a composite video
input but a signal is present at the selected component
video input, the AVR will display the component video signal.
To avoid this, turn off the component video source device,
or adjust this setting to select a component video input that
is not in use. When no component video signal is present,
the AVR will automatically select the composite video input
associated with the source.
Audio In: If you used a digital audio connection for a source,
change this setting to assign the correct digital audio input, even if
you also connected its analog audio outputs to the receiver. Move
the cursor to this line, and press the Buttons until the cor-
rect digital input appears. If an analog audio connection was used,
change this setting to ANALOG.
Auto Poll: The Auto Poll feature is used when both an analog
audio and digital audio connection have been made for one source
device. If no digital signal is available, the AVR 1600 will switch to
the analog input for the source. This situation can occur with some
cable or satellite television broadcasts, where some channels are
broadcast with digital audio and others with analog audio, or when
a DVD player is paused or stopped.
For some sources, the Auto Poll feature is unnecessary and may be
undesirable, such as for a DVD player. Move the cursor to this line,
and press the Buttons until OFF appears, disabling the Auto
Poll feature. With Auto Poll turned off, the receiver will only check
for a signal at the audio input assigned to the source.
The remaining lines in the Input Setup menu adjust the audio per-
formance, and may be skipped at this time. Leaving these settings
at their factory defaults is recommended for most listening, in order