


Reflector/
Backstructure
Assembly
Step 1
20
Installation Procedures
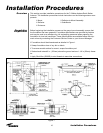
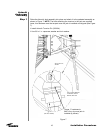
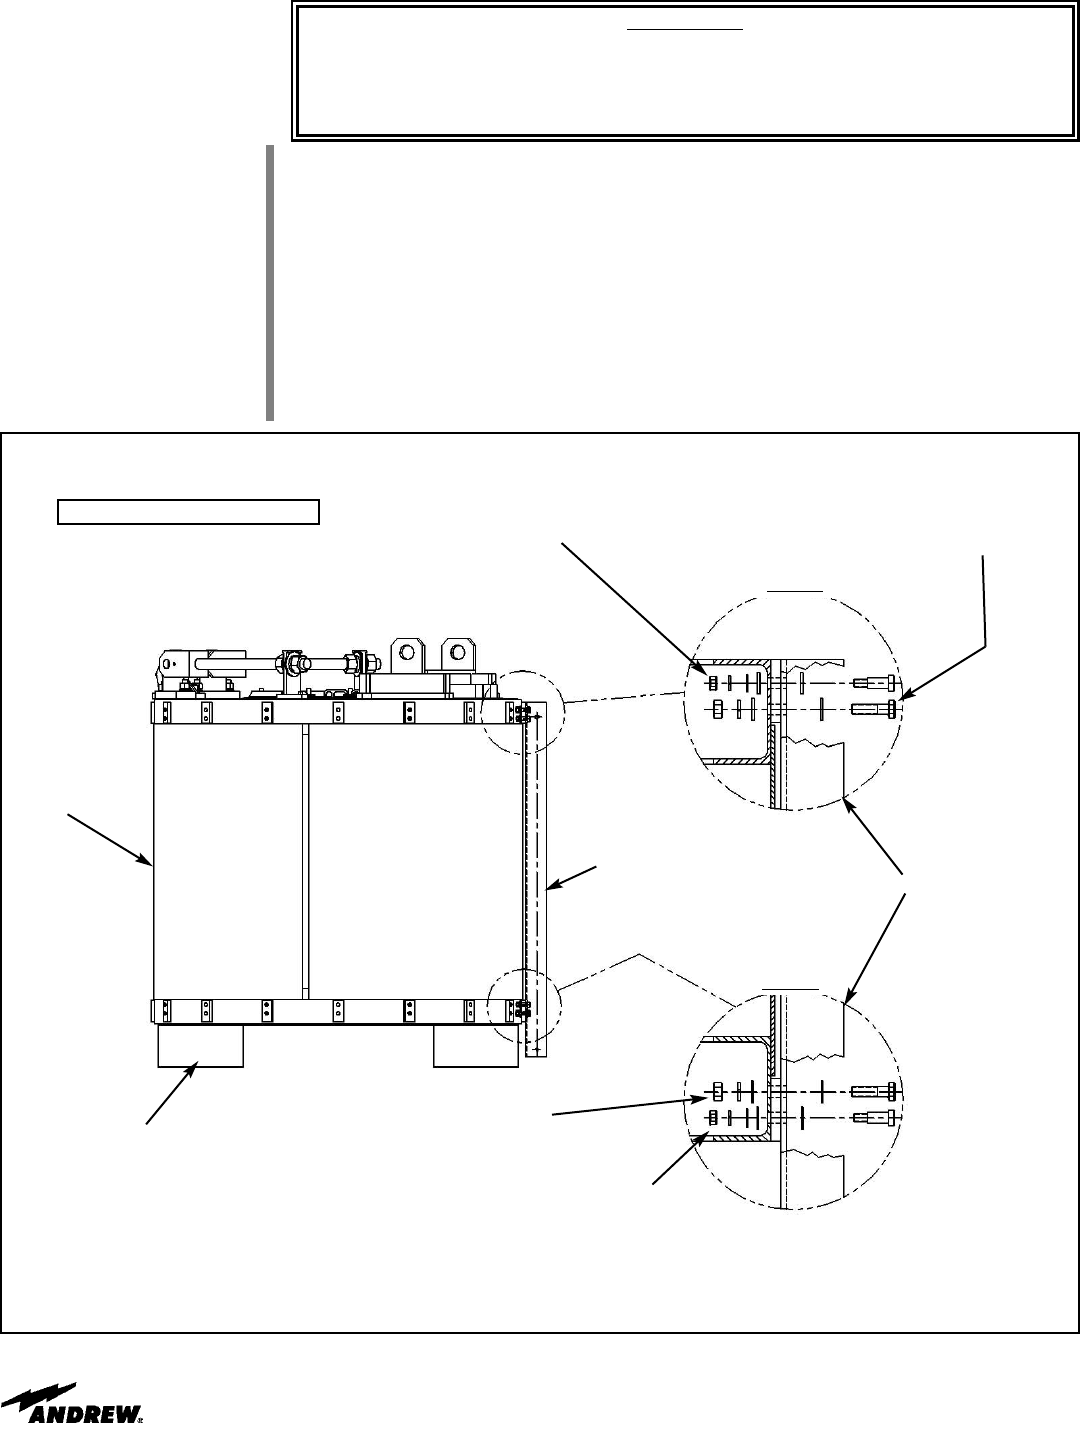
Figure 11
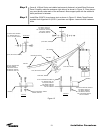
WARNING
Assembly and installation of Reflector/Backstructure should only take place when
winds are less than 15 mph (24 km/h) to prevent damage to reflector panels and ease
the assembly process. Follow special instructions stenciled on crate relative to crate
opening, contents removal and/or personnel safety.
Note
Lubricate bolt threads of both stainless steel and A325 hardware with supplied Stick
Wax (200852) to reduce friction. Do not allow wax under flat washer.
Refer to Figure 11. Position Enclosure Assembly (303659) upside down on four tempo-
rary wood support blocks. The blocks should be positioned equally around the enclo-
sure’s perimeter.
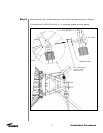
Remove the Rear Enclosure Panel. With one person inside the enclosure and one per-
son on the outside, attach Short Struts (220915) to the enclosure as per Detail A and B.
Hub Assembly,
303659
Wood Support Blocks (4)
Short Strut, 220915
1/2” x 1.0 Shoulder Bolt, 9858-18
1/2” Washer, 9997-101 (2)
3/8” Washer, 9997-89
3/8” Lockwasher, 9974-63
3/8” Nut, 9999-60
1/2” x 1-3/4 Bolt, 9963-129
1/2” Washer, 9997-101 (2)
1/2” Lockwasher, 9974-64
1/2” Nut, 9999-61
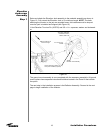
Detail `A
’
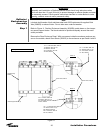
Det
ail `B’
(Short Strut, 220915)
1/2” x 1.0 Shoulder Bolt, 9858-18
1/2” Washer, 9997-101 (2)
3/8” Washer, 9997-89
3/8” Lockwasher, 9974-63
3/8” Nut, 9999-60
1/2” x 1-3/4 Bolt, 9963-129
1/2” Washer, 9997-101 (2)
1/2” Lockwasher, 9974-64
1/2” Nut, 9999-61
Note: Tighten all hardware at this stage