


Elevation
Jackscrew
Assembly
Step 1
19
Installation Procedures
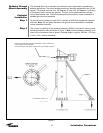
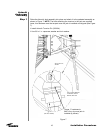
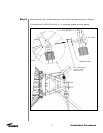
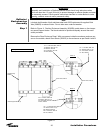
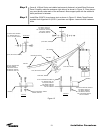
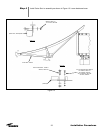
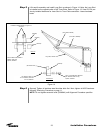
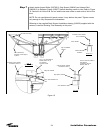
Raise and attach the Elevation Jack assembly to the pedestal assembly as shown in
Figure 10. Fully retract the Elevation Jack to it’s minimum length. NOTE: The bolts
attaching the trunnion to the jack are supplied loose, this hardware must be torqued
once the jack is installed and aligned (see Figure 10).
•
Use Elevation Trunnion Pin (303725) and 3/8 x 1 in. capscrew, washer and lockwash-
er.
Figure 10
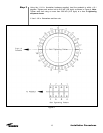
The ground mount assembly is now completed with the necessary essentials. All ground
mount options have seperate instructional bulletins located in the Parts Kit that contain
the option.
The next step in the installation process is the Reflector Assembly. Proceed to the next
page to begin installation of the reflector.
3/8”x1 Bolt, 9963-632
Lockwasher, 9974-5
Washer, 9997-146
EL Trunnion Pin,
303725
Retract Jackscrew to
minimum length
303941
Elevation Jack Assembly
Torque hardware to 260 ft.-lbs. dry
once jack is installed (4 places)