


23
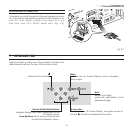
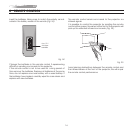
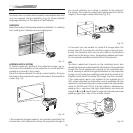
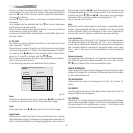
n the initial phase of installation the configurable keys (F1, F2)
serve as optical zoom and optical focus (Fig.34).
POWER ON
If active (AUTO) allows to power up the system directly from the
power feeder, once the initializing phase is completed.
If not active (STAND-BY) once the initializing phase is completed
the system remains in a stand-by mode waiting to receive the
power on command from the remote control or the key pad.
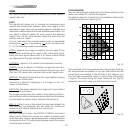
TEST PATTERNS
Displays a series of five test patterns, useful for the installation
of the projector.
Press È and Í keys to browse pattern.
FACTORY DEFAULTS
Reconfigures the projector to original factory settings except
Position, Orientation, Y/C Delay, Zoom and Focus.
No
Confirm?
Yes
MENU
LANGUAGE
Lists the languages available for the On Screen Display me-
nus.
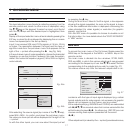
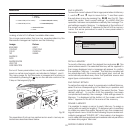
SOURCE LIST
In order for projector to be more flexible, the following described
functions allow to modify the input selection menu making it
more user friendly.
The main window shows all the inputs available on the
projector.
If one or more inputs are not utilized, it is often helpful to blank
them from the input list (accessed with the 0 key).
Once the input has been chosen, in the drop menu that
appears by pressing the Á key, it is possible to activate the
source (Fig. 35).
The exclusion or activation of the source will automatically
renumber the remaining active inputs.
2 S-VIDEO
4 GRAPHICS RGB
5 HDMI HDMI
1 VIDEO
1
2
3 COMP / RGB
3
4
5
S-VIDEO 3
COMP RGB 5
HDMI 12
VIDEO 1
S-VIDEO 4
Source list/Edit source name
ACTIVE
NAME
Yes No
Fig.35
The inputs with an active video signal (visible in the input selec-
tion menu) are marked with a check symbol.
It can be also helpful to identify the input with a name chosen
by the user (for example with the name of the connected
source) rather than with the signal type.
Once chosen to have the input visible, in the drop menu, by
selecting the Name option it is possible to rename the source
in use.
This will make it easier to remember the source connected to
a specific input. You can use up to 12 alphanumeric letters
to name the source (for more details check the “Insert text”
section)
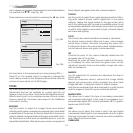
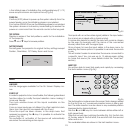
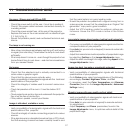
INSERT TEXT
You will be able to insert text easily and rapidly by accessing
the text insertion menu (Fig.36))
Fig.36
The text insertion mode remains the same if text is being inserted
for the first time or if a previously inserted name is being edi-
ted. The letter insertion can be done in any available position
(represented by horizontal lines).
Use the Á and Ë keys to move between letters either left or
right respectively.
Press the numeric key matching the letter (Fig. 36), the first click
of the key selects the first letter, the second click the second
letter and so on.
The available letters are shown in the text insertion menu.