


15
SD-AS10
Preparation for Use
- Main unit preparation -
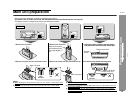
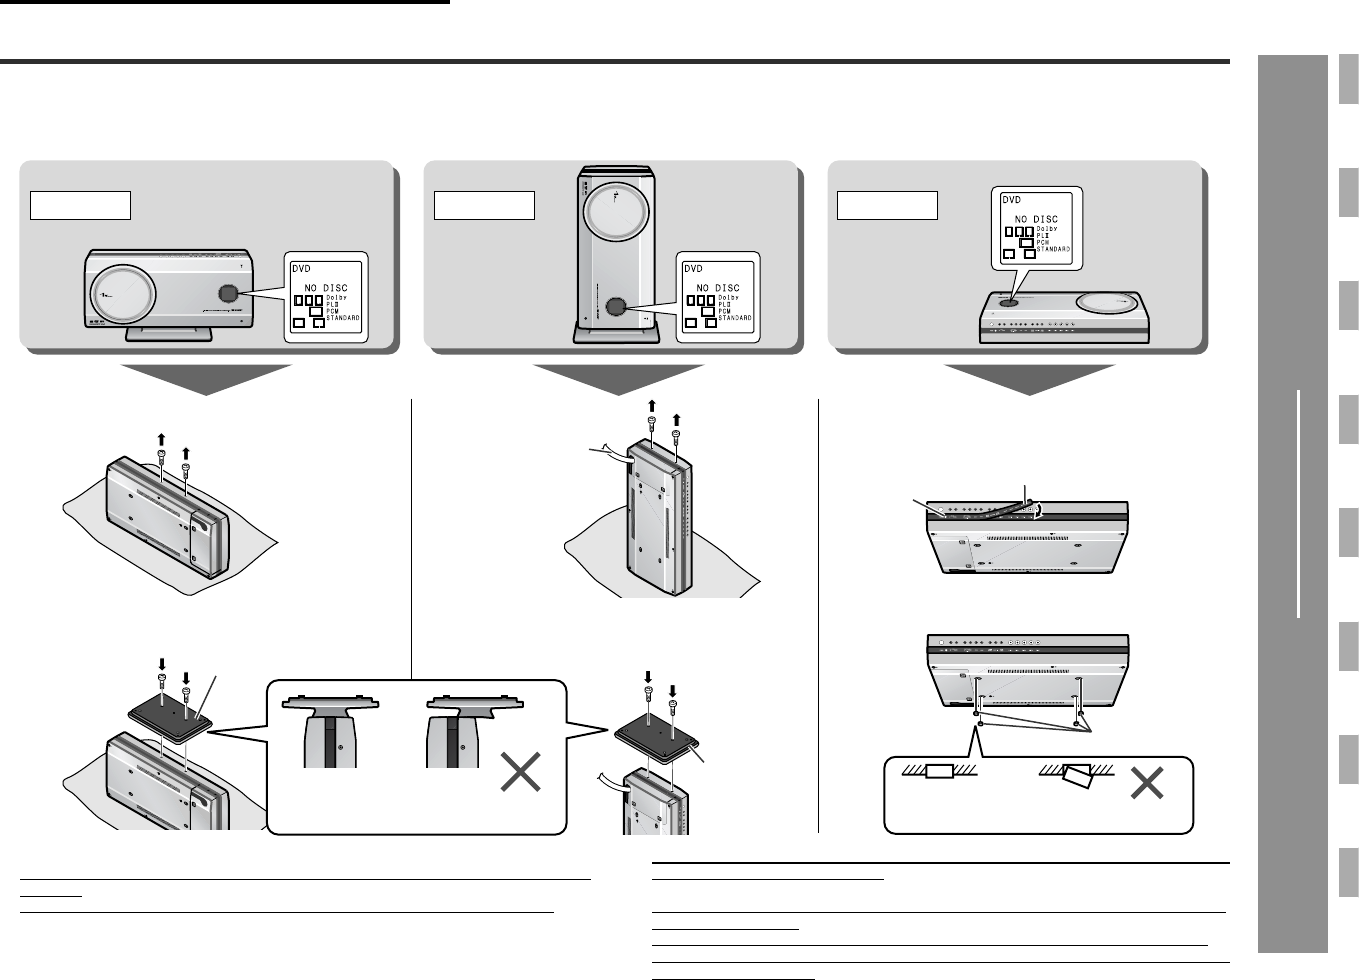
Main unit preparation
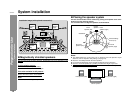
Position B Position C
L R
SW
L R
SW
L R
SW
Main unit stand
Make all connections
before attaching the
stand (see pages 17,
19).
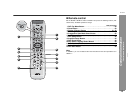
1 Align the position with the remote sensor
and attach the included button name label.
Button name label
2 Fit the non-slip sheets into the groove.
Non-slip sheet
for main unit
Remote
sensor
Select from three installation methods according to the location.
For position A or B, make sure to use the included main unit stand. Otherwise the unit may fall.
The display direction changes according to the installation direction.
Position A
1 Remove the 2 screws.
2 Secure the stand with the removed screws.
1 Remove the 2 screws.
2 Secure the stand with the removed screws.
Main unit stand
YES
Correct
NO
YES
Correct
NO
Notes:
! When attaching the stand, place the main unit on a cushion or soft cloth to avoid
damage.
! Use the removed screw to secure the stand. Otherwise, the unit may break.
Caution:
! Do not change the installation direction when the main unit is turned on. Discs may
not be read or may be damaged.
! Remove the only specified screws. Malfunction may occur. Be careful not to lose
the removed screws.
! To turn on the power after the first installation or after changing the installation
method, use the POWER button on the main unit. From the next time, you can also
use the remote control.