9
Owner’s Manual
Owner’s Manual
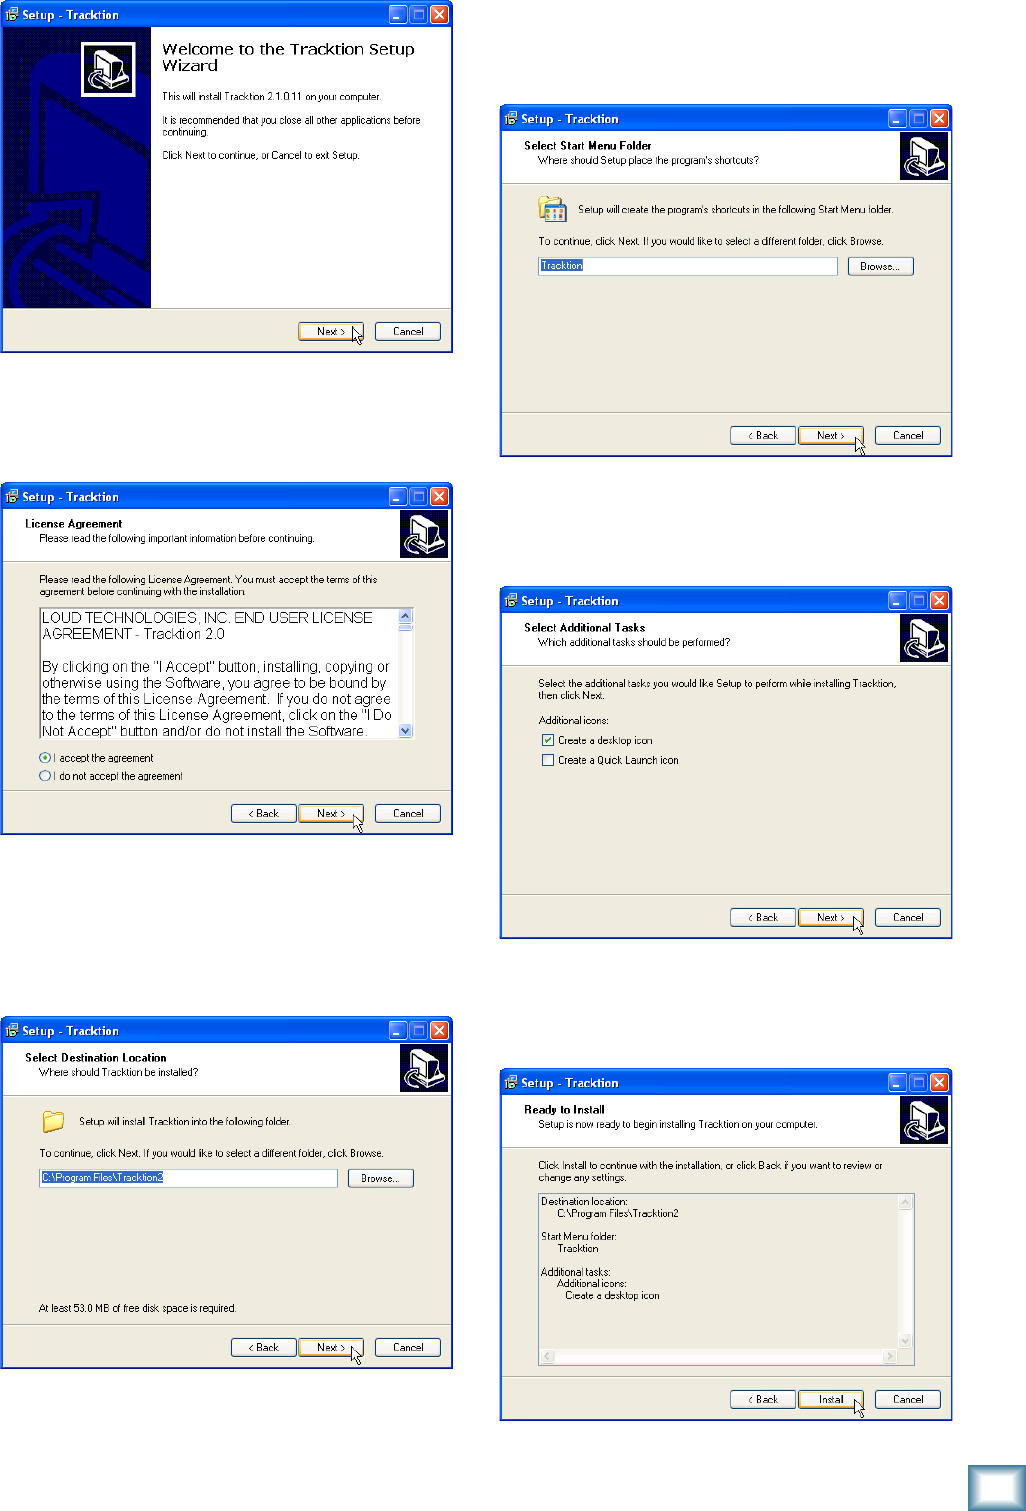
9. Next you are asked to select the Start Menu Folder
where you would like the Tracktion shortcuts in-
stalled.
We recommend you use the default location
used by the installer, but you can choose a different
location if you want by clicking the Browse button.
Then click “Next.”
10. The next window gives you the options of creating
a desktop icon and creating a Quick Launch icon.
Select the additional icons you would like to install,
and click “Next” to continue.
11. The next window gives you a summary of the instal-
lation options you have selected. Click “Back” if
you want to make any changes. Click “Install” to
proceed with the installation.
6. The Tracktion Setup Wizard opens. Click “Next” to
continue.
7. Next you will see the Tracktion License Agreement.
Read through the text and click “I accept the agree-
ment.” Click “Next” to continue.
8.
The next window lets you choose the Destination
folder for installing the software files. We recommend
you use the default location used by the installer, but
you can choose a different location if you want by
clicking the Browse button. Then click “Next.”
