81
|
KDC-X996/ KDC-BT952HD
English
|
82
Appendix
• Sirius,XMandallrelatedmarksandlogosare
trademarks of Sirius XM Radio Inc. All rights reserved.
• PANDORA,thePANDORAlogo,andthePandoratrade
dress are trademarks or registered trademarks of
Pandora Media, Inc., used with permission.
• HDRadioTechnologymanufacturedunderlicense
from iBiquity Digital Corporation. U.S. and Foreign
Patents. HD Radio™ and the HD, HD Radio, and “Arc”
logos are proprietary trademarks of iBiquity Digital
Corp.
• “AdobeReader”isatrademarkofAdobeSystems
Incorporated.
• The“AAC”logoisatrademarkofDolbyLaboratories.
• TheBluetoothwordmarkandlogosareownedby
the Bluetooth SIG, Inc. and any use of such marks
byJVCKENWOODCorporationisunderlicense.
Other trademarks and trade names are those of their
respective owners.
• iTunesisatrademarkofAppleInc.
• “MadeforiPod”and“MadeforiPhone”meanthatan
electronic accessory has been designed to connect
specifically to iPod, or iPhone, respectively, and
has been certified by the developer to meet Apple
performance standards. Apple is not responsible for
the operation of this device or its compliance with
safety and regulatory standards. Please note that the
use of this accessory with iPod, or iPhone may affect
wireless performance.
• iPhone,iPod,iPodclassic,iPodnano,andiPodtouch
are trademarks of Apple Inc., registered in the U.S. and
other countries.
• AndroidisatrademarkofGoogleInc.
• BlackBerry®,RIM®,ResearchInMotion®andrelated
trademarks, names and logos are the property of
Research In Motion Limited and are registered and/or
used in the U.S. and countries around the world. Used
under license from Research In Motion Limited.
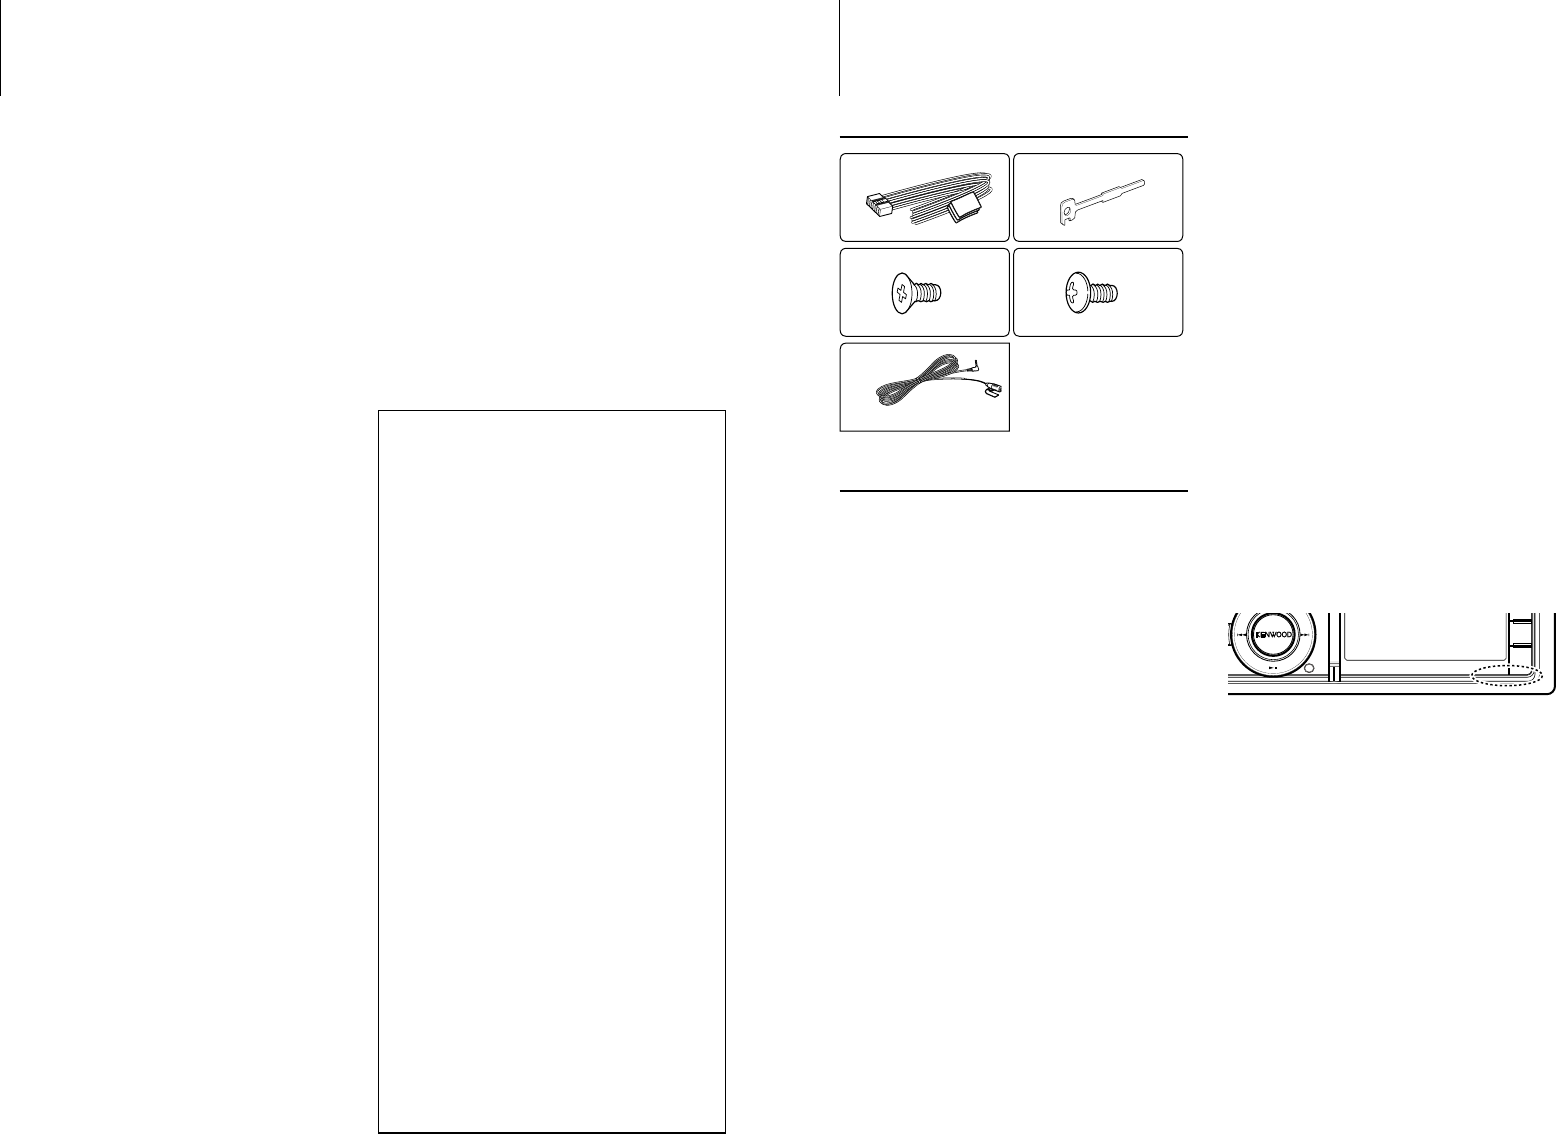
Accessories/ Installation Procedure
Accessories
1
..........1
2
..........2
3
..........4
4
..........4
5
3 m (9.5 ft) ..........1
Installation Procedure
1
To prevent a short circuit, remove the key from the
ignition and disconnect the - battery.
2
Make the proper input and output wire
connections for each unit.
3
Connect the speaker wires of the wiring harness.
4
Connect the wiring harness wires in the following
order: ground, battery, ignition.
5
Connect the wiring harness connector to the unit.
6
Install the unit in your car.
7
Reconnect the - battery.
8
Press the reset button.
2WARNING
If you connect the ignition wire (red) and the battery wire
(yellow) to the car chassis (ground), you may cause a short
circuit, that in turn may start a fire. Always connect those
wires to the power source running through the fuse box.
¤
• Mountingandwiringthisproductrequiresskillsand
experience. For safety’s sake, leave the mounting and wiring
work to professionals.
• Makesuretogroundtheunittoanegative12VDCpower
supply.
• Donotinstalltheunitinaspotexposedtodirectsunlight
or excessive heat or humidity. Also avoid places with too
much dust or the possibility of water splashing.
• Donotuseyourownscrews.Useonlythesuppliedscrews.
Using wrong screws, could damage the unit.
• IfthepowerisnotturnedON(“Protect”isdisplayed),the
speaker wire may have a short-circuit or touched the
chassis of the vehicle and the protection function may
have been activated. Therefore, the speaker wire should be
checked.
• Ifyourcar’signitionkeyswitchdoesnothaveanACC
position, connect the ignition wires to a power source
that can be turned on and off with the ignition key. If you
connect the ignition wires to a constant-voltage power
source, as with battery wires, the battery may die.
• Iftheconsolehasalid,makesuretoinstalltheunitsothat
the faceplate will not hit the lid when it is closed or opened.
• Ifthefuseblows,firstmakesurethewiresarenottouching
other parts to cause a short circuit, and then replace the old
fuse with one with a new the same rating.
• Insulateunconnectedwireswithvinyltapeorothersimilar
materials. To prevent a short circuit, do not remove the caps
on the ends of the unconnected wires and terminals.
• Connectthespeakerwirescorrectlytothecorresponding
terminals. The unit may be damaged or fail to work if you
share the - wires or ground them to any metal part in the
car.
• Whenconnectingonlytwospeakers,connectthe
connectors either to both of the front output terminals
or to both of the rear output terminals (do not mix front
and rear terminals). For example, if you connect the +
connector of the left speaker to a front output terminal, do
not connect the - connector to a rear output terminal.
• Aftertheinstallingtheunit,checkwhetherthebrakelamps,
blinkers, wipers, etc. on the car are working properly.
• Mounttheunitsothatthemountingangleis30°orless.
• Receptionmaybecomepoorifthereare
metal objects near the Bluetooth antenna
Bluetooth antenna unit
For Good Reception
To assure good reception, note the following:
• Communicatewiththecell-phonewithintheline-
of-sightdistanceof10m(30ft).Thecommunication
range becomes shorter depending on the
surrounding environment. The communication
range also becomes shorter when there is an
obstacle between this unit and the cell-phone. The
abovemaximumcommunicationrange(10m)is
not always assured.
• Abroadcaststationorwalkie-talkielocatednearby
can interfere with communication due to a too
strong signal.


