14
Basic Settings
DVD TV VCR CD FM
AM
RX-E100
HOME THEATER RECEIVER
TV DILECT
DVD
MEMORY
CONTROL
ADJUST
SETTING
STANDBY
DIGITAL
DIGITAL
SURROUND
INPUT
ANALOG/DIGITAL
INPUT ATT
MASTER VOLUME
SURROUND
ON/OFF
DSP
MODE
ANALOG
PRO LOGIC
SUBWFRLFE
SLEEP STTUNED MUTING
MH
Z
KH
Z
VOL
AUTO
DGTL AUTO
INPUT ATT
DSP
LCR
LS S RS
LPCM
DOLBY D
DTS
POWER
CONTROL
5/∞/3/2
Display
SETTING
ANALOG
PRO LOGIC
SUBWFRLFE
VOL
DGTL AUTO
INPUT ATT
DSP
LCR
LS S RS
LPCM
DOLBY D
DTS
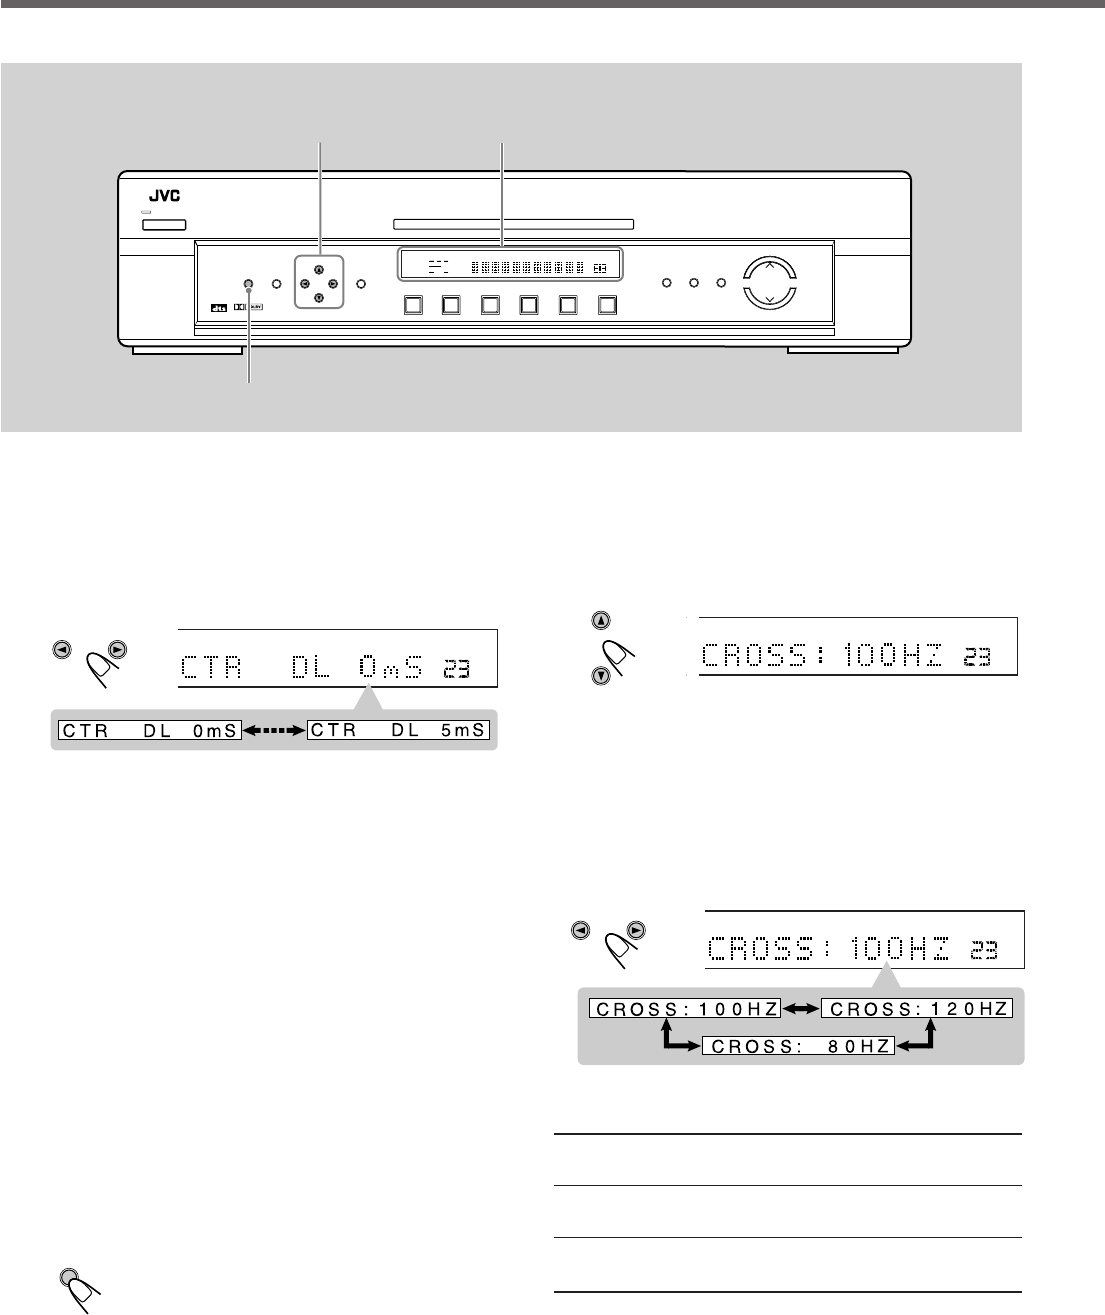
Ex.: When adjusting the center delay
CONTROL
2
Press CONTROL ∞ (or 5) repeatedly until
“CROSS (Crossover)” (with the current setting)
*
appears on the display.
* “100HZ” is the initial setting. If you have already changed the
setting, another frequency will be shown.
3
Press CONTROL 3 (or 2) to select the crossover
frequency level.
• Each time you press the button, the crossover frequency level
changes as follows:
• Use the following criteria as reference when adjusting:
80HZ: Select this frequency when the cone speaker unit
built in the speaker is about 4
3
/4 inches (12 cm).
100HZ: Select this frequency when the cone speaker unit built
in the speaker is about 3
15
/16 inches (10 cm).
120HZ: Select this frequency when the cone speaker unit
built in the speaker is about 3
3
/16 inches (8 cm).
CONTROL
ANALOG
PRO LOGIC
SUBWFRLFE
VOL
DGTL AUTO
INPUT ATT
DSP
LCR
LS S RS
LPCM
DOLBY D
DTS
CONTROL
SETTING
3
Press CONTROL 3 (or 2) to select the delay
time.
• Each time you press the button, the delay time changes by
“1 mS (msec).”
4
Repeat steps
2
and
3
to adjust the other delay
time.
Crossover Frequency — CROSS
Small speakers cannot reproduce the bass sounds efficiently. If you
use a small speaker in any position, this receiver automatically
reallocates the bass sound elements assigned to the small speaker to
large speakers.
To use this function properly, set this crossover frequency level
according to the size of the small speaker connected.
• If you have selected “LRG (large)” for all speakers, this function
will not take effect.
Before you start, remember...
There is a time limit in doing the following steps. If the setting is
canceled before you finish, start from step 1 again.
1
Press SETTING.
The CONTROL buttons now work for basic
settings.
G
IC
VOL
U
TO
T
T
EN08-16.RX-E100SL[J]_f 01.3.7, 2:49 PM14


