


6
Connections
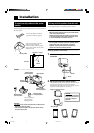
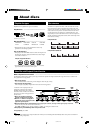
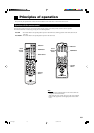
Connecting the FM and AM antennas
FM antenna connections ———————————
A. Using the supplied FM antenna
The FM antenna provided can be connected to the FM 75Ω
COAXIAL terminal as temporary measure.
B. Using the standard type connector (Not supplied)
A standard type connector should be connected to the FM 75Ω
COAXIAL terminal.
Note:
• If reception is poor, connect the outdoor antenna.
Before attaching the 75 Ω coaxial cable (the kind with a round
wire going to an outdoor antenna), disconnect the supplied FM
antenna.
AM antenna connections ———————————
Turn the loop until you have the best reception.
Notes:
• Make sure the antenna conductors do not touch any other
terminals, connecting cords and power cord. This could cause
poor reception.
• If reception is poor, connect an outdoor single vinyl-covered wire
to the AM EXT terminal. (Keep the AM loop antenna connected.)
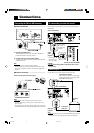
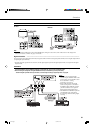
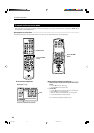
To connect the powered sub-woofer
Use the supplied system cable to connect the powered sub-woofer
(SP-PWA10).
Center unit (XV-THA10)
Powered sub woofer (SP-PWA10)
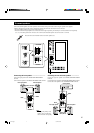
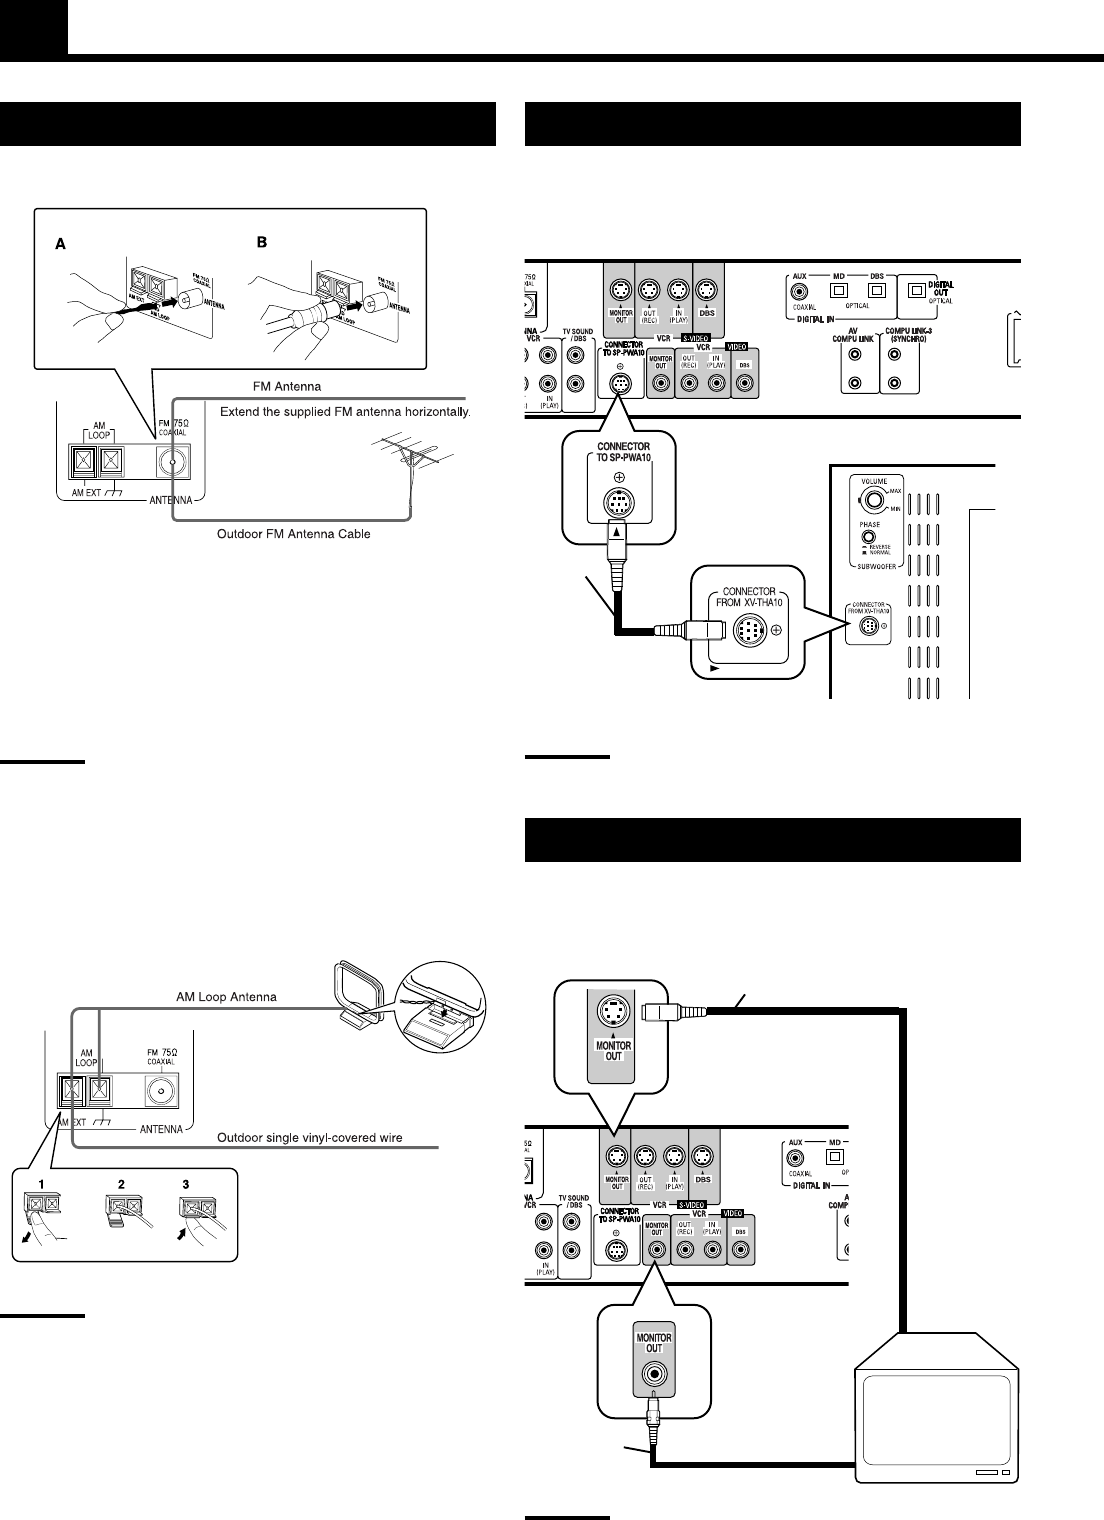
Connecting the TV
Connect the TV to view video images from the center unit.
Note:
• When connecting the TV to the TV SOUND/DBS jacks, DO NOT
connect the TV’S-video output to these video input terminals.
Center unit (XV-THA10)
S-video cable (not supplied)
Connect to the TV if it has an S-video input
(for higher image quality). Connect the cables
with the £ mark facing down.
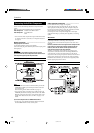
System
cable
(supplied)
Video cable
(supplied)
To composite
video input
To S-video
input
Ensure that the £
mark on the plug
faces to the right.
Ensure that the
£ mark on
the plug faces
upwards.
CAUTION:
• Use the system cable provided for attaching the center unit and
the sub woofer.
TH-A10[J]1/1 00.2.24, 14:476