4
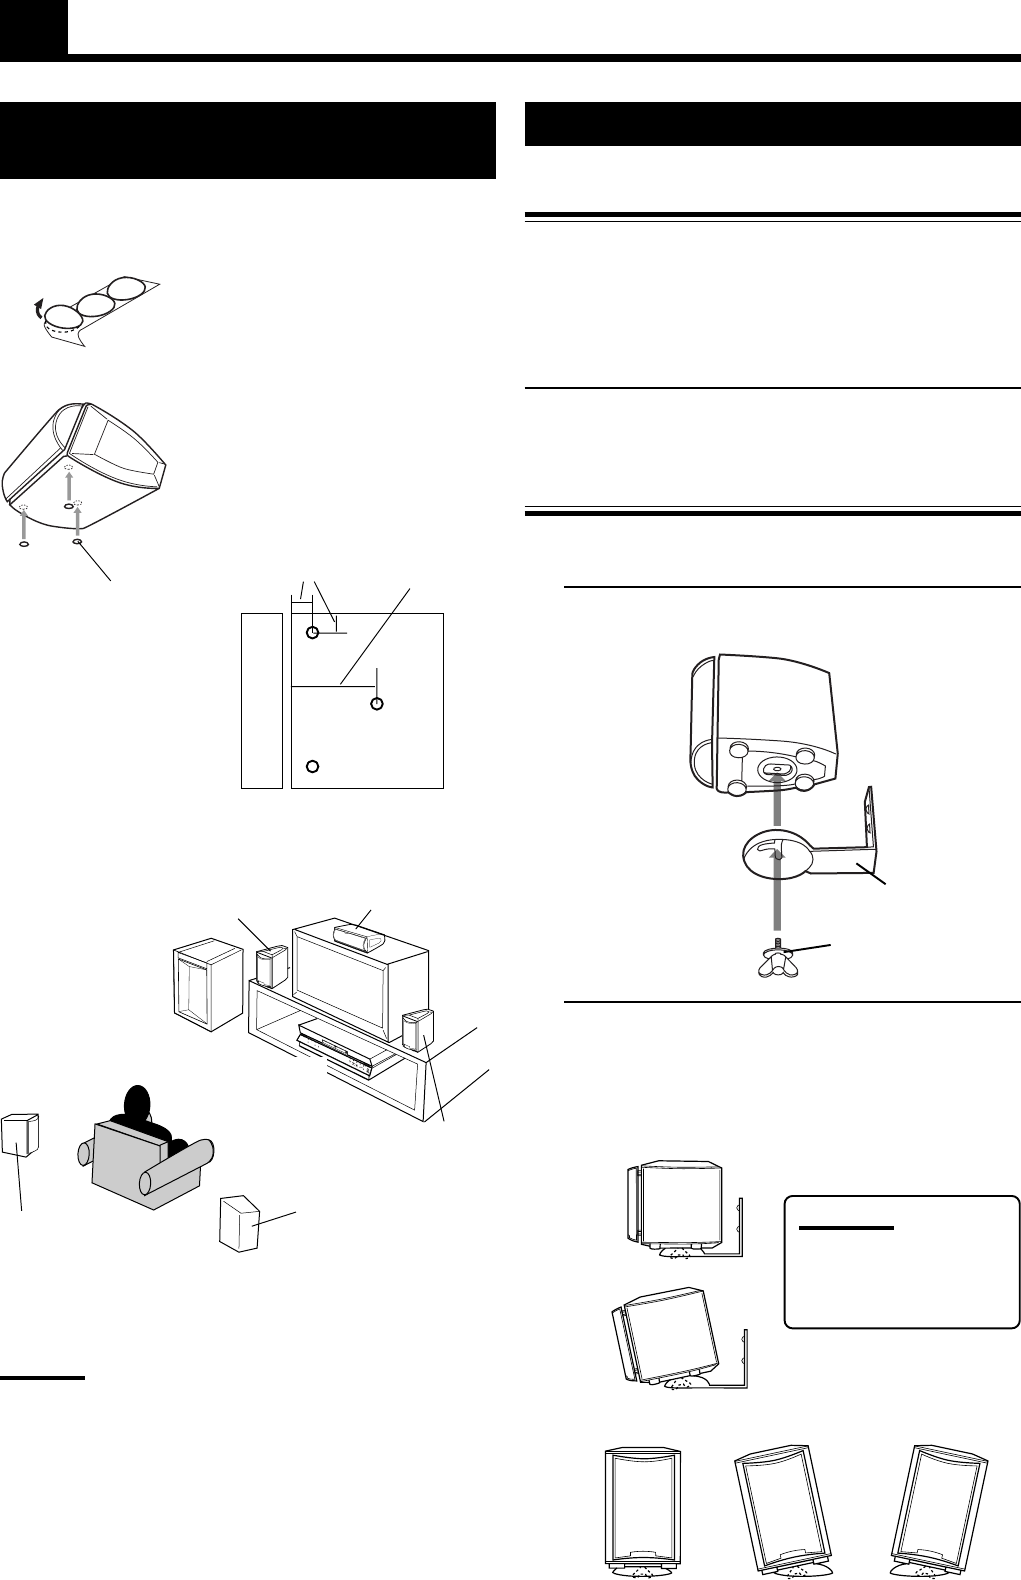
To attach non-slip rubbers to the center
speaker
Attach the supplied non-slip rubbers at three points on the bottom of
the center speaker.
Installation
Example ——————————————————
CAUTIONS:
• For safety reasons, always ensure that there is sufficient place
behind the powered sub-woofer.
• If the front and rear speakers are placed on the floor, always
ensure that they are level.
To hang satellite speakers from the wall
Use the supplied bracket to fix satellite speakers to the wall.
CAUTION: ATTACHING THE BRACKETS ON THE WALL
When attaching the brackets on the wall, have them attached
to the wall by a qualified person.
DO NOT attach the brackets on the wall by yourself to avoid
an unexpected damage of their falling from the wall, caused
by incorrect attachment or weakness in the wall.
Location of attachment to wall:
Care is required in selecting a location for attaching satellite
speakers to the wall. Injury to personnel, or damage to
equipment, may result if the speakers are attached in a
location which interferes with daily activities.
Attaching speakers to the bracket ————————
1. Use the screw supplied to attach the speaker to
the bracket.
Tilting the speaker to the front
Tilting left-right
2. Adjusting the angle of the satellite speakers
The angle of the speaker may be adjusted in the front-rear and
left-right directions along the channel in the bracket.
When adjusting the angle, loosen the screw slightly, make the
adjustment, and then tighten the screw firmly.
Bracket
CAUTION:
If the screw is not tightened
firmly, it may cause injury to
personnel or damage to
equipment.
1 cm (7/16”)
5 cm (2”)
Front side
Bottom
TV
Satellite speaker
(front left speaker)
Satellite speaker
(front right speaker)
Center speaker
Powered
sub-woofer
Satellite speaker
(rear left speaker)
Satellite speaker
(rear right speaker)
Screw
Center unit
The rear speakers are
placed behind the
listening position.
Non-slip rubber
The non-slip rubbers are adhesive.
Peel off the seal before applying.
Attach non-slip rubbers at the three
points shown in the diagram.
Attach two rubbers at left and right at
the front of the speaker, and one in the
middle at the rear.
TH-A10[J]1/1 00.2.24, 14:474


