


55
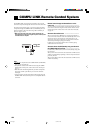
Operating JVC’s Audio/Video Components
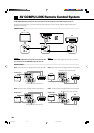
You can operate JVC’s audio and video components with this system’s remote control, since control signals for JVCcomponents are preset
in the remote control.
IMPORTANT:
To operate JVC’s audio components using this remote control:
• You need to connect JVC audio components through the COMPU LINK-3 (SYNCHRO) jacks (see page 54) in addition to the connections
using cables with RCA pin plugs (see pages 8 and 9).
• Aim the remote control directly at the remote sensor on the center unit.
• If you use the buttons on the front panel or the menu function to choose a source, the remote control will not operate that source. To
operate a source with the remote control, the source must be selected using source selecting buttons on the remote control.
• To operate the cassette deck or MD recorder using the COMPU LINK remote control system, set the source name correctly (see page 17).
• Refer also to the manuals supplied with your components.
To operate JVC’s video components using this remote control:
• You need to connect JVC video components through the AV COMPU LINK terminals (see page 52) in addition to the connections using
cables with RCA pin plugs (see pages 8 and 9).
• Some JVC VCRs can accept two types of the control signals — remote code “A” and “B.” Before using this remote control, make sure that
the remote control code of the VCR is set to code “A.”
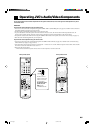
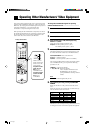
• When using the remote control:
– Aim the remote control directly at the remote sensor on each component, not on the center unit.
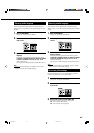
Check to see if its
remote control mode
selector is set to the
correct position.
To operate the audio
system, TVs, and
VCRs, set it to
“AUDIO/TV/VCR.”
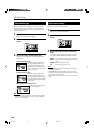
Primary remote control Primary remote control
TH-A10[J]7/1 00.2.24, 14:5955