


10
English
YES
NO
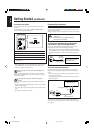
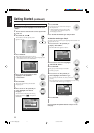
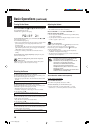
Setting the DVD Player
You need to set the following before starting playback, using the
choice menu shown on the TV.
• You can select the language used in the choice menu.
• For further information about the choice menu, see pages 58 to
66.
Make sure you have selected the correct input mode on the TV
before setting.
Step 1: Select the on-screen language for the choice menu.
Step 2: Select the monitor type according to your TV.
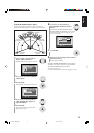
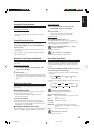
Is audio equipment connected to the OPTICAL DIGITAL OUTPUT
terminal?
Step 3: Select the output signal type.
Setting is finished.
Go to the next page to start the initial setup.
If no operation is done for about 5 minutes while the
choice menu is shown on the TV
The Screen Saver automatically works to prevent the TV screen
from being damaged.
To cancel the Screen Saver, cancel this function. (See page 61.)
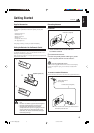
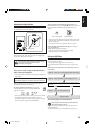
Now, you are ready to plug in the unit and any
other connected equipment.
• If the wall outlet does not match the AC plug, use the supplied AC
plug adaptor.
IMPORTANT: Be sure to check that all connections are
done before plugging the AC power cord into a wall outlet.
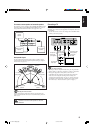
When connecting the AC power cord to a wall outlet, the unit
automatically starts display demonstration.
To cancel the display demonstration, press and hold
CANCEL/DEMO on the front panel until “DEMO OFF”
appears on the display.
• When you press other buttons on the front panel or on the remote
control, the demonstration stops temporarily. It will start
automatically again (if no operation is done for about 2 minutes)
unless you cancel it by pressing CANCEL/DEMO.
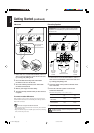
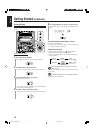
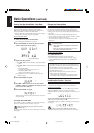
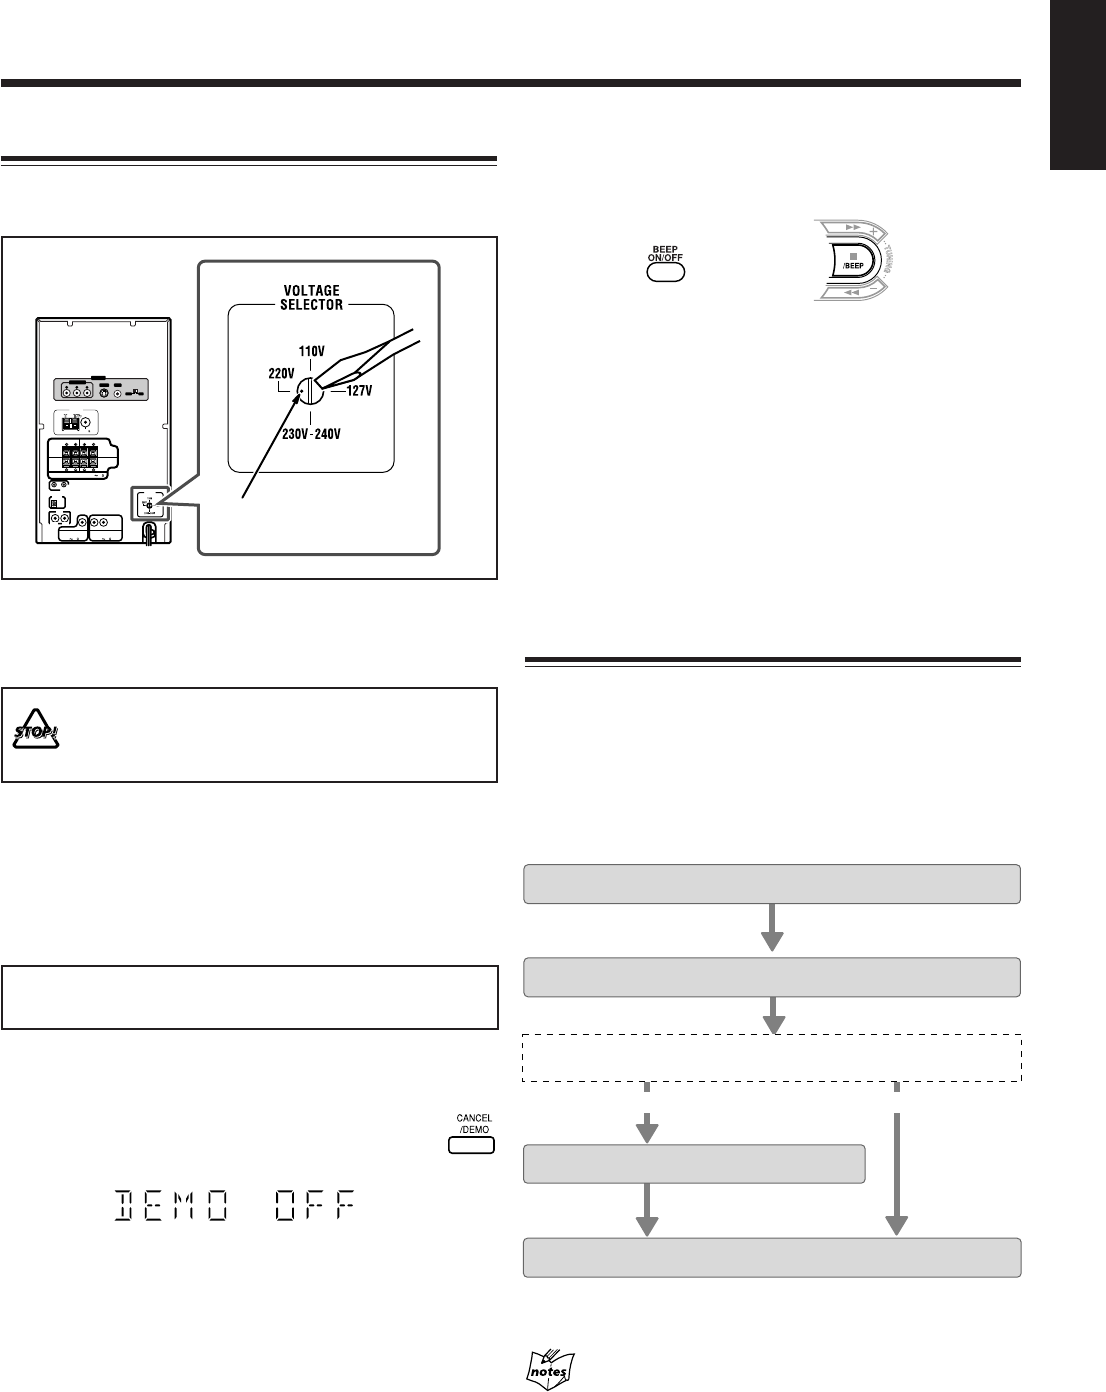
Adjusting the Voltage Selector
Before plugging in the unit, set the correct voltage for your area with
the voltage selector on the rear of the unit.
Use a screwdriver to rotate the voltage selector so that the voltage
mark is pointing at the same voltage as where you are plugging in
the unit. (See also the back cover page.)
DO NOT plug in before setting the voltage selector
on the rear of the unit and all connection
procedures are complete.
To cancel only beep sounds during the demonstration, press
BEEP ON/OFF or press and hold BEEP (7) for more than 2 seconds
on the front panel. The BEEP ON indicator goes off from the
display.
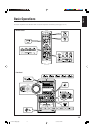
On the remote control On the front panel
• “0:00” flashes on the display until you set the built-in clock. After
setting the clock, the clock time will appear on the display while
the unit is turned off.
To set the built-in clock, see “Setting the Clock” on page 13.
To start the display demonstration manually, press and hold
CANCEL/DEMO again.
“DEMO START” appears on the display.
• Each time you press and hold the button, the display
demonstration turns on and off alternately.
AM EXT
AM
LOOP
FM 75
COAXIAL
COMPONENT
P
R
P
B
Y
VIDEO
S-VIDEO
PALNTSC
VIDEO OUT
AV
COMPU LINK
FRONT
SUBWOOFERS
FRONT
MAIN
SPEAKERS
ANTENNA
CAUTION: SPEAKER IMPEDANCE 6 16
CAUTION:
SPEAKER IMPEDANCE
8 16
CENTER SPEAKER SURROUND SPEAKERS
CENTER RIGHT LEFT
OPTICAL
DIGITAL
OUTPUT
VOLTAGE
SELECTOR
RIGHT LEFT
RIGHT LEFT
AUX
IN
CAUTION:
SPEAKER IMPEDANCE
16 32
Voltage mark
01-13HX-Z77&55[U]6.p65 03.8.18, 10:42 AM10