


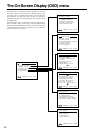
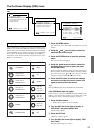
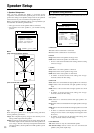

27
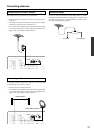
Smart Scan
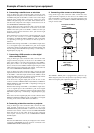
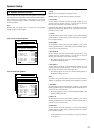
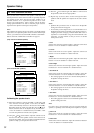
Controller
Push To Enter
DSP/Preset
Standby/On
Standby
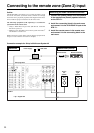
Zone 2
Rec Out
Zone 2
Phones
Master Volume
Video 1
VCR 1
Video 2 Video 3 Tape
FM
AM Phono CDDVD
Dimmer
Down UpTuning
Stereo
Display
Listening Mode
/DTS
Surround
On
O
f
f
Power
FM Mute/
Mode
Character/
Memory
Bass/
Treble
Zone 2 VolCH Level
ExitDirect THX Menu
Video 4
/
Video Cam Input
S Video Video
L Audio
R
--
VCR 2
Video 4
Audio
Selector
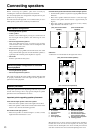
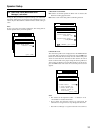
Power
Standby/On
OPEN/COLSEREC
AUDIO MUTING
DISCTRACK
DVD
CD
PH
TUN
T2T1
V1
STEREO
123
654
7
+
10 0
ENT
89
SURROUND THX DSP
LEVEL
+
CH SELRe-EQ
LEVEL
–
DIMMERLATE NIGHT
DIRECT DSP
V2 V3 V
–
ON
AUDIO MODE
STNBY
HOME THEATER CONTROLLER
RC-418M
Standby indicator
SEND/LEARN
indicator
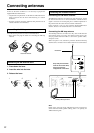
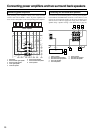
Connecting the power
Turning the power on from the remote controller:
Before you can use the remote controller, you must perform steps
1 and 2 above and place the DTR-7.1 in the standby state.
1. Press the AUDIO MODE button.
2. Press the ON button to turn on the DTR-7.1
(take it out of the standby state).
• To return the DTR-7.1 to the standby state, press the
STNBY button.
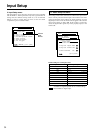
Connecting the power
• The DTR-7.1 is shipped with the main power (Power) switch
in the on position (
ON
). When the power cord is plugged in
for the first time, the DTR-7.1 will automatically enter the
standby state and the Standby indicator will light (same
condition after step 2 below).
• Before you plug in the DTR-7.1, confirm that all connections
have been made properly.
• Turning on the power may cause a momentary power surge,
which might interfere with other electrical equipment on the
same circuit, such as computers. If this happens, use a wall
outlet on a different circuit.
1. Plug the power cord into an AC wall outlet.
2. Press the Power switch to set the DTR-7.1 to
standby state.
The Standby indicator will light up.
3. Press the Standby/On button to turn on the
DTR-7.1. The display will light up and the
Standby indicator will turn off.
If you press the Standby/On button again, the receiver returns
to Standby mode.
Memory preservation
This unit does not require memory preservation batteries. A
built-in memory power backup system preserves the contents
of the memory during power failures and even when the
Power switch is set to off. The Power switch must be set to on
in order to charge the backup system.
The memory preservation period after the unit has been
turned off varies depending on climate and placement of the
unit. On the average, memory contents are protected over a
period of a few weeks after the last time the unit has been
turned off. This period is shorter when the unit is exposed to a
highly humid climate.
To wall outlet