SYSTEM CONFIgURATION
NOTE
: When the display has a DVI input which is connected to the AVR using
an HDMI-to-DVI adapter, if the display is not HDCP-compliant, the picture
will be distorted. In that case, a different video connection must be used
(component, composite or S-video).
Resolution from Source
: This line, which is informational only, indicates
the video format (NTSC or PAL) output by the source device.
Adjust Lip Sync
: Use this adjustment to resynchronize the audio and
video signals from a source to eliminate a “lip sync” problem. Lip sync issues
can occur when the video portion of a signal undergoes additional processing
in either the source or the video display that desynchronizes it from the audio.
Select this line to display the Lip Sync adjuster by itself, enabling you to view
the video while listening to the audio. Use the
M N
Buttons to delay the
audio by up to 180ms. See Figure 3.
Figure 3 – Adjust Lip Sync
Change Name
: Use this line to change the display name for your source.
This can be useful if your source’s device type is different from the available
source names. Select this line and use the
KL
Buttons to scroll forward
or reverse through the letters A through Z. When the desired letter appears,
use the
N
Button to move the cursor to the next position. Move the cursor
again to leave a blank space. When you have finished entering the new name,
press the OK Button. The name will be used on the front panel to refer to the
source, and will appear next to its original name, e.g. DVD, throughout the on
screen menu system. To end the entry without making any changes, press the
Back/Exit Button.
Audio Input Polling
: Use this setting when both analog and digital
audio connections are made from the source device to the AVR. When no
digital signal is present, the AVR will automatically switch to the analog audio
input.
This can be useful for some older cable television systems that broadcast
some channels in analog audio and others in digital audio. It is also useful for
making analog recordings of copy-protected digital sources. However, it can
be inconvenient when no analog audio connection is made and playback is
stopped, as the audio signal will be lost.
If an analog audio connection was made, select it here. If not, choose the Off
setting, and the AVR will always use the digital audio connection.
Zone 2 Audio
: When a multizone system has been connected and is in
use, this setting determines the source for the remote zone. Select any analog
audio input or the tuner. Digital audio is not available to the multizone
system, nor is any type of video.
Use the Back/Exit Button to return to the Setup Source line of the Main Menu.
Press the OK Button, and select the next source to configure. When you have
finished configuring all sources, press the Back/Exit Button to clear the menus
from view.
You are now ready to begin enjoying your new receiver!
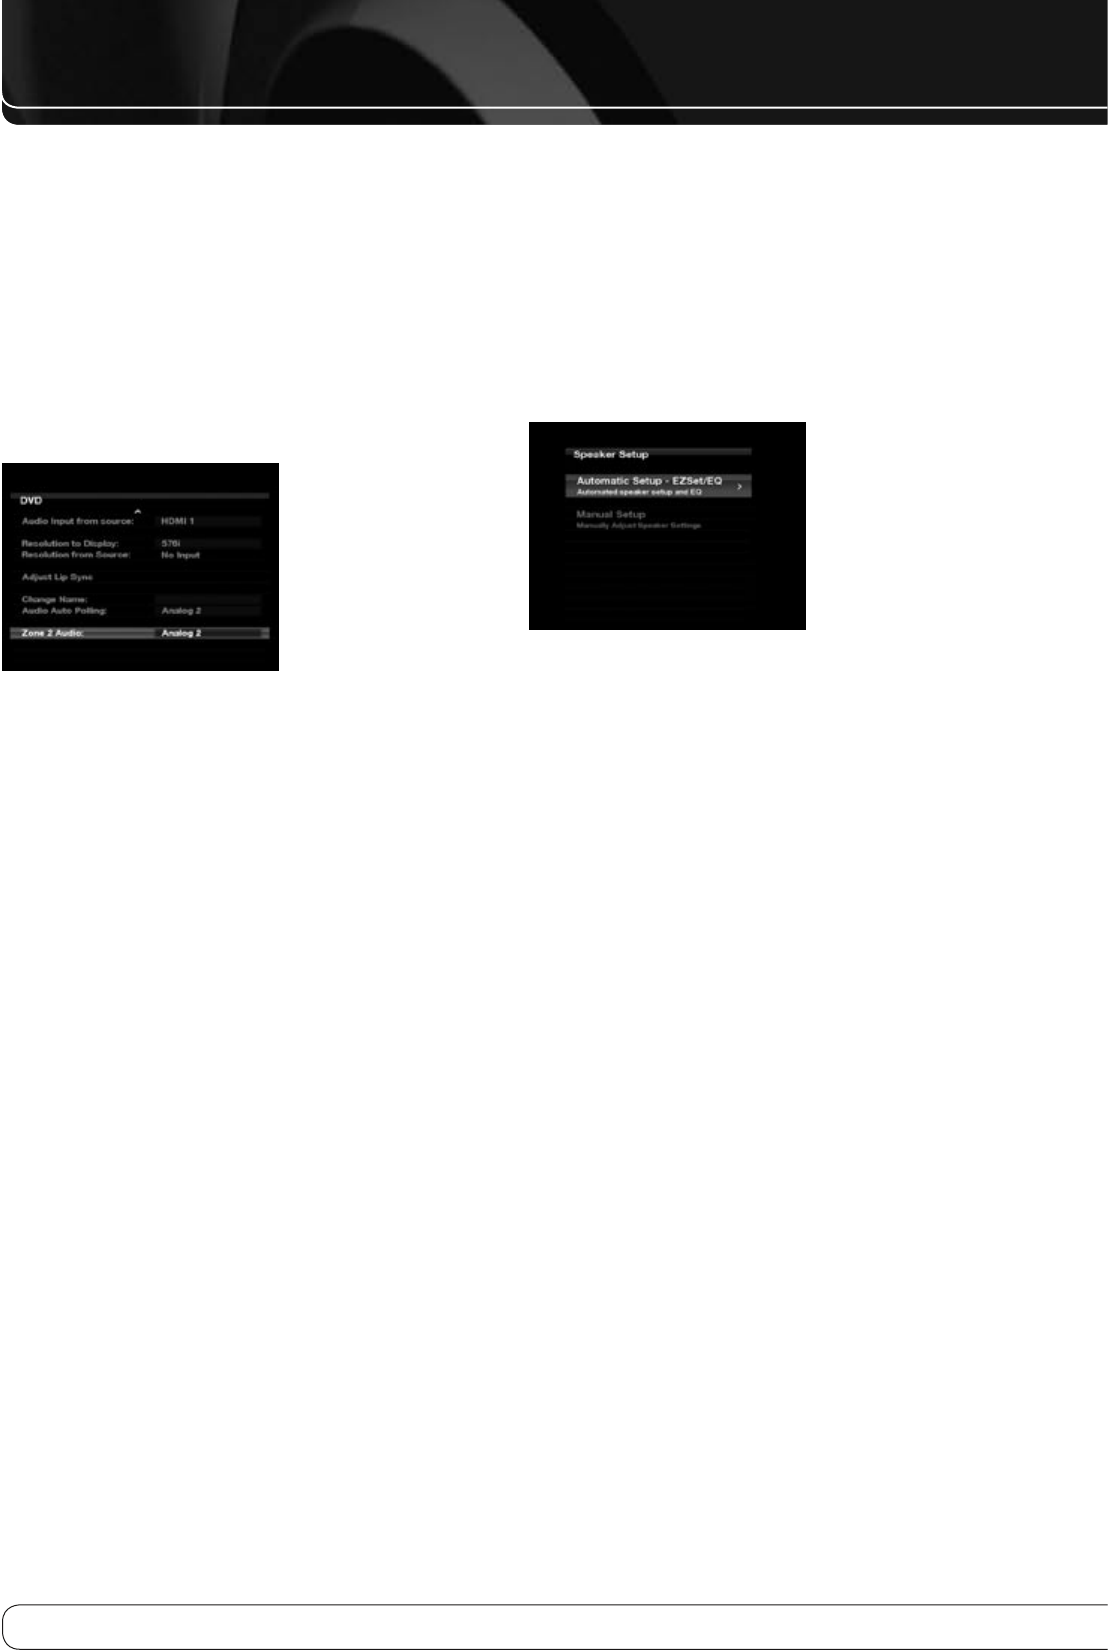
Speaker Setup
With EzSet/EQ you are able to calibrate your system in a fraction of the time
it would take to enter the settings manually, and with results that rival those
achieved with expensive test equipment and time-consuming procedures.
The end result is a system calibration profile that enables your new receiver to
deliver the best possible sound, no matter what type of speakers you have or
what the dimensions of your listening room are.
We recommend that you take advantage of the precision of EzSet/EQ
to calibrate your system, but if desired you may also make any of the
configuration settings manually, or trim the settings provided by EzSet/EQ by
following the instructions.
Figure 4
Step 1
: EzSet/EQ requires that your listening room have as little background
noise as possible to avoid interfering with the measurement of tones
produced by your AVR during the setup procedure. Turn off all loud fans, air
conditioners and other equipment, and try to avoid making any noise during
the process.
Step 2
: The EzSet/EQ microphone should be placed in either your usual
listening position or, if there is a large seating area, the center of the room,
at the listeners’ ear level. You may find it convenient to use a camera tripod
for stable placement of the EzSet/EQ microphone at the correct height. The
microphone includes a threaded insert on the bottom for tripod mounting.
Step 3
: Plug the EzSet/EQ microphone into the AVR 260’s Headphone
Jack
3
, making certain that the mini-plug to 1/4" phone plug adaptor
supplied with the microphone is firmly connected. The microphone cable is
approximately 7 meter long, which should accommodate most listening room
situations. If required, you may use an optional extension cable, available
at most electronics stores, for use in larger rooms. However, we recommend
that you avoid using extension cords for the microphone cable, as they may
adversely affect the test results.
Step 4
: Once the microphone is properly positioned and plugged in, proceed
to the Speaker Setup menus by first pressing the AVR Settings Button
W
to
bring the main Menu to the screen. Next, press the
KL
Navigation Buttons
D
to highlight the
Speaker Setup
-tab, and press OK
V
to access the
Speaker Setup menu. Press the
K
Button
F
to select the
Automatic
Setup - EzSet/EQ
-line and press the OK Button
V
to move to the next
screen (Figure 5).


