14
Starting and Stopping Projection
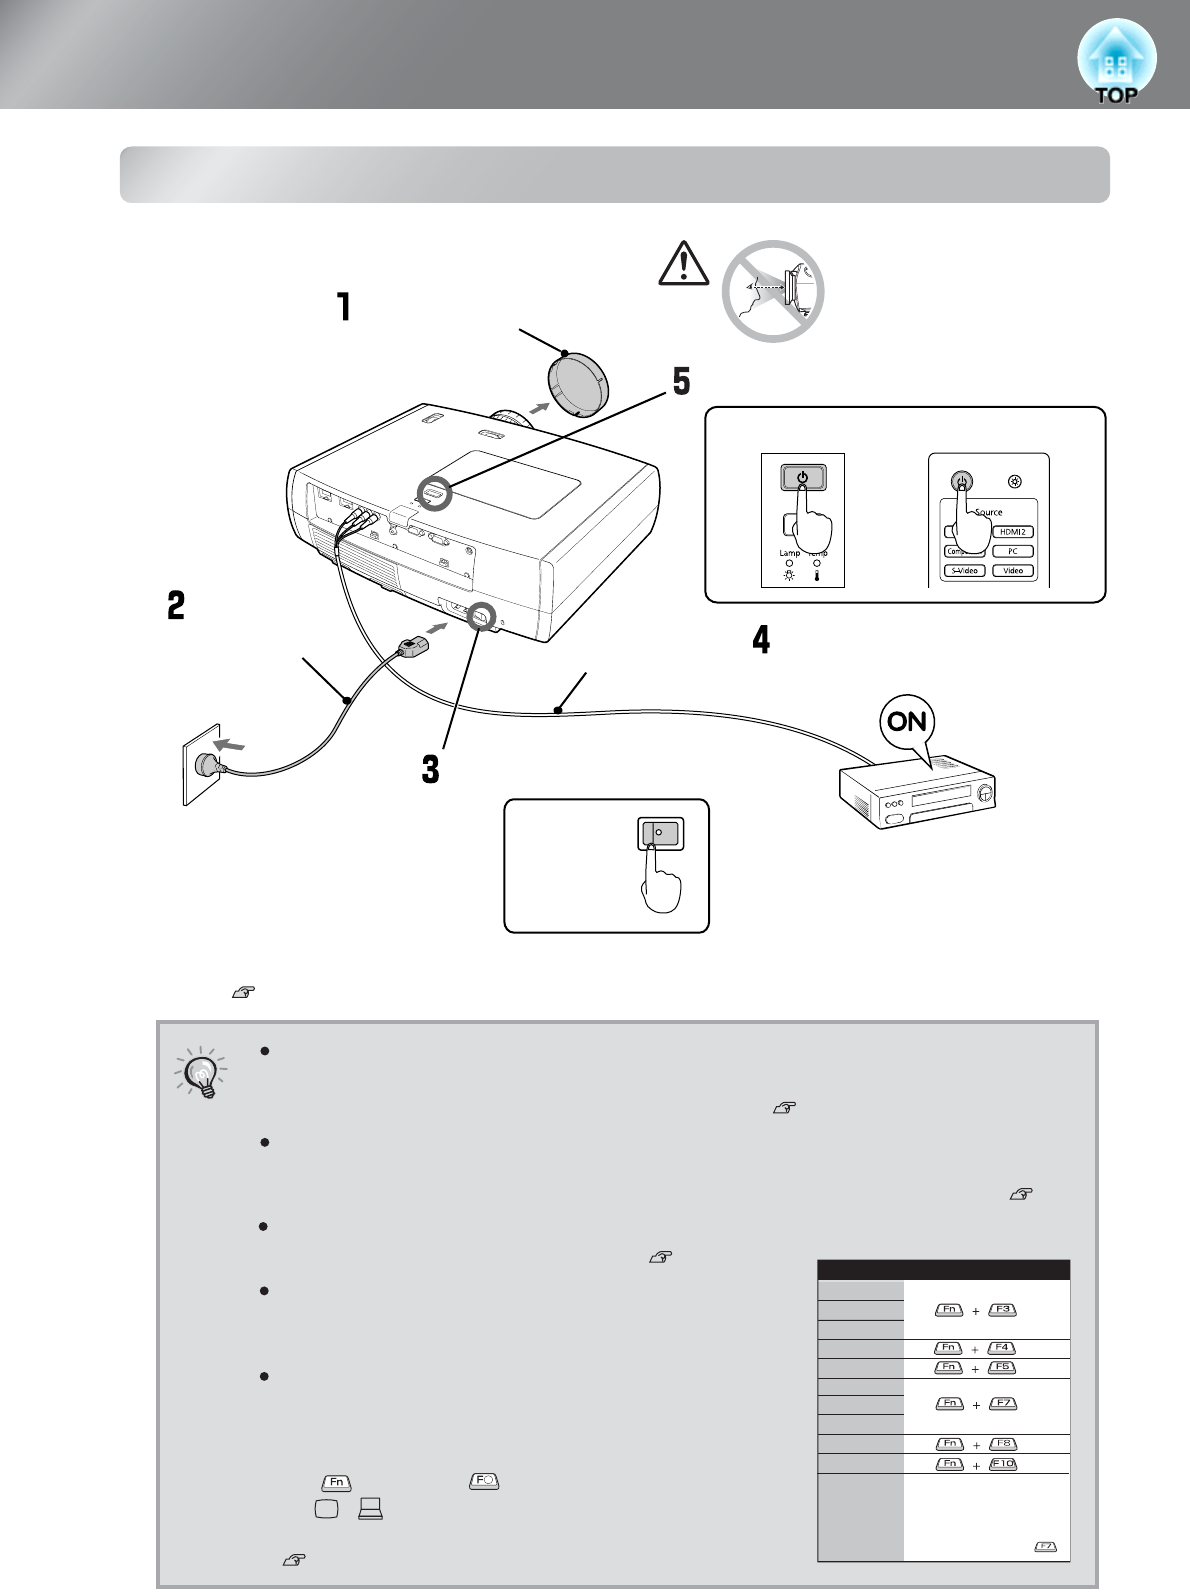
Turning the power on and projecting images
TIP
If you set the "Direct Power On" to "On", the power of the unit will turn on when
the main power switch is turned on, without having to press the power button of
the remote control or the projector's control panel. p.33
If there is a problem with projection even though the projector is set up and connected correctly,
refer to p.15, 37.
The projector is equipped with the "Child Lock" function that prevents young
children from accidentally turning the power on and looking into the lens, and also
the "Control Panel Lock" function that prevents mis-operations is available. p.33
When using the projector at an altitude of about 1500m or above, make sure you
set the "High Altitude Mode" to "On". p.34
This projector is equipped with an automatic
adjustment function that automatically optimizes it
when a computer input signal is switched.
If a laptop computer or a computer with a LCD
screen has been connected to the projector, you
may need to use keyboard or function settings to
change the output destination. While holding down
the key, press (the key with a symbol such
as / on it). After the selection is made,
projection will soon start.
Computer's documentation
NEC
Panasonic
SOTEC
HP
Toshiba
IBM
LENOVO
SONY
DELL
Fujitsu
Macintosh
Example of output selection
Set mirror setting or
display detection.
Depending on OS, you can
change the output
selection by pressing .
ON
Remove the lens cover.
Connect the
power cable.
Turn on the main power switch.
Turn the power on for the
connected equipment.
Turn the power on.
Control Panel
Remote Control
Do not look into the lens
while projection is in
progress.
(Commercially-
available)


