


The duration will be automatically set after 4 seconds. It will also be set if ENTER or is pressed within 4
seconds after step 4.
5 Adjust the volume.
The source sound will play at the volume level set in this step when the power is turned on by the timer.
If the volume level is set to 21 or higher, however, it will automatically be set to 20 when the power is turned on.
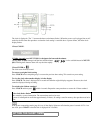
6 Prepare the source.
To listen to a CD, load the disc to be played first on tray 1.
To listen to a tape, insert the tape into deck 1 or 2.
To listen to the radio, tune in to a station.
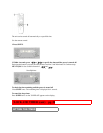
7 Press POWER to turn off the power.
When the timer-on time is reached, the unit turns on and begins play with the selected source.
You can change the source that was selected in step 1 by pressing one of the function buttons before pressing
ENTER or instep 3.
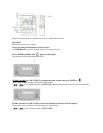
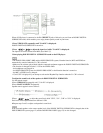
To check the timer setting
Press TIMER.
The selected source, the timer-on time, and the duration for the timer-activated period will be displayed for 6
seconds.
To change any of the previous setting
Carry out from step 1.
However, if you do not change the timer-on time, in step 3 just press ENTER twice and continue from step 4.
To cancel timer standby mode temporarily
Press TIMER repeatedly so that disappears.
To restore the timer standby mode, press again to display .
Using the unit while the timer is set
You can use the unit normally after setting the timer. Before turning off the power, carry out step 5 and 6.
• Timer playback and timer recording will not begin unless the power is turned off.
• Connected equipment cannot be turned on and off by the built-in timer of this unit. Use an external timer.
TIMER RECORDING
Timer recording is applicable for TUNER and VIDEO/AUX (with an external timer) sources only.
Press either TUNER/BAND or VIDEO/AUX to select a source, then press TIMER repeatedly until REC