78 C2630M-B (4/08)
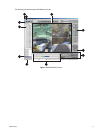
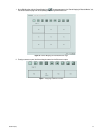
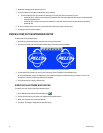
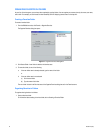
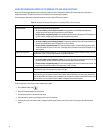
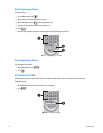
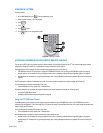
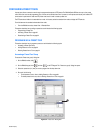
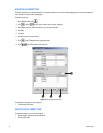
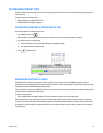
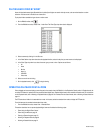
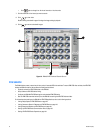
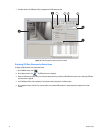
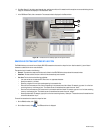
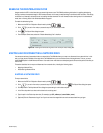
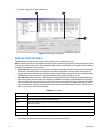
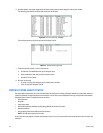
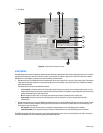
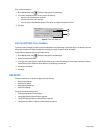
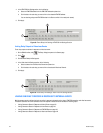
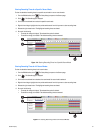
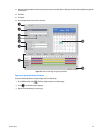
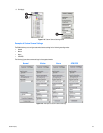
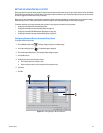
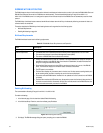
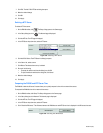
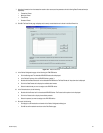
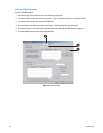
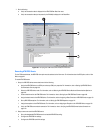
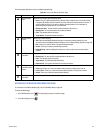
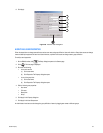
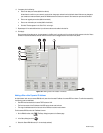
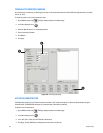
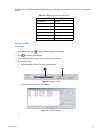
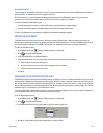
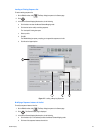
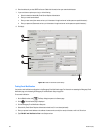
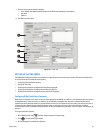
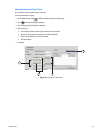
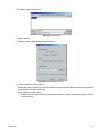
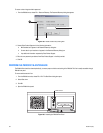
• Click again to change from 10-minute intervals to 1-hour intervals.
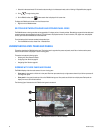
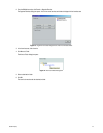
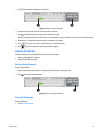
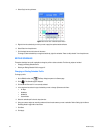
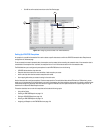
7. Click the thumbnail of the interval you want to search.
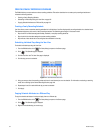
8. Click to view video.
Double-clicking a thumbnail image will enlarge the image and begin playback.
9. Click to return to thumbnail images.
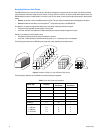
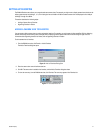
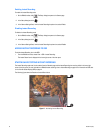
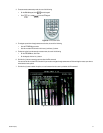
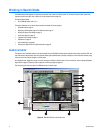
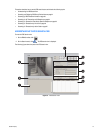
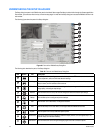
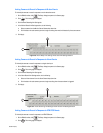
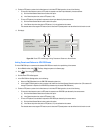
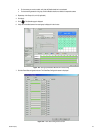
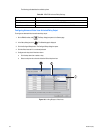
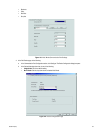
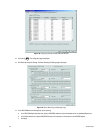
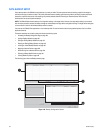
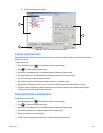
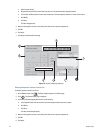
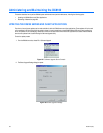
Figure 50. DX8100 DVR Thumbnail Search Screen
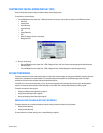
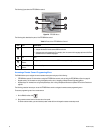
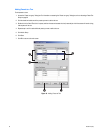
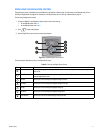
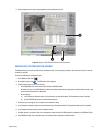
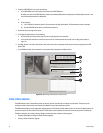
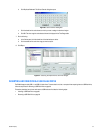
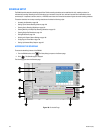
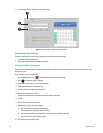
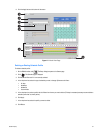
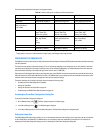
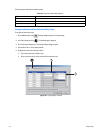
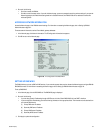
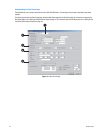
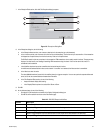
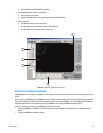
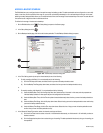
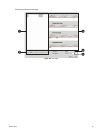
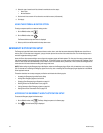
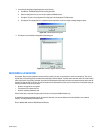
POS SEARCH
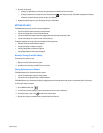
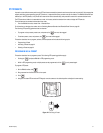
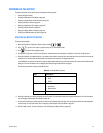
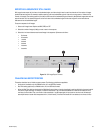
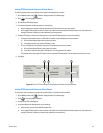
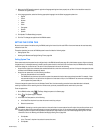
The DX8100 allows a user to search any 24-hour period of recorded POS video and data. To record ATM/POS video and data, the ATM/POS
devices and DX8100 must first be connected and configured as follows:
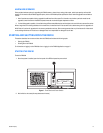
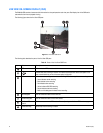
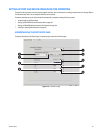
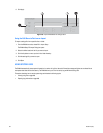
• Physically connect the ATM/POS devices to the DX8100.
• Set up camera-to-ATM/POS device linking.
• Configure the DX8100 ATM/POS settings for each attached ATM/POS device.
• Start an ATM/POS transmittal and verify that the DX8100 is receiving the ATM/POS video and data.
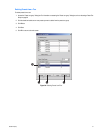
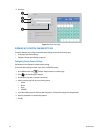
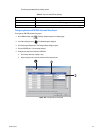
For information about setting up the DX8100 for ATM/POS applications, refer to the following sections:
• Linking Relay Outputs to ATM/POS Events on page 121
• Linking Cameras to Record in Response to ATM/POS Events on page 123
• Linking Presets and Patterns to ATM/POS Events on page 126
• Setting Up ATM/POS Device Communication Ports on page 163
• Setting UP ATM/POS Device Properties on page 164