C2630M-B (4/08) 209
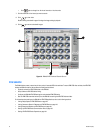
Using Ctrl+Alt+Del
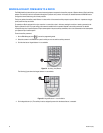
You must enable the Ctrl+Alt+Del key combination and verify your actual keyboard mapping. In some cases, the DX8100 keyboard is remapped
and the actual Ctrl, Alt, and Delete key function is assigned to other keys.
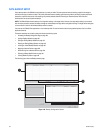
Ctrl+Alt+Del allows you to access the Windows Task Manager dialog box from within the DX8100 shell. When you exit the Windows
environment, you are returned to the DX8100 shell. In this case, you do not have to log back into the DX8100.
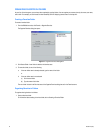
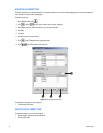
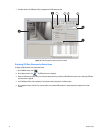
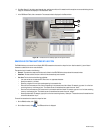
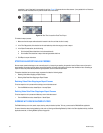
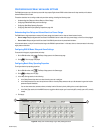
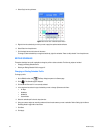
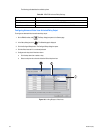
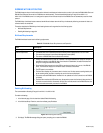
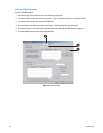
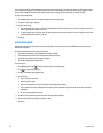
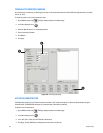
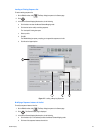
To access the Windows Task Manager dialog box:
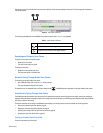
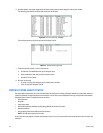
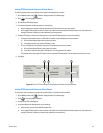
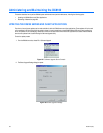
1. Press the assigned keys that implement the Ctrl+Alt+Del function. The Windows Security dialog box opens.
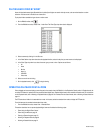
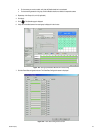
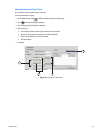
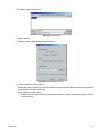
2. In the Windows Security dialog box, click Task Manager. The Windows Task Manager window opens.
To return to the DX8100 shell without rebooting the DX8100, exit the Windows Task Manager dialog box.
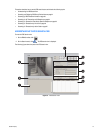
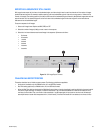
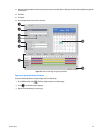
SETTING UP AUTO REBOOT
The DX8100 allows you to select the day and time for the server to perform an automatic reboot. If there are mapped network drives, the
Windows feature requires that the password be entered at the Enter Network Password dialog box. In this case, the DX8100 application will not
start until the password is manually entered. NOTE: The DX8100 will not automatically reboot if there are mapped network drives.
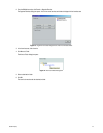
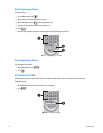
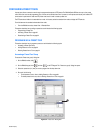
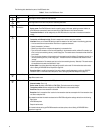
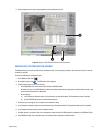
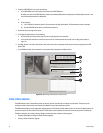
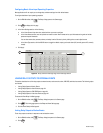
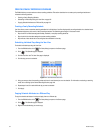
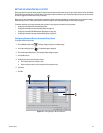
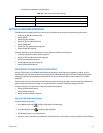
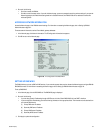
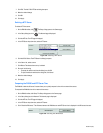
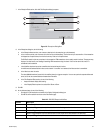
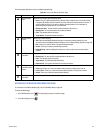
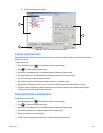
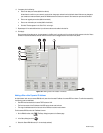
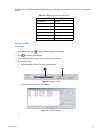
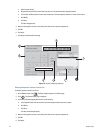
To enable the Auto Reboot feature:
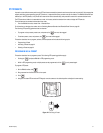
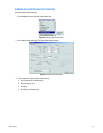
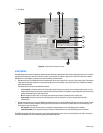
1. On the DX8100 toolbar, click . The Setup dialog box opens to the Camera page.
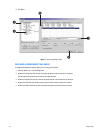
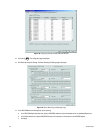
2. Click . The System page is displayed.
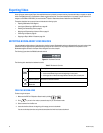
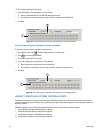
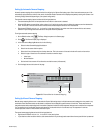
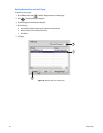
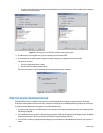
3. In the Auto Reboot section, click the Enable check box.
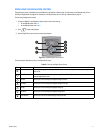
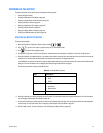
4. In the Auto Reboot section, do the following to specify the day and time to automatically reboot the system:
a. Select the day of the week in the drop-down box.
b. In the Hour drop-down box, select the hour. Time is displayed in 24-hour clock format.
c. In the Minute drop-down box, select the minutes.
5. Click Apply.
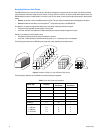
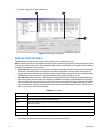
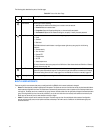
SPECIFYING THE DATA RETENTION TIME LIMIT
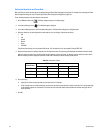
The DX8100 data retention time setting allows the Administrator user to configure a time limit for viewable recorded video. The time limit can be
entered manually or selected from the drop-down menu lists. The data retention time is set in increments of one or more days. The viewing time
limit window starts from the date of recording to the configured time limit. For example, if the time limit is set for 11 days, all video recorded on
Aug. 24, 2006 can be viewed up to and including September 4, 2006. The data recorded on Aug. 24 cannot be viewed on Sept. 5. The video data
recorded on Aug. 24 is not be deleted; it is just not available for viewing.
If the Administrator sets the retention time to unlimited or to a time later than the current retention time limit, all video data (if the retention time
is set to Unlimited) or data within the newly set retention time limit can be viewed.
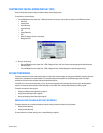
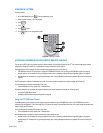
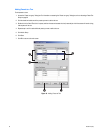
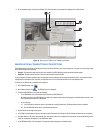
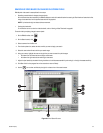
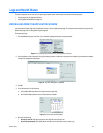
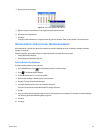
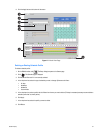
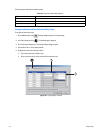
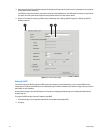
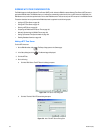
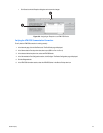
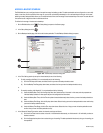
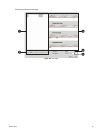
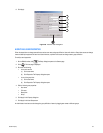
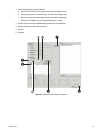
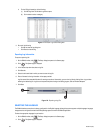
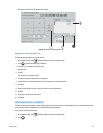
To set the data retention time limit:
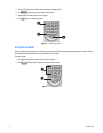
1. On the DX8100 toolbar, click . The Setup dialog box opens to the Camera page.
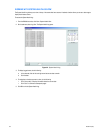
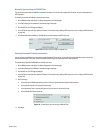
2. Click . The System page is displayed.
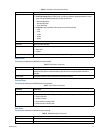
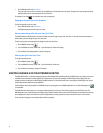
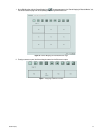
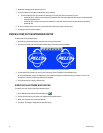
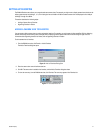
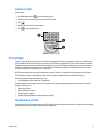
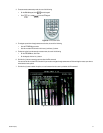
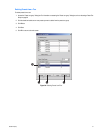
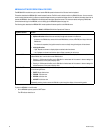
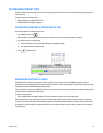
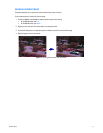
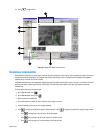
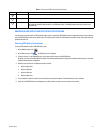
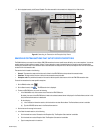
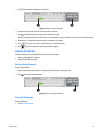
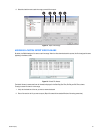
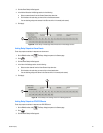
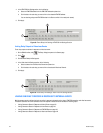
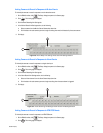
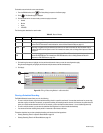
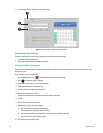
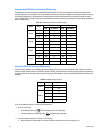
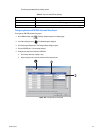
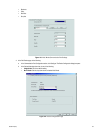
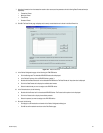
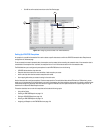
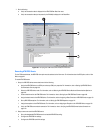
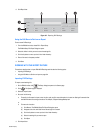
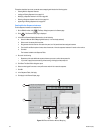
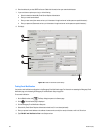
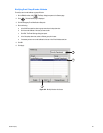
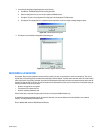
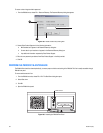
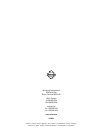
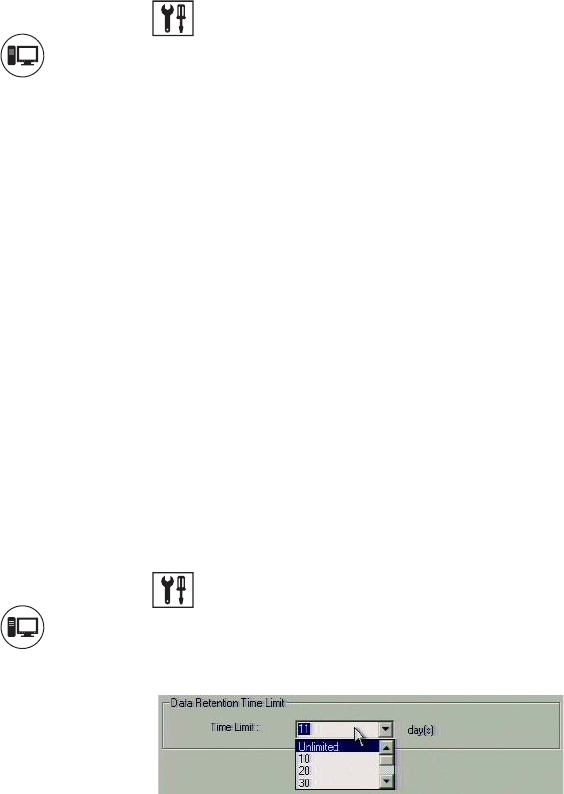
3. In the Data Retention Time Limit area, select a retention time limit from the drop-down list.
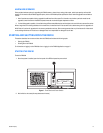
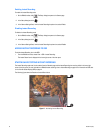
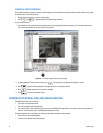
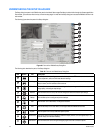
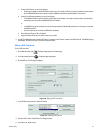
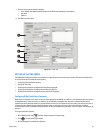
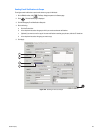
Figure 174. Data Retention Time Limit Entered Manually
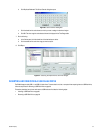
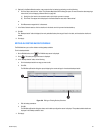
4. Click Apply. The Shut Down dialog box opens, prompting you to restart the DX8100.