180 C2630M-B (4/08)
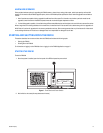
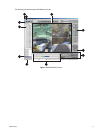
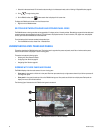
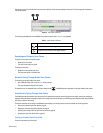
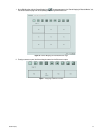
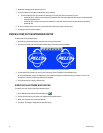
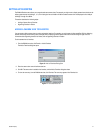
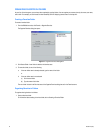
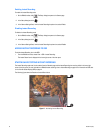
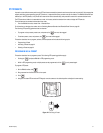
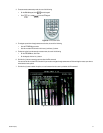
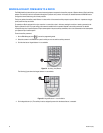
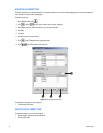
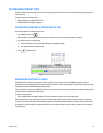
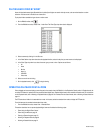
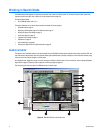
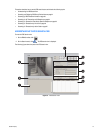
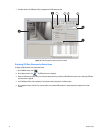
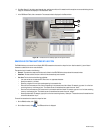
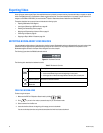
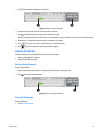
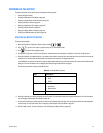
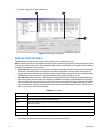
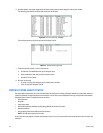
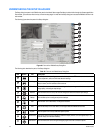
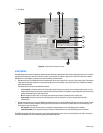
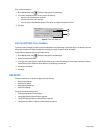
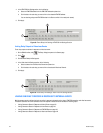
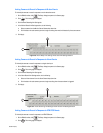
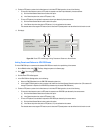
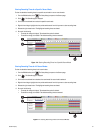
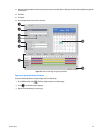
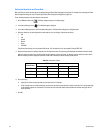
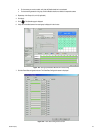
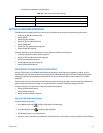
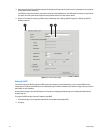
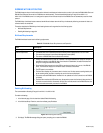
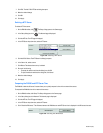
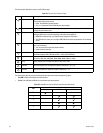
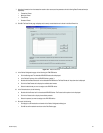
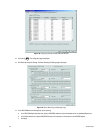
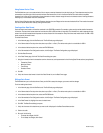
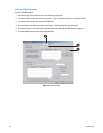
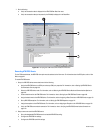
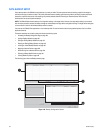
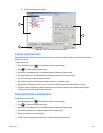
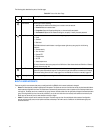
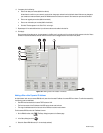
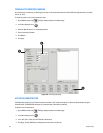
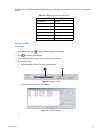
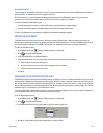
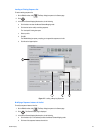
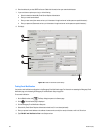
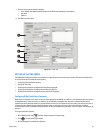
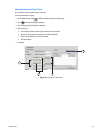
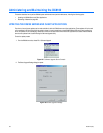
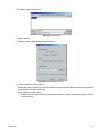
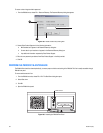
7. Do the following:
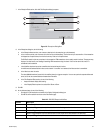
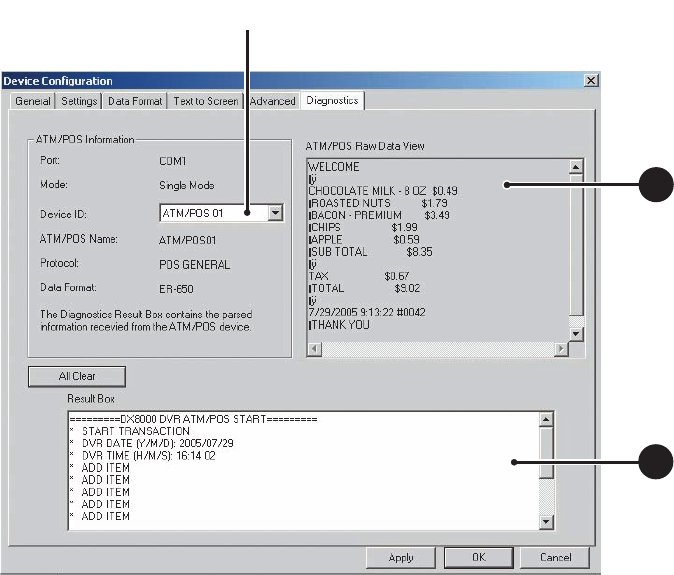
a. Verify that transaction data is displayed in the ATM/POS Raw Data View area.
b. Verify that transaction data (as interpreted by the DX8100) is displayed in the Result Box.
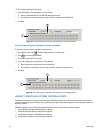
Figure 156. Verifying the ATM/POS Communication Connection
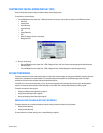
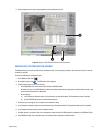
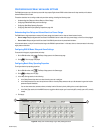
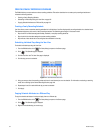
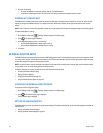
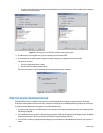
Recording ATM/POS Events
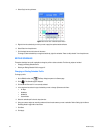
To view POS recorded dates, the OSD POS view option must be selected at the View menu. For information about the POS option, refer to View
Menu on page 24.
To record ATM/POS events:
1. Set up the ATM/POS device communication and do the following:
a. Assign the ATM/POS device to a COM port and set up COM port properties. For information, refer to Setting Up ATM/POS Device
Communication Ports on page 163.
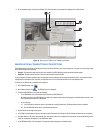
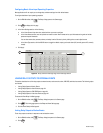
b. Select the ATM/POS device mode. For information, refer to Selecting the ATM/POS Device Mode and Communications Options on
page 164
c. Create a data format for the ATM/POS device. For information, refer to Setting Up an ATM/POS Data Format on page 169.
d. Assign the data format to the ATM/POS device. For information, refer to Assigning a Data Format to an ATM/POS Device on page 173.
e. Set up ATM/POS exceptions. For information, refer to Setting Up ATM/POS Exceptions on page 174.
f. Assign the exception to the ATM/POS device. For information, refer to Assigning an Exception to An ATM/POS Device on page 178.
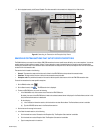
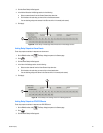
g. Verify the ATM/POS communication connection. For information, refer to Verifying the ATM/POS Communication Connection on
page 179.
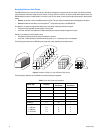
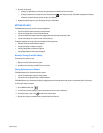
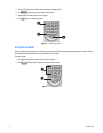
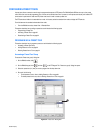
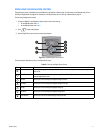
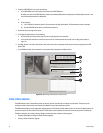
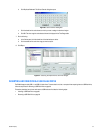
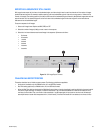
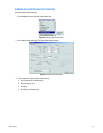
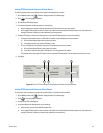
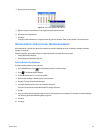
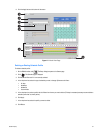
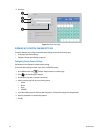
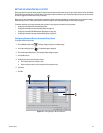
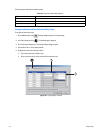
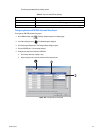
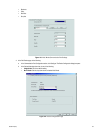
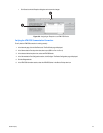
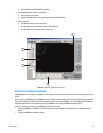
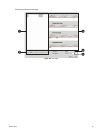
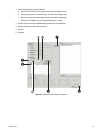
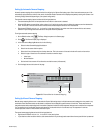
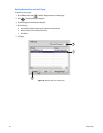
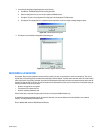
2. Setup a camera to record the ATM/POS events:
a. Set up the designated ATM/POS camera for scheduled ATM/POS recording.
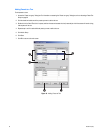
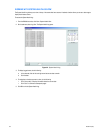
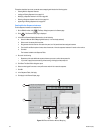
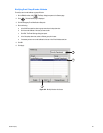
b. Configure the ATM/POS link settings.
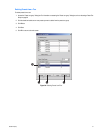
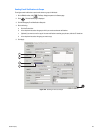
c. Configure the ATM/POS record link settings.
ᕤ