


10
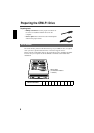
The following describes how to install the CRW-F1 drive on the computer by taking
a tower-type computer for example.
The methods of removing the computer cover or panels and installing an internal device
vary depending on the computer model. Refer to the instruction for the computer.
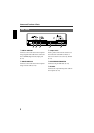
Check the connection of any IDE device installed to decide the installation method
of the CRW-F1 drive.
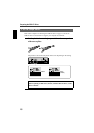
• The CRW-F1 drive supports Ultra ATA/33. (The CRW-F1 drive is operated with
Ultra ATA/33 even if the motherboard or the IDE cable support Ultra ATA/66 or
Ultra ATA/100.)
• The 40-pin IDE cable (with 40 wires) included in a Yamaha retail kit supports Ultra
ATA/33. IDE devices connected to the 40-pin IDE cable are operated with Ultra
ATA/33 even if the devices support Ultra ATA/66 or Ultra ATA/100.
• Install the CRW-F1 drive horizontally.
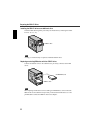
1
Turn off and unplug the computer.
When handling internal computer devices, always turn off the computer to
avoid the risk of an electrical shock or damage to the drive or computer
devices. Be sure to unplug the computer prior to handling any internal
computer device.
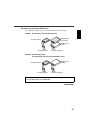
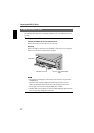
2
Remove all peripheral devices and cables connected to the
computer prior to removing the computer cover.
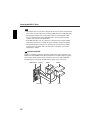
Clothes and body can become charged with static electricity.
Discharge any static electricity by touching a metallic part of the case or
power unit.
For more information, refer to the instruction for the computer.
Note
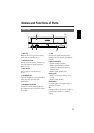
1 Decide the Installation Method
Note