


Model MRC88m / MRAUDIO8x8m Page: 49
© 2009 Xantech Corporation
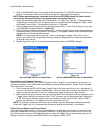
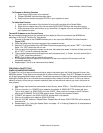
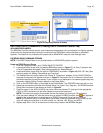
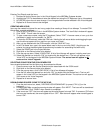
Entering Text Directly onto the icons
1. Double click on the Source Icon in the Virtual Keypad in the MRC88m Systems window.
2. Highlight the TEXT to be edited and enter the desired text using the PC Keyboard (up to 4 characters)
3. Hit {ENTER} when done to save change. Your changes should now be reflected in the Virtual Keypad
4. Repeat for all Source Icons to be changed
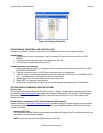
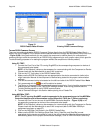
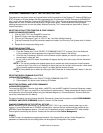
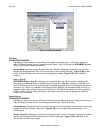
CREATING NEW ICONS
Icons can be created and stored for use in any project thus creating a library of icon bitmaps. To create ICON
bitmap files, proceed as follows:
1. Click on the “ICON EDITOR” tab in the MRC88m System window. The ‘Icon Editor’ window will appear.
2. Click “NEW”. This will clear the screen.
3. To type a new source name, using the PC keyboard, Select “TEXT”. A source name, or icon, up to four
characters in length can be created. (i.e. SAT2).
4. To draw the ICON freehand, select the PEN icon. Holding the left mouse button and dragging the pen
over the bit map screen will turn each box you cross over ‘black’.
5. After you are satisfied with the ICON creation, click the “SAVE AS” icon.
6. In the ‘File Name’ box, type in the same letters used in the icon and click SAVE. (Anything can be
entered, but using the same letters/characters may be easier for associating files with icons).
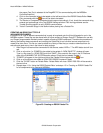
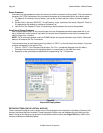
7. Select the ZONES tab in the Project Window.
8. Right click on the Source button to be labeled.
9. From the pop-up menu, Select “LOAD ICON”. A list of icon bitmaps will appear, including new icons.
10. Select the desired icon and click “OK” (or double-click the desired icon). The icon will appear in the
‘virtual LCD’ on the keypad in the MRC88m System Window. The source icon will appear in all
zones on the ‘virtual’ keypads.
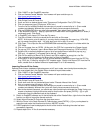
SELECTING ICONS FROM THE ICON GENERATOR
Icons created and saved into the library may be accessed as follows:
1. Place the cursor over the Source Selection button associated with the ICON to add.
2. Right click on the Source button to be labeled.
3. From the pop-up menu, click “LOAD ICON”. A list of icon bitmaps will appear.
4. From the list, select the desired icon and click “OK” (or double-click the desired icon). The icon will
appear in the ‘virtual LCD’ on the keypad in the MRC88m System Window. The source icon will appear
in all zones on the ‘virtual’ keypads.
5. Repeat for all source icons
DOWNLOADING SOURCE ICONS TO THE KEYPAD
1. From the main menu bar, select, “KEYPADS ICON DOWNLOAD” (or press [CTRL]+[I] on the
keyboard)
2. A Dragon/MRC88m connection warning window will appear. Click ‘NEXT”. The icons will be transferred
to the MRC88m. Click “FINISH” when transfer is completed.
3. If the zones are “OFF” the icons will appear as the zone Keypad is turned “ON”. If zones are “ON” when
the icons are transferred, the zone keypad will turn “OFF”. New icons will appear when zone Keypad is
turned “ON”.