– 108 –
… El audio se interrumpe durante la
búsqueda.
Cuando busca una pista creada por
medio de una operación de edición, el
audio se interrumpe algunas veces.
… Los números de pista no son
correctamente asignados.
Cuando graba un CD por medio de una
conexión digital, pistas cortas pueden
ser grabadas dependiendo del
contenido del CD. También, cuando el
marcado de pista automática es
efectuado, los números de pista pueden
no ser correctamente asignados en
algunos casos.
… La indicación "TOC Reading" no se
borra.
"TOC Reading" aparece indicado
durante un tiempo mayor que el usual
cuando se coloca un disco MD grabable
nuevo.
… Note lo siguiente cuando intenta
efectuar la grabación mientras borra
(sobreescritura) una grabación
anterior:
≠ El tiempo de grabación restante del
MD puede no ser indicado correcta-
mente.
≠ Después de repetidas operaciones
de sobreescritura, puede no ser
posible la grabación por
sobreescritura. En este caso, primero
edite la grabación anterior (borrando
pistas, etc.), luego proceda con la
operación de sobreescritura.
≠ El tiempo de grabación restante es
más corto después de grabar que lo
era antes de grabar.
≠ No se recomienda la operación de
sobreescritura si la pista que va a ser
sobreescrita contiene interferencia.
Como la grabación se efectúa en
base a 6 bloques (12 segundos
aprox.), la pista con interferencia
puede borrar parte de la pista.
… No es posible asignar un título de
pista durante la grabación por
sobreescritura.
… Algunas veces el tiempo máximo de
grabación no estará disponible aun
después de la ejecución de “ERASE
DISC”.
En este caso, intente ejecutar
nuevamente "ERASE DISC". Aunque, no
será posible anularlo posteriormente.
… Aunque el modo LP4 (cuádruple larga
duración) le ofrece una excepcional
cantidad de tiempo para la grabación
gracias a una avanzada tecnología de
compresión, algunas veces puede que
escuche algunos pequeños ruidos,
dependiendo del material que esté
grabando. Por ese motivo le
recomendamos que si la calidad de
sonido es más importante para su
proyecto de grabación que el tiempo de
grabación total, utilice mejor los modos
SP (stereo) o LP2 (doble larga
duración).
Mensajes de indicación
Los siguientes mensajes aparecen indicados dependiendo de las condiciones de operación.
Mensaje Descripción
Blank Disc El MD grabable no contiene datos grabados.
Cannot Copy ! Es imposible copiar.
Cannot EDIT ! Es imposible editar.
Disc Error ! Los datos en el MD son anormales.
Disc Full !! No hay lugar para continuar grabando.
D-IN UNLOCK ! No se ha realizado la conexión de entrada digital.
ERASE DISC ? ¿Se pueden borrar los datos grabados del MD?
ERASE TRK ? ¿Se puede borrar esta pista?
Name Full !! La memoria de títulos está llena.
NO DISC !! No se ha colocado un MD.
No Track !! No hay pista grabada.
PGM Empty !! No se han programado las pistas.
PGM Full !! No hay lugar para programar pistas.
Play Mode !! El modo de reproducción seleccionado es incorrecto.
Protected !! El MD está protegido contra borrado accidental.
Un MD que sólo reproduce está insertado.
Rec Error !! Ha ocurrido un error de grabación.
Track Full !! El MD ha completado todos sus números de pista.
UNDO ? ¿Se puede cancelar la última operación?
UTOC Writing Los datos grabados están siendo escritos en el MD.
Restricciones del sistema
ª Handling MDs
The MiniDisc (MD) measures 64 mm in
diameter. Although the MD is housed in a
protective cartridge (68 mm x 72 mm x 5
mm) and can be handled easily, deck
malfunc-tions may result if the cartridge
gets dust on it or is damaged. To protect
the disc, always take the following
precautions:
… Be sure that the MD is taken out of the
deck and put back in its MD case after
using it.
… Do not touch the disc inside the
cartridge. Do not open the shutter to
expose the MD.
… Do not place MDs in direct sunlight, high
temperatures, or high levels of humidity.
… Use a dry, soft cloth to clean the
cartridge.
… When attaching a label to the MD
cartridge, be sure to apply it correctly to
the specified position. If the label is
rolled up or partially detached, the MD
cartridge may get stuck inside the deck.
… Do not place one label on top of another.
ª Memory back-up function
This unit is provided with a memory back-
up function. When you use the deck for the
first time, leave it on for about 5 minutes to
allow the back-up circuit to be charged
and become operational. When not using
the deck for a while, try to turn the power
on every 3 or 4 days.
ª Serial Copy Management System
This deck complies with the SCMS (Serial
Copy Management System). As a result, it
is not possible to digitally record from a
source MD which has been recorded
digitally.
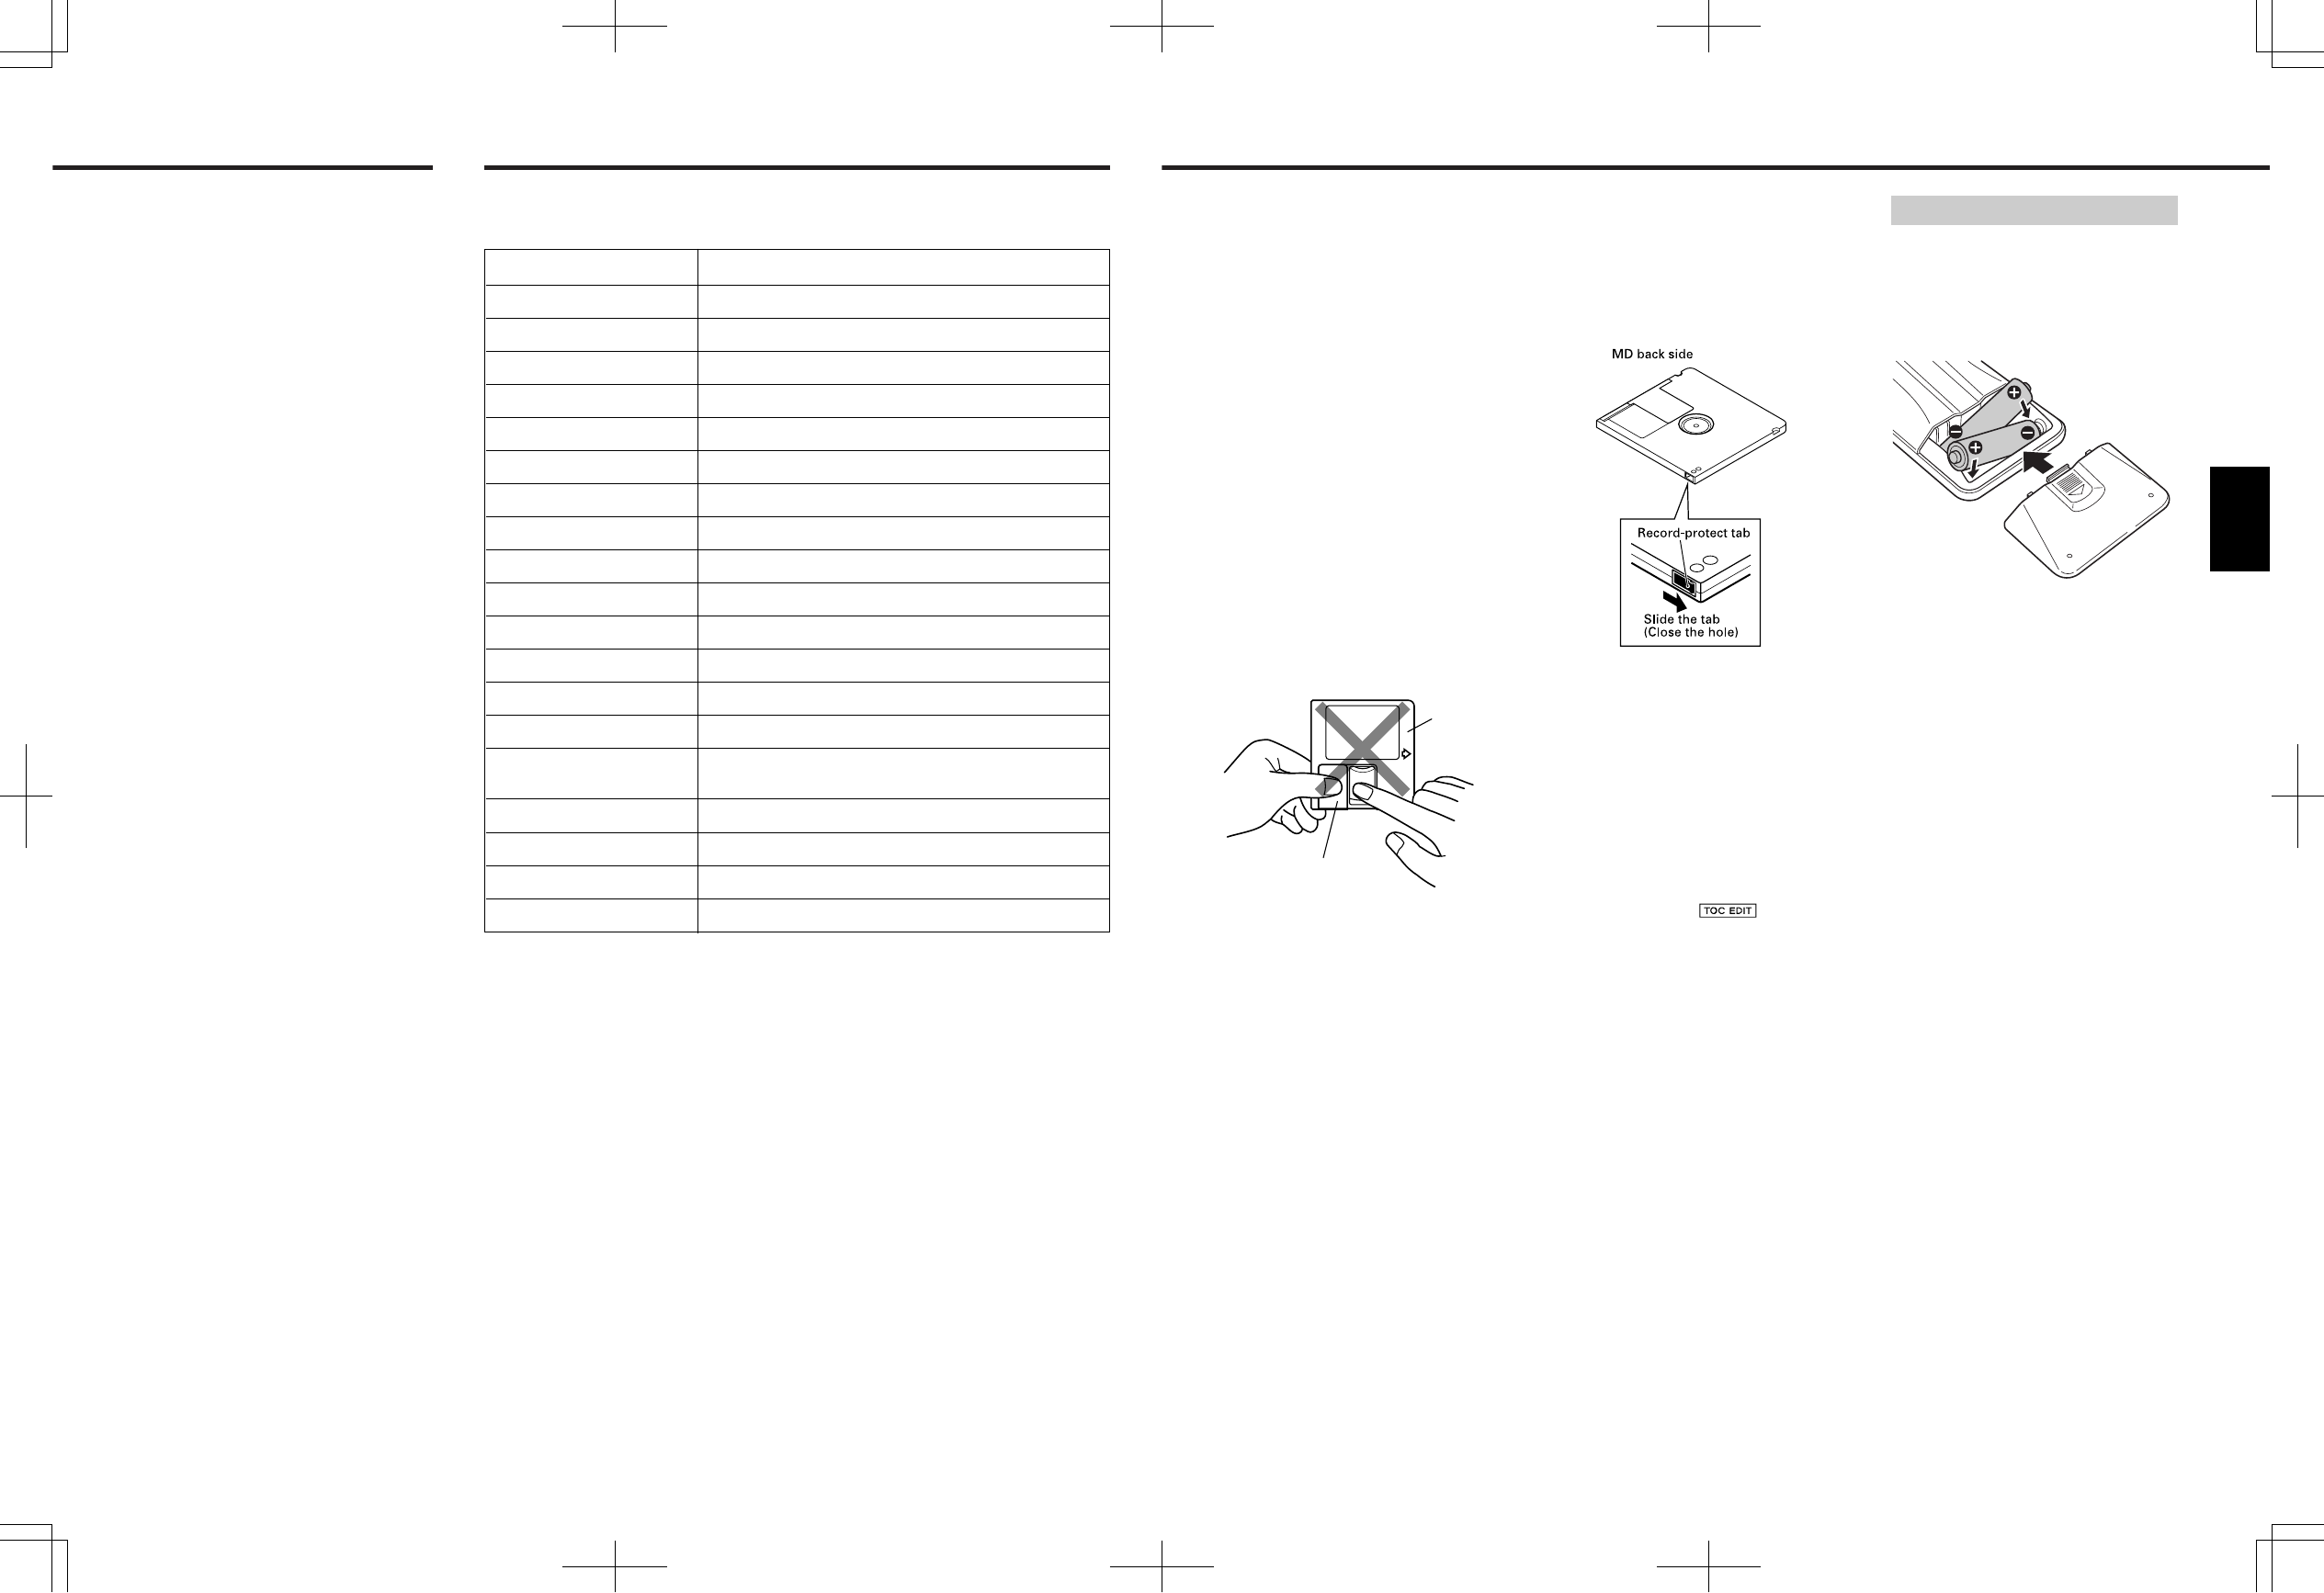
ª When "Protected !!" is
displayed
… A playback-only MD is loaded.
… The MD is record-protected against
accidental erasure. To make recording
(or editing) possible, slide the record-
protect tab to close the hole.
ª While "UTOC Writing" is
blinking:
"UTOC Writing" blinks while the MD is
being ejected after recording (or
editing). While it is blinking, the recorded
data is being written on the MD. Do not
pull out the power cord or vibrate the
deck. Otherwise the recorded data may
not be written correctly on the MD.
If the power is turned off with the MD
left in the deck (" " lights up)
after recording, the UTOC cannot be
recorded. Turn the power back on
within 3 or 4 days and eject the MD. The
recorded data might be lost if the MD is
left in the deck for a long time.
ª When "D-IN UNLOCK !" blinks
… The program source is not connected to
the [DIGITAL INPUT 1] or [DIGITAL IN 2]
terminal even though you have selected
[DIGITAL 1] or [DIGITAL 2] with the
[INPUT SELECTOR]. Either make the
digital connection or select [ANALOG]
with the [INPUT SELECTOR] and perform
analog recording.
… This message also appears when the
digital signal input is interrupted during
digital recording. To continue recording,
restart the digital program source.
– 5 –
When operating the remote control unit,
point it towards the remote sensor on the
front panel of the unit.
ª Battery installation
1. Remove the battery compartment
cover.
2. Insert two "AA" (R6, SUM-3) dry
batteries.
Make sure that the batteries are
inserted with their positive ± and
negative — poles positioned correctly.
3. Close the cover until it clicks.
Battery replacement
If you notice that the distance between
the remote control unit and the player for
correct operation becomes shorter, it
indicates that the batteries are exhaust-
ed. In this case replace the batteries with
new ones.
Precautions concerning batteries
… Be sure to insert the batteries with
correct positive ± and negative —
polarities.
… Use batteries of the same type. Never
use different types of batteries
together.
… Rechargeable and non-rechargeable
batteries can be used. Refer to the
precautions on their labels.
… When the remote control unit is not to
be used for a long time (more than a
month), remove the batteries from the
remote control unit to prevent them from
leaking. If they leak, wipe away the
liquid inside the battery compartment
and replace the batteries with new
ones.
… Do not heat or disassemble batteries
and never dispose of old batteries by
throwing them in fire.
Remote Control Unit
ENGLISH


