


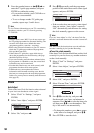


102
Level
Sets the loudness of each speaker individually.
Use the test tone for easy adjustment (see “Test
Tone” on page 102).
To adjust the volume of all the speakers at one
time, press 2 +/–.
Front Left
Set the front left speaker level within -6.0 and 0.0
(set in 1 dB increments). The default setting is
“0.0
.”
Center
Set the centre speaker level within -6.0 and 6.0 (set
in 1 dB increments). The default setting is “0.0
.”
Front Right
Set the front right speaker level within -6.0 and 0.0
(set in 1 dB increments). The default setting is
“0.0
.”
Surround Right
Set the surround right speaker level within -6.0
and 6.0 (set in 1 dB increments). The default
setting is “0.0
.”
Surround Left
Set the surround left speaker level within -6.0 and
6.0 (set in 1 dB increments). The default setting is
“0
.0.”
Subwoofer
Set the subwoofer level within -6.0 and 6.0 (set in
1 dB increments). The default setting is “0.0.”
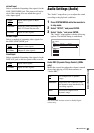
Test Tone
Set the speaker levels by using the test tone.
1 Press SYSTEM MENU while the recorder is
in stop mode.
2 Select “SETUP,” and press ENTER.
3 Select “Speaker,” and press ENTER.
The “Speaker” setup appears.
4 Select “Test Tone” and press ENTER.
5 Select “On,” and press ENTER.
6 Select “Level,” and press ENTER.
7 Select the speaker you want to adjust; “Front
Left,” “Center,” “Front Right,” “Surround
Right,” “Surround Left,” or “Subwoofer,” and
press ENTER.
The selected speaker emits the test tone.
8 From your listening position, adjust the
speaker level by pressing M/m and ENTER.
9 Repeat steps 7 and 8 to adjust the other
speaker levels.
10 When you finish adjusting levels, repeat the
above steps to select “Off” in step 5.
The test tone stops.
11 Press SYSTEM MENU to turn off the menu.
Note
When you adjust the speaker settings, sound
momentarily cuts off.
Off Emits no test tone.
On Emits the test tone from the
speakers in sequence.
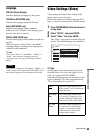
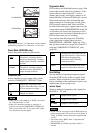
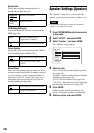
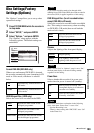
SETUP
Settings
Easy Setup
Speaker
Features
Options
Audio
Video
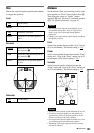
Test Tone:
Level
Distance
Off
Size