


Chapter 1 Overview
Chapter 1 Overview 13
EN
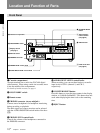
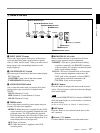
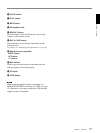
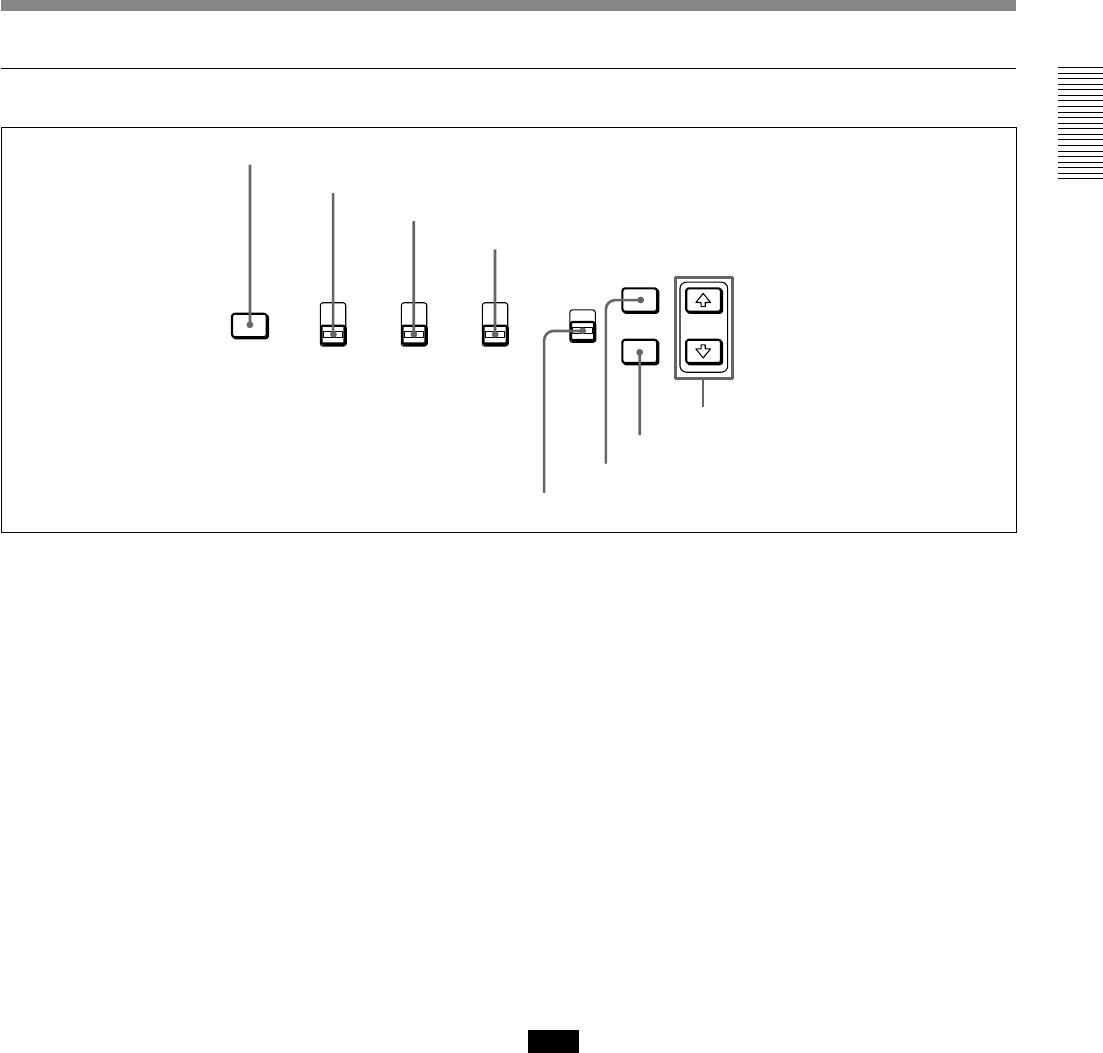
3 Inside of the door
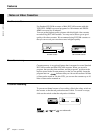
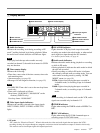
1 INPUT SELECT button
Select video input signals. Each press of this button
cycles through three video signal selection options:
video, S-video, and DV input. When you select one of
these options, the corresponding indicator in the
display lights up.
2 COUNTER SELECT switch
Select the type of time data in the time counter display.
TC: Time code
COUNTER: Count value of the time counter
TAPE REMAIN: Remaining time
3 AUDIO MONITOR switch
Use to select the audio track you want to hear when
playing pack a tape recorded in 4-channel mode
(Fs32k).
CH-1/2: Channels 1/2 only
MIX: Channels 1/2 and channels 3/4 (mix)
CH-3/4: Channels 3/4 only
4 TIMER switch
Use to select timer recording or auto repeat using an
external AC timer (not supplied).
REPEAT: When the power is supplied to this VCR,
a tape rewinds to its beginning automatically and
playback starts. The VCR repeats the playback
from the beginning to the first index (if there is no
index on the tape, to the unrecorded portion; if no
unrecorded portion, to the tape end).
OFF: Timer is released.
REC: When the power is supplied to this VCR,
recording starts.
5 REMOTE/LOCAL switch
Selects whether the unit is operated from its front
panel or from external (remote) equipment.
REMOTE : The unit is operated from an editing
controller connected to the REMOTE connector
on the rear panel. No operation on the front panel
works except sliding switches.
LOCAL : The unit is operated from its front panel,
from an external equipment connected to the
LANC jack on the rear panel, or from a SIRCS-
system remote controller connected to the
CONTROL S jack on the rear panel.
6 MENU button
Press this button to display the menu on the monitor
screen. Press it again to return from the menu display
to the usual display.
Note
If you set the REMOTE/LOCAL switch to REMOTE
while the menu display is on the monitor, it returns to
the usual display.
On how to use the menu, see Chapter 3 “Menu Settings”.
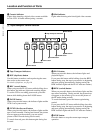
7 SET button
Press this button to save selected menu items to the
unit’s memory.
8 Arrow (˘ ≥) buttons
Use these buttons to move around the menu items.
1 INPUT SELECT button
INPUT
SELECT
TC
TAPE
REMAIN
COUNTER
COUNTER
SELECT
CH-1/2
CH-3/4
MIX
AUDIO
MONITOR
REPEAT
REC
OFF
TIMER
REMOTE
LOCAL
MENU
SET
2 COUNTER SELECT switch
3 AUDIO MONITOR switch
4 TIMER switch
5 REMOTE/LOCAL switch
6 MENU button
7 SET button
8 Arrow (˘ ≥) buttons