62
4 Press ENTER/YES.
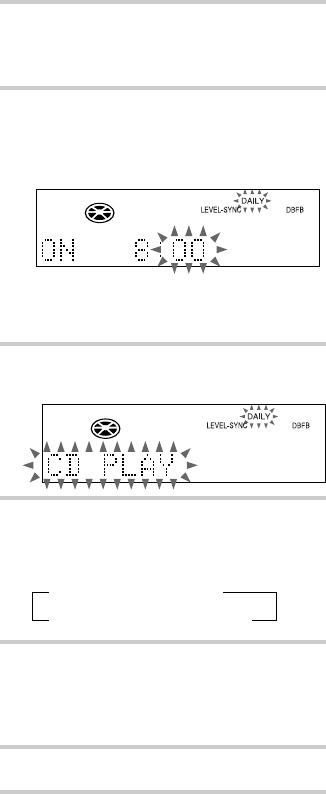
“ON” lights up, and the hour indication
flashes.
5 Set the time to start play.
Press . or > repeatedly to set the hour,
then press ENTER/YES.
The minute indication flashes.
Press . or > repeatedly to set the
minute, then press ENTER/YES.
The hour indication flashes again.
6 Set the time to stop play following the
above procedure.
7 Press . or > repeatedly to select
the desired sound source.
The indication changes as follows:
t TUNER y CD PLAY T
t TAPE PLAY y MD PLAY T
8 Press ENTER/YES.
The start time, the stop time, and the sound
source appear in turn, before the original
display returns.
9 Press ?/1 to turn off the system.
To change the setting
Start over from step 1.
To check the setting / activate
the timer
Press CLOCK/TIMER SELECT, then press .
or > repeatedly until “SET DAILY” appears.
Then, press ENTER/YES.
To cancel the timer
Press CLOCK/TIMER SELECT, then press .
or > repeatedly until “TIMER OFF” appears.
Then press ENTER/YES.
Notes
• You cannot activate Daily Timer and recording
timer at the same time.
• Do not operate the system from the time the system
turns on until the play starts (about 30 seconds
before the preset time).
• If the system is on at the preset time, the set sound
source starts playing.
• You cannot use the optional components connected
to the LINE IN jack as the sound source for Daily
Timer.
Waking up to music (continued)


