22
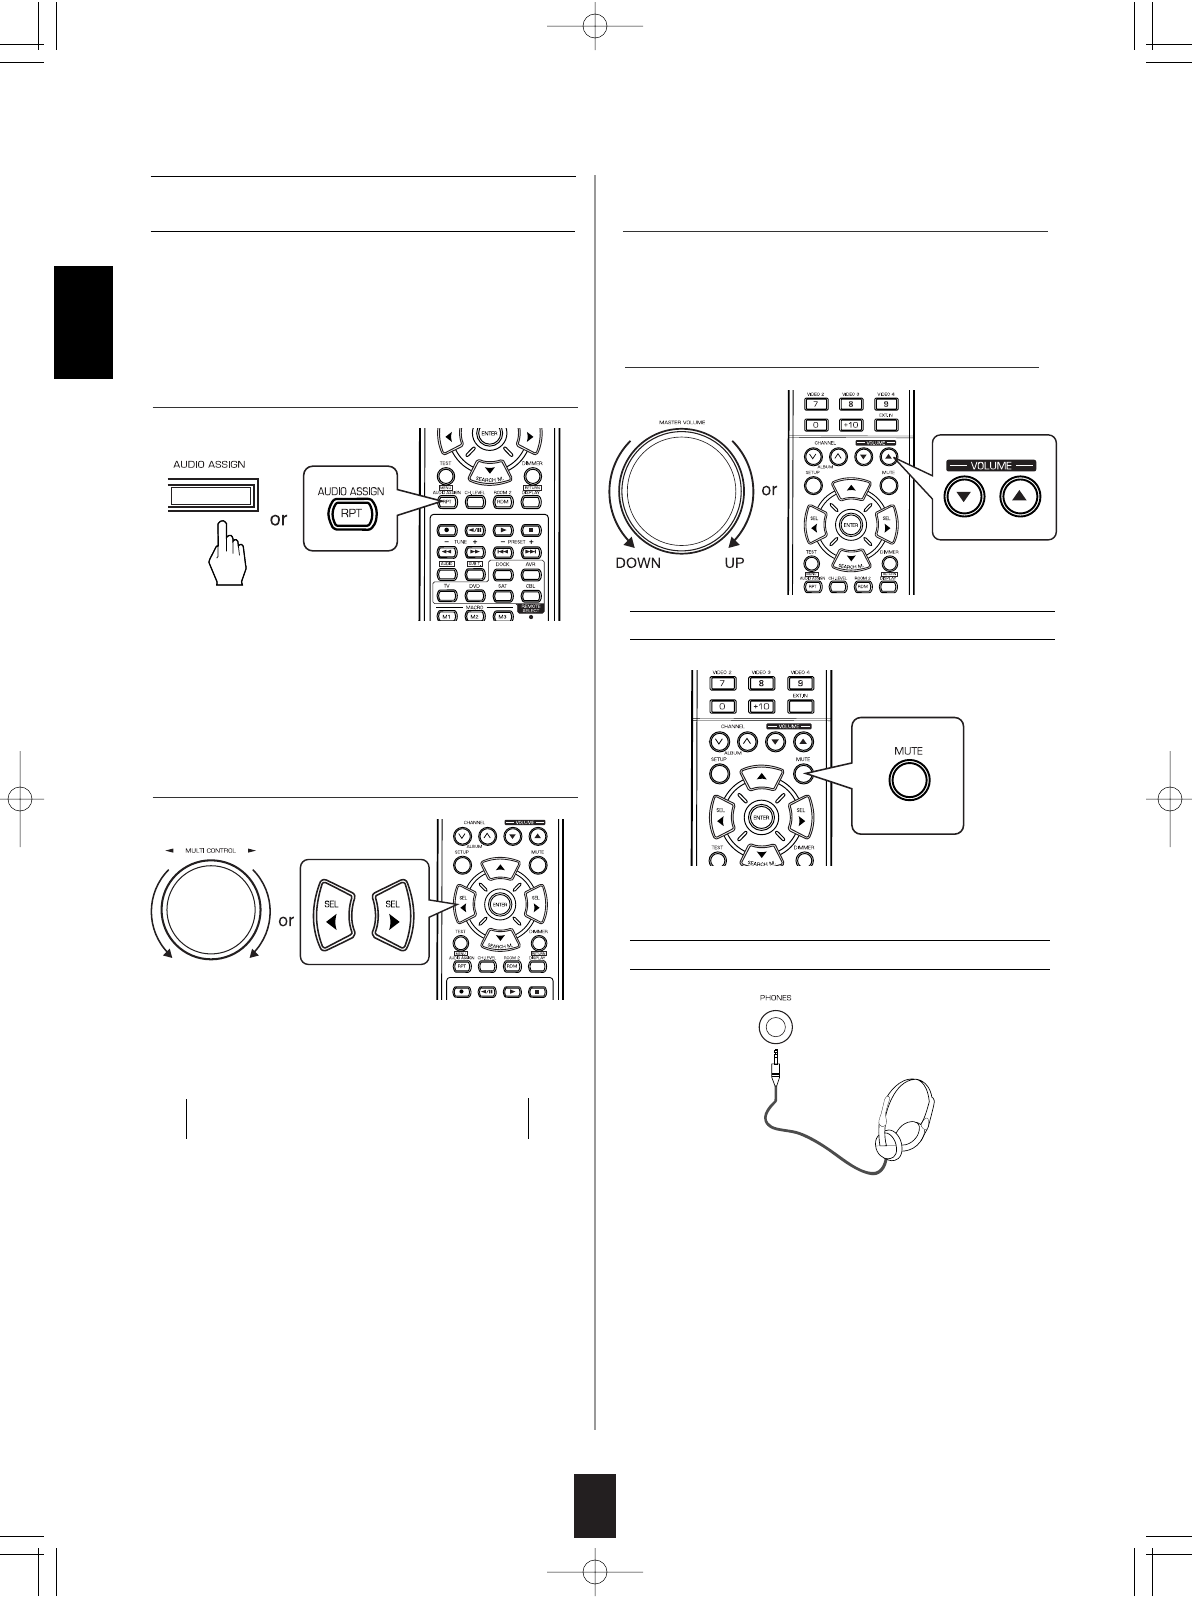
Muting the sound
• "MUTE" flickers.
• To resume the previous sound level, press it again.
• Ensure that the SPEAKER button is set to off.
• When listening to a DTS or Dolby Digital program
source, if the headphones are plugged in and the
SPEAKER button is set to off, it enters the 2CH
downmix mode automatically. (For details, refer to "2CH
downmix mode" on page 26.)
Note:
• Be careful not to set the volume too high when using
headphones.
Listening with headphones
• When playing back the program sources with surround
sound, refer to "ENJOYING SURROUND SOUND" on
page 25.
• If the AUDIO MODE is set to the mode other than
"DIGITAL" for the corresponding input source on the
INPUT SETUP menu, you cannot hear the sound from
the selected digital input. (For details, refer to
"SETTING THE INPUT SETUP" on page 45.)
When CD, F.AUX, VIDEO 1~ 3 is selected as
an input source
4. Press the AUDIO ASSIGN button.
6. Operate the selected component for playback.
7. Adjust the (overall) volume.
• Each time the MULTI CONTROL knob is rotated or the
CURSOR LEFT()/RIGHT() buttons are pressed, the
corresponding input is selected as follows :
OPT 1(Optical 1) OPT 2
- - - COX 2 COX 1(Coaxial 1)
(No assignment)
Notes:
• When the selected digital input is not connected, the
digital input flickers and no sound will be heard.
• The selected digital input is automatically assigned to the
corresponding input source on the INPUT SETUP menu.
(For details, refer to "SETTING THE INPUT SETUP" on
page 45.)
• The sound from the component connected to the
selected digital input can be heard regardless of the
selected input source.
5. Select the desired of the digital inputs connected
while displaying "AUD ~ ".
• "AUD ~ " is displayed for several seconds.
• "AUD ~ " disappears, press the AUDIO ASSIGN button
again.
ENGLISH
RD-7503(A) 2008.11.4 1:45 PM 페이지 22


