1
2
3
2
1
3
AM loop
antenna
FM antenna
Outdoor
FM antenna
49 feet (15 m)
25 feet (7.5 m)
Outdoor AM
antenna
Ground rod
75 ohm coaxial
cable
Ground wire
AC 120 V, 60 Hz
To an AC
outlet
AC OUTLET
(Continued)
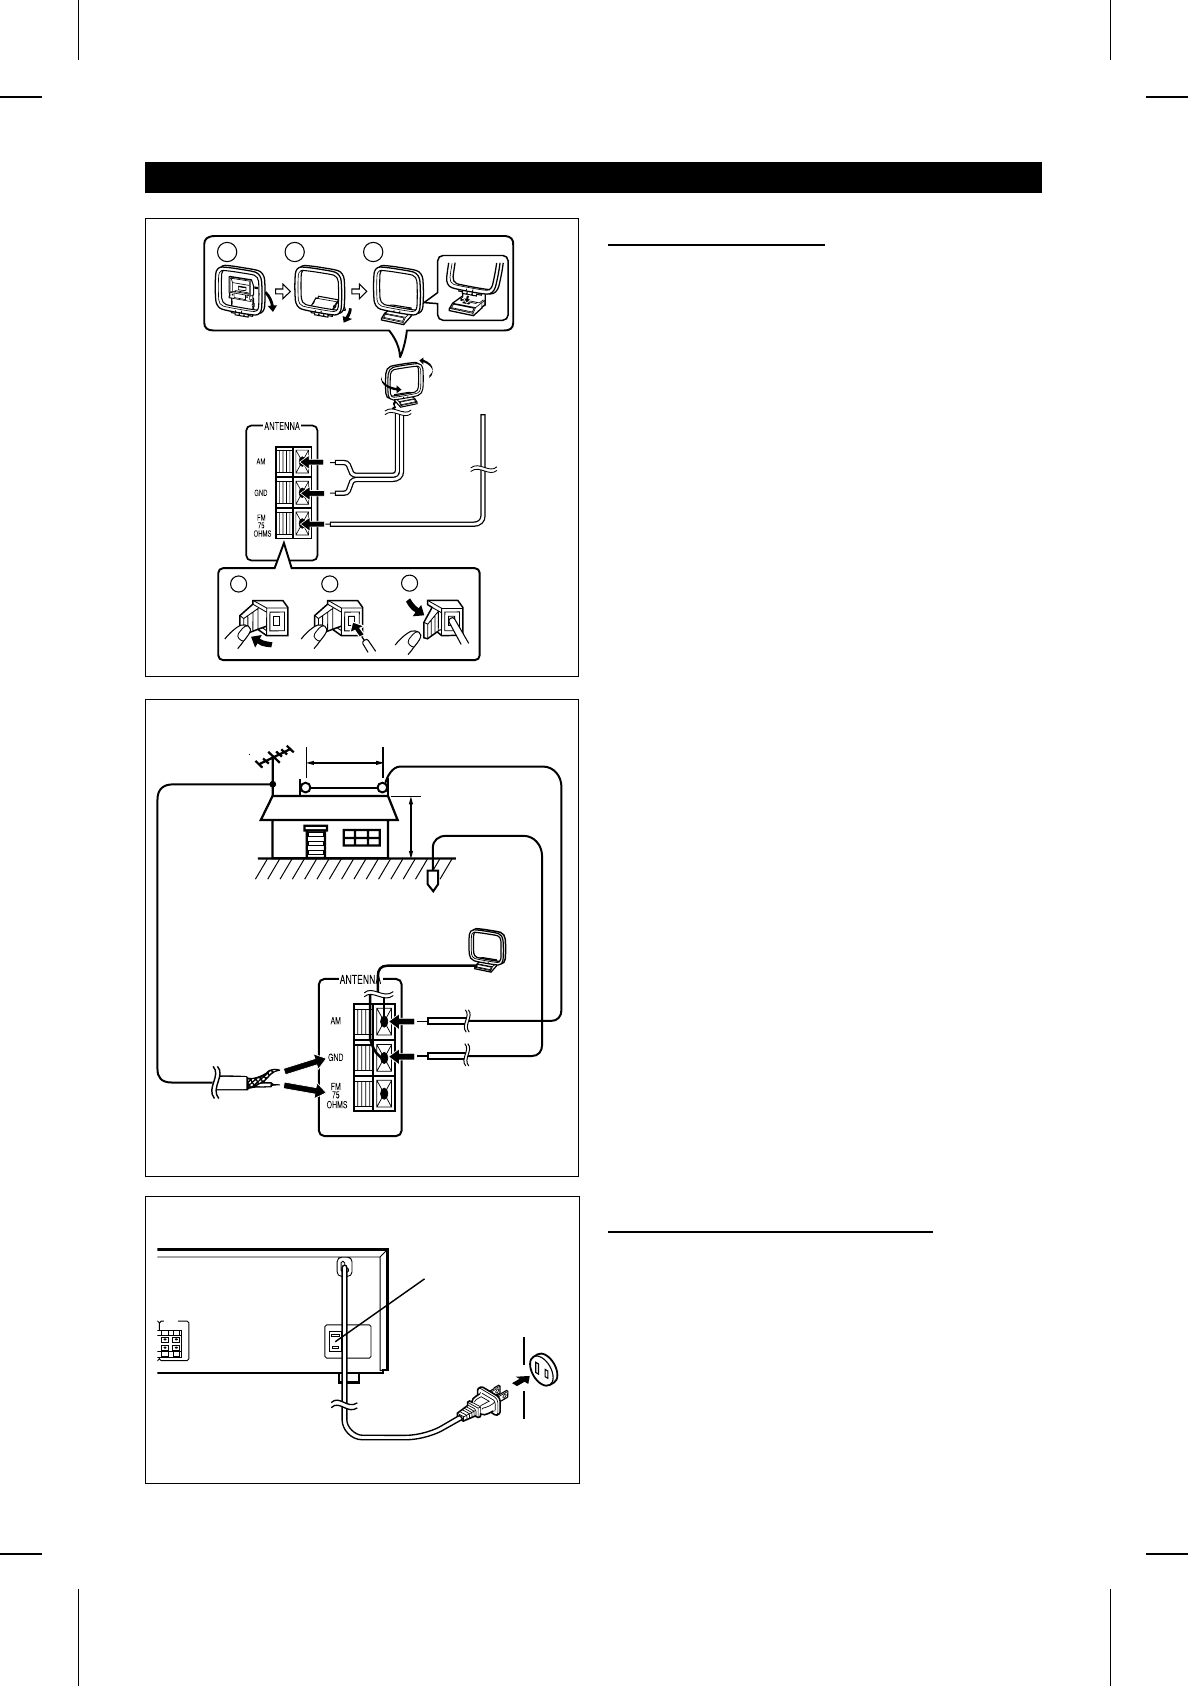
■ Antenna connection
Supplied FM antenna
Connect the FM antenna wire to the FM 75 OHMS terminal
and position the FM antenna wire in the direction where the
strongest signal can be received.
Supplied AM loop antenna
Connect the AM loop antenna wire to the AM and GND
terminals. Position the AM loop antenna for optimum recep-
tion.
Place the AM loop antenna on a shelf, etc., or attach it to
a stand or wall with screws (not supplied).
Notes:
● If you still hear static even after adjusting the position of
the AM loop antenna, try reversing the wires or turn off
the power to any external unit not in use.
● Do not place the antenna wires on the unit. It may result
in noise generation, since the unit is equipped with digital
electronics.
Place the AM loop antenna and the FM antenna wire
away from the unit for better reception.
● If the antenna wires are placed near the AC power cord,
they may cause interference.
Outdoor FM antenna
Use an outdoor FM antenna (75 ohm coaxial cable) if you
require better reception.
Consult your dealer.
Note:
When an outdoor FM antenna is used, disconnect the sup-
plied FM antenna wire from the FM 75 OHMS terminal.
Outdoor AM antenna
Use an outdoor AM antenna if you need better reception.
Consult your dealer.
Note:
When using an outdoor AM antenna, be sure to keep the
wire of the AM loop antenna connected.
■ Connecting the AC power cord
After connecting the speakers and antennas, plug the AC
power cord into a convenient AC outlet.
Note:
● Unplug the AC power cord from the AC outlet if the unit
will not be in use for a prolonged period of time.
Unswitched AC Outlet
Used to plug in the AC power plug from other equipment.
The power consumption of any units connected to this outlet
should not exceed a total of 120 W. The power to any equip-
ment connected to this outlet is not switched by the POWER
switch on the HT-DD5000.
HT-DD5000(SEC) TINSE0009SJZZ
7


