18
Powering Up and Setting the Clock—
Continued
If you cannot set the clock by using the ACCUCLOCK
function, you can set it manually. In this case, the ACCU-
CLOCK function will not automatically update the clock
each day.
You can set the clock while the CR-L5 is on or in Standby.
1
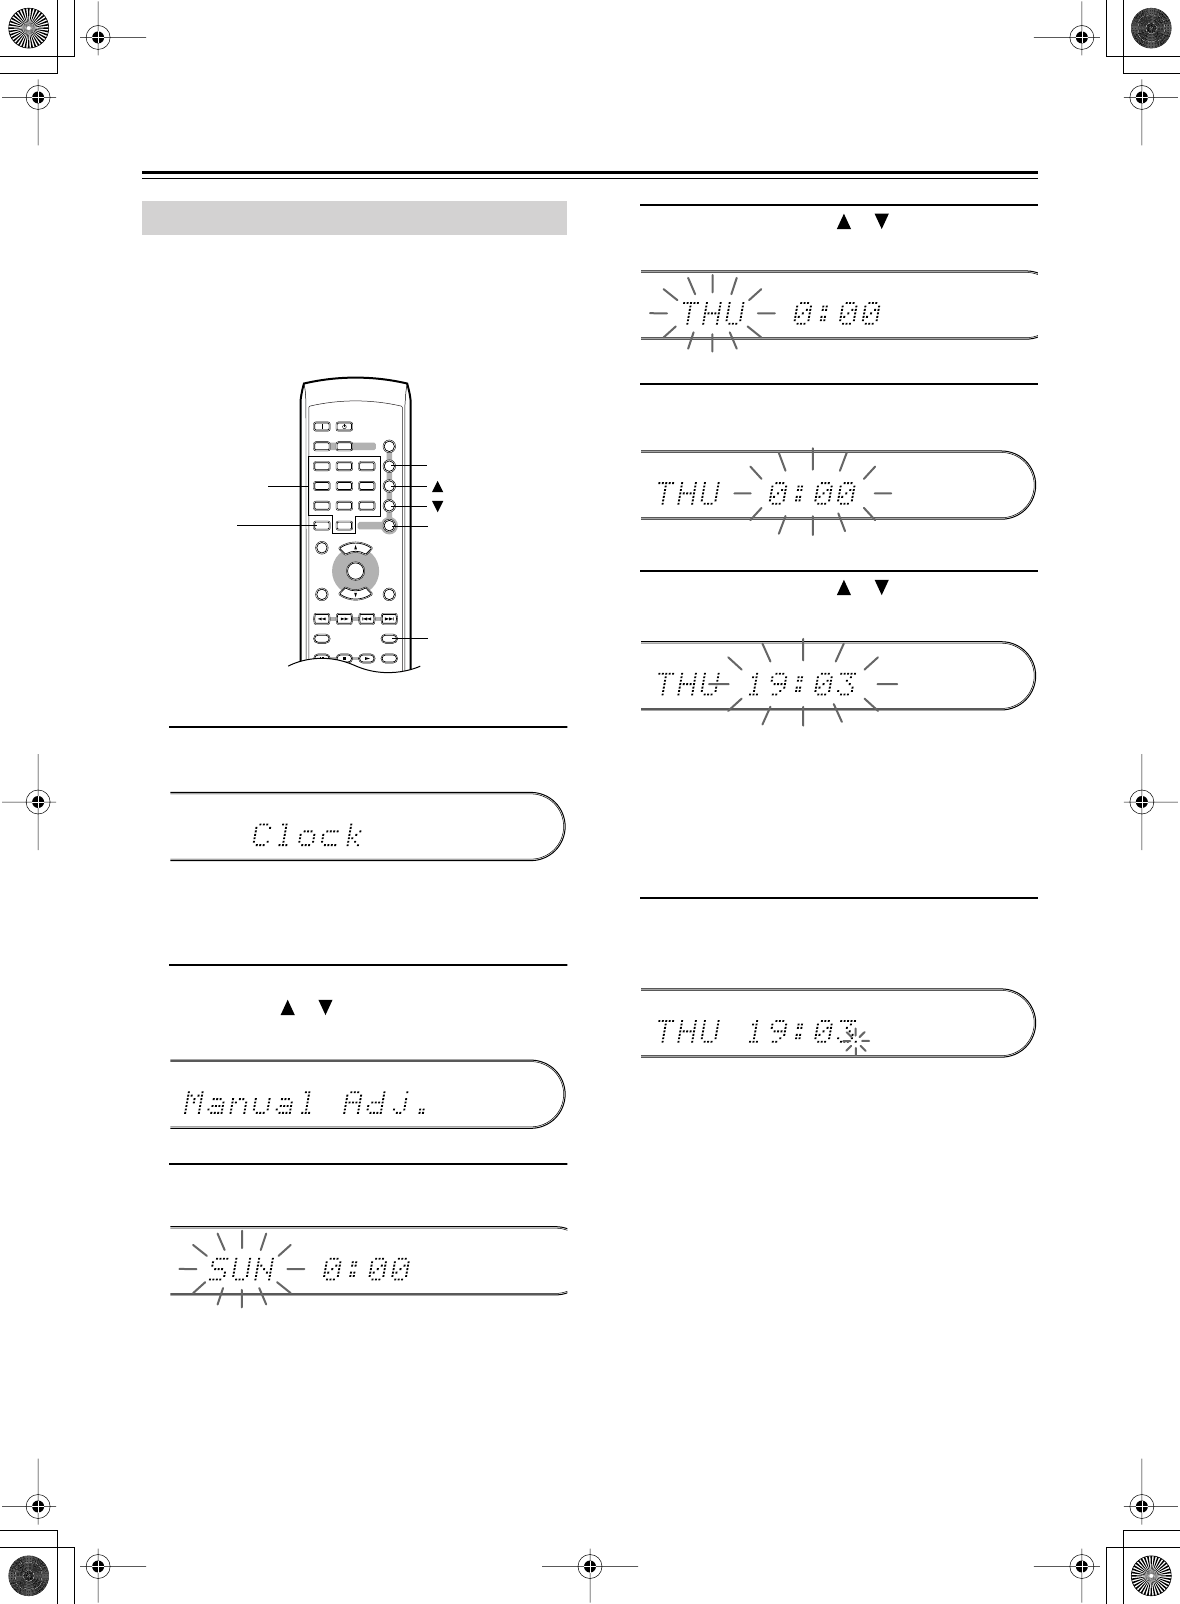
Press the [TIMER] button.
“Clock” appears on the display, as shown.
If the clock has already been set, a timer option appears
instead. In this case, you’ll need to press the [TIMER]
button repeatedly until “Clock” appears.
2
Press the [ENTER] button and use the
Up/Down [ ]/[ ] buttons to select
“Manual Adj.”.
3
Press the [ENTER] button.
The day of the week flashes.
4
Use the Up/Down [ ]/[ ] buttons to
select a day.
5
Press the [ENTER] button.
The time flashes.
6
Use the Up/Down [ ]/[ ] buttons to
set the time.
You can use the number buttons to enter the time. For
example, to enter 19:03, press [1], [9], [10/0], and [3].
Use the [DISPLAY] button to toggle between 12- and
24-hour formats.
While the 12-hour format is selected, use the [>10] but-
ton to toggle between AM and PM.
7
Press the [ENTER] button to set the
clock.
The seconds indicator starts flashing, as shown.
Note:
To cancel this procedure at any point before step 7,
press the [TIMER] button.
Setting the Clock Manually
ON STANDBY
ENTER
TONE
TIMER
DIRECT
SLEEP VOLUME
UP
DOWN
CLOCK CALL
DIMMER DISPLAY
CDR
C
D
TAPE
PLAY MODE
REPEAT
CLEAR
MUTING
12
▼
▲
3
456
789
▲
▼
INPUT
10/0
>
10
Number
buttons
>10
TIMER
ENTER
DISPLAY
