


Installing a Single Carrier Model 117A4 Carrier Installation Instructions
Model 117A4 Carrier Installation Instructions
503-801-180
Issue 2 February 1999 11
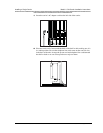
•
Install carrier(s) within 15 feet (5 m) of either side of, and within 6 to 8 feet (1.8
to 2.4 m) above, a properly grounded 3-prong electrical outlet that is not
controlled by an on/off switch.
•
Choose a location where handset users will not approach the carrier(s)
within a radius of 6 feet (1.8 m) for 1 or 2 carriers or 10 feet (3 m) for 3
carriers.
•
When installing multiple carriers:
~
Install multiple carriers 1 foot (0.3 m) optimally to 4 feet (1.2 m) apart.
~
Install multiple carriers on the same horizontal axis (do not install one carrier
higher or lower than another).
~
Install the control carrier as the leftmost carrier, using only the expansion
cables provided.
!
CAUTION:
Carrier(s) cannot be installed outdoors
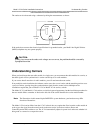
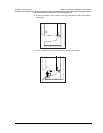
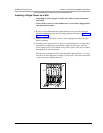
Installing a Single Carrier
Be sure you have read “Understanding Carriers.” Then go to one of the following:
•
“Installing a Single Carrier on a Shelf or Desk” or
•
“Installing a Single Carrier on a Wall”
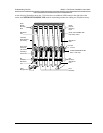
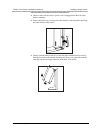
Installing a Single Carrier on a Shelf or Desk
•
You will not receive optimum performance if unit is placed on a desk or low
shelf
•
Install as high as possible, leaving 6–12 inches (15.2–30.5 cm) between
antennas and ceiling if on high shelf
•
Never install or remove a radio module from a carrier that is plugged into a
wall outlet (hot insertion)
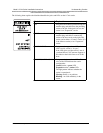
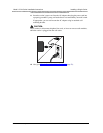
1
Be sure you have determined the optimal placement for your carrier using the
Performance/Range test and the positioning guidelines described in “Positioning
Your Carrier(s).”
Go to one of the following:
•
If installing a single carrier, go to “Installing a Single Carrier.”
•
If installing multiple carriers, go to “Installing Multiple Carriers.”