


Calibration Utility for MACINTOSH
2–35
Part No. 1H9659 September 1997
Densitometer
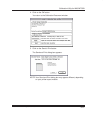
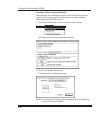
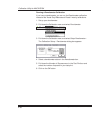
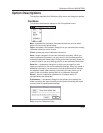
A Densitometer calibration corrects the printer’s response based on the
densitometer reading for selected patches. If you have a densitometer, you
do not need to run Visual Gray Balance and Visual Linearity calibrations.
You only have to run the Densitometer calibration.
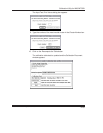
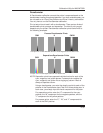
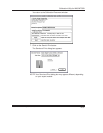
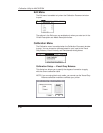
Print a test print and read it with a densitometer. There are two kinds of
densitometer prints: process and separation. The kind of print you get
depends on your printer. Densitometer calibration prints look similar to
the following examples.
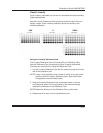
CMYK
Process Densitometer Prints
CMY K
example: from a Kodak XLS 8600 Printer or
Kodak Digital Science
8650 Printer
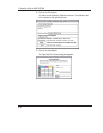
Separations Densitometer Prints
example: from a
Kodak Digital Science
DCP 9000 Printer
CMYKCMY K
NOTE: Separation prints have separate individual colors for each of the
cyan, magenta, and yellow planes. Process prints combine the
cyan, magenta, and yellow into a single gray column. Black is
always a separate column.
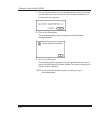
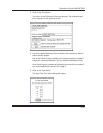
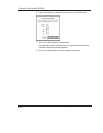
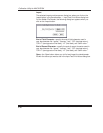
Using a densitometer, you enter the density results for each of the
patches in the Densitometer Input Test Print Values dialog box. In
each case, you always input the visual component for the patch.
For separations prints, enter the “C” component for the cyan
patches, the “M” component for the magenta patches, and the
“Y” component for the yellow patches.
For process prints, enter the “C,” “M,” and “Y” components for
each of the CMY patches.