


45
Notes:
• When the surround speakers are deactivated, the 3D-PHONIC
processing is applied to the DSP modes (the 3D-PHONIC indicator
also lights up).
• If “USER MODE 1” (then “NO DATA”) appears, press and hold DSP
MODE on the unit until it disappears. (This mode is only for service
personnel.)
To cancel the DSP modes
Press DSP MODE repeatedly until “SURROUND OFF” appears on
the display.
• When a pair of headphones is connected or when the front
speakers are deactivated, “HEADPHONE” will appear.
If you want to modify the stored sound adjustments
temporarily
See “Adjusting the Surround Sounds Temporarily” on page 42.
• When adjusting the surround sounds for the DSP modes, you
cannot output the test tone.
• When you select “3D THEATER,” you cannot adjust the
surround speaker levels and surround back speaker levels.
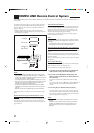
Adjusting the DSP Parameters Temporarily
Activating the DSP mode for a source automatically recalls the
memorized DSP parameter settings done on the Adjustment
Menu.
However, if you want to modify the stored adjustments temporarily
only for the current playback source, you can use the number
buttons on the remote control.
IMPORTANT:
Check to see if the following before or while using the buttons and
controls.
• When using the remote control:
Check the indication shown on the remote’s display when you press
a button—this indicates the remote control operation mode for a
while (10 or 5 seconds).
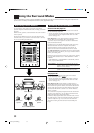
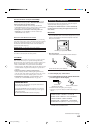
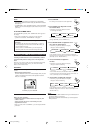
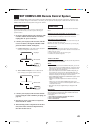
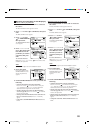
1. Press SOUND.
The 10 keys are activated for sound adjustments.
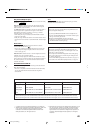
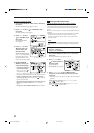
2. Press EFFECT to adjust the overall
level of the effect.
• Each time you press the button, the effect
level changes as follows:
As the number increases, the selected DSP effect becomes
stronger. (Normally set it to “EFFECT 3.”)
3. Press ROOM SIZE to adjust the room
size (sense of spaciousness).
• Each time you press the button, the display
changes to show the following:
As the number increases, the interval between reflections
increases so that you will feel as if you were in a larger room.
(Normally set it to “ROOM SIZE 3.”)
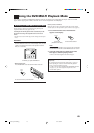
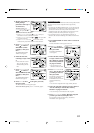
4. Press LIVENESS to adjust the
liveness.
• Each time you press the button, the display
changes to show the following:
As the number increases, the attenuation level of reflections
over time decreases so that acoustics change from “Dead” to
“Live.” (Normally set it to “LIVENESS 3.”)
5. Press WALL to adjust the wall type.
• Each time you press the button, the display
changes to show the following:
As the number increases, the hardness of the wall to be
simulated changes from “Soft” to “Hard.” (Normally set it to
“WALL TYPE 3.”)
Notes:
• You cannot adjust “SEAT POSITION” using the number buttons. If
you want to adjust it, see page 38.
• When the front speakers are deactivated, you cannot adjust the
DSP parameters.
SOUND
EFFECT 1 EFFECT 2 EFFECT 3
EFFECT 4EFFECT 5
EFFECT
3
ROOM SIZE
6
ROOM SIZE 1
ROOM SIZE 5 ROOM SIZE 4
ROOM SIZE 2 ROOM SIZE 3
LIVENESS
9
LIVENESS 1
LIVENESS 5 LIVENESS 4
LIVENESS 2 LIVENESS 3
100
+
WALL
+
10
WALL TYPE 1
WALL TYPE 5 WALL TYPE 4
WALL TYPE 2 WALL TYPE 3
STANDBY/ON STANDBY/ON
STANDBY
TV/CATV/DBS
VCR 1
ON
Ex.When you press SOUND.
Before you start, remember...
• Adjustments using the number buttons are temporary and
cannot be stored.
When you change the source or turn off the power, the
adjustments are erased.
• When you select “ALL CH STEREO,” you cannot adjust the DSP
parameters.
EN39-46_RX-DP9VBK[J]_f 01.6.21, 5:47 PM45