SYSTEM CONFIGURATIONSYSTEM CONFIGURATION
20 SYSTEM CONFIGURATION20 SYSTEM CONFIGURATION
ence through the use of the delay settings to adjust
the timing for the speaker placement and acoustic
conditions in your listening room or home theater.
The AVR 135’s advanced software enables you to
quickly and easily set delay times without the need to
calculate them using a complex formula. Instead, all
you need to do is measure the approximate distance
between your listening position and each of the
speakers in your system.When you enter those
distances into the AVR’s memory as shown below,
the AVR’s microprocessor does the rest of the work,
calculating the proper delay time.The measurements
need not be accurate to the inch, as the system is
designed to accommodate a typical listening area
rather than require the precise measurement to one
“sweet spot” position.
Due to the differences in the way each surround
mode operates, some modes allow for a greater range
of delay times than others.To avoid problems, we
recommend that delay times be adjusted using the
Dolby Digital mode. If a different mode is selected at
a later time, the AVR 135 will automatically restrict
the delay settings to those required by the surround
mode in use.
Delay times are only adjustable for the Dolby modes,
so you will notice that the
DELAY menu may not
be accessed when any other mode, such as a DTS
or Logic 7 option, has been selected. In addition,
when a non-Dolby Digital mode such as Dolby 3
Stereo or Pro Logic II is selected, adjustments may
be made to the Surround speakers only.
To set the delay time for a specific input, the
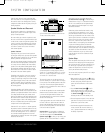
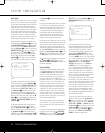
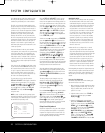
DELAY ADJUST menu (Figure 7) should be
visible on your on-screen display. If it is not, press
the
OSD Button v to bring up the MASTER
MENU
, and press the
¤
Button n until the
on-screen
›
cursor is pointing at the DELAY
ADJUST
line
. Press the
Set Button p to
call up the menu.
NOTE: In order to adjust the Delay settings for the
surround back channels, a Dolby Digital or DTS source
must be playing.This enables the system to activate
the surround back processing mode.
Figure 7
Once the DELAY
ADJUST
menu is on your
screen, note that the default setting to enter the dis-
tances from the speakers to the listening position is in
feet. If your measurements are in feet, proceed to the
next step;
if your measurements are made in meters,
press the
¤
Button n until the on-screen
›
cursor
is at the
UNIT line on the menu.Then, press the
‹
/
›
Buttons o so that METER is highlighted.
When the change in measurement units is made,
press the
⁄
/
¤
Buttons n to retur
n the
›
cursor
to the
CENTER position.
With the on-screen
›
cursor pointing to CENTER,
press the
‹
/
›
Buttons o until the distance from
the center speaker to the preferred listening position is
entered. Next, press the
¤
Button n to move the
cursor to the
SURROUND line and use the
‹
/
›
Buttons o again to enter the distance
from the
video display at the front of the room to the surround
speakers. Finally, if the system is configured for 7.1
operation by entering
LARGE or SMALL on
the
SURR BACK line of the SPEAKER
SETUP
menu, press the
¤
Button n again
and use the
‹
/
›
Buttons o to enter the distance
from the listening position to the surround speakers.
Remember that this last adjustment will only be needed
when you have surround back speakers installed and
Dolby Digital chosen as the surround mode.
When the speaker-to-listening-position distance has
been entered for all active speaker positions, press the
⁄
/
¤
Buttons n until the on-screen cursor is next
to
BACK TO MASTER MENU and press the
Set Button p.
The delay settings may be changed at any time
directly from the remote control by pressing the
Delay Button . CENTER DELAY will
appear in the
Lo
wer Display Line
¯,
but you
may press the
⁄
/
¤
Buttons n to select any
of the speaker groups.
Press the
Set Button p when the desired speaker
group appears, and then press the
⁄
/
¤
Buttons
n again to enter the distance from the speaker to
the listening position.
Press the
Set Button p
again to enter the data.
You may then press the
⁄
/
¤
Buttons n to select another speaker group to
repeat the procedure
as needed,
or wait five seconds
for the system to return to normal operation.
Output Level
Adjustment
Output level adjustment is a key part of the configura-
tion of any surround sound product. It is particularly
important for a digital receiver such as the
A
VR 135,
as correct outputs ensure that you hear soundtracks
with the proper directionality and intensity.
IMPORTANT NOTES:
• Listeners are often confused about the operation of
the surround channels.While some assume that
sound should always be coming from each speaker
,
most of the time there will be little or no sound in
the surround channels.This is because they are
only used when a movie director or sound mixer
specifically places sound there to create ambience
or a special effect,
or to continue action from the
front of the room to the rear. Once the output
levels are properly set, it is normal for surround
speakers to operate only occasionally. Artificially
increasing the volume to the rear speakers may
destroy the illusion of an enveloping sound field
that duplicates the way
you hear sound in a movie
theater or concert hall.
• When the AVR 135 is configured for 6.1-channel
operation using a single surround back speaker, the
output level adjustments will still provide an adjustment
for separate surround back left and surround back right
positions even though your system has only one
surround back speaker.This means that the Surround
Back channel will seem to appear twice, and in 6.1
operation this is normal. The separate SBL/SBR adjust-
ments for 6.1 operation are needed to optimize the
balance between the two discrete channels within the
AVR as they are mixed for output to a single speaker.
Before beginning the output level adjustment process,
make certain that all speaker connections have been
properly made.The system volume should be set to
the level that you will use during a typical listening
session.
Using the Full-OSD System
F
ollow these steps while seated in the listening posi-
tion that will be used most often:
1. Make certain that all speaker positions have been
properly configured for their “large” or “small” set-
tings (as outlined above) and turn off the OSD
system if it is in use.
2. Adjust the volume so that it is at
-15dB,as
shown in the on-screen display or
Lo
wer
Display Line
¯.
3. Output level adjustment is most easily done
through the
CHANNEL ADJUST menu
(Figure 8).
If you are already at the
MASTER
MENU
, press the
¤
Button n until the
on-screen
›
cursor is next to the CHANNEL
ADJUST
line. If you are not at the
MASTER MENU, press the OSD Button
v to bring up the MASTER MENU
(Figure 1), and then press the
¤
Button n
until the on-screen
›
cursor is next to the
CHANNEL ADJUST line. Press the Set
33
34
35
36
37
38
39
40
41
48
49
46
47
44
45
42
43
38
39
40
41
31
32
30
28
29
25
26
27
28
29
30
24
23
22
21
20
31
37
36
35
34
33
32
31
37
36
35
34
33
32
48
49
50
51
47
46
45
44
43
42
* DELAY ADJUST *
FRONT :10FT
CENTER :10FT
SURROUND :10FT
SURR BACK :10FT
UNIT :FEET
BACK TO MASTER MENU
AVR 135 OM 12/3/04 12:11 PM Page 20


